This quilt is going to be 67" x 67" when finished. I will post a picture of what the overall design will look like later. The center portion is approximately 48" square (if I recall correctly). I don't remember exactly what the fabric requirements are, but I can give more details on the size of the finished items if people are interested.
Here's what the finished diamonds look like (these two are already sewn together):
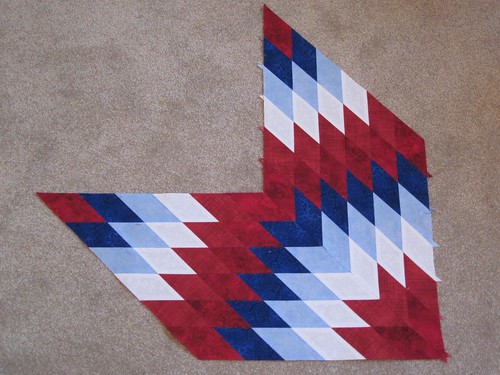
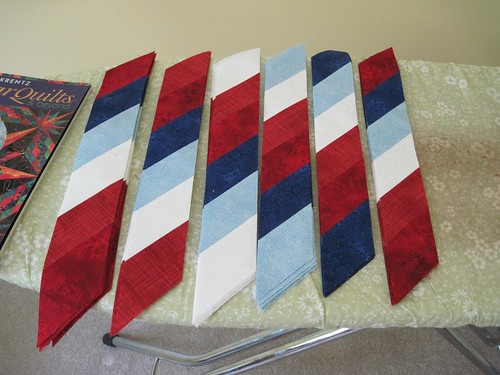
As you go through the steps below, you will need to create several strip sets in different color orders to achieve the design. Using the diamonds and colors in the pictures above the strip sets are as follows:
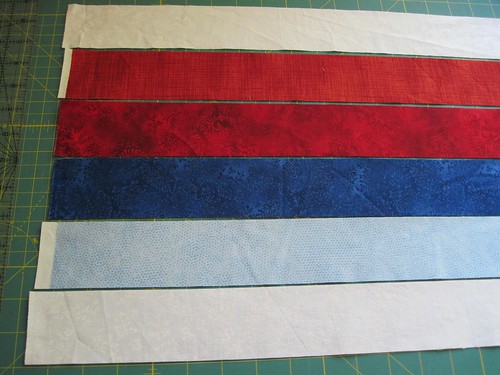
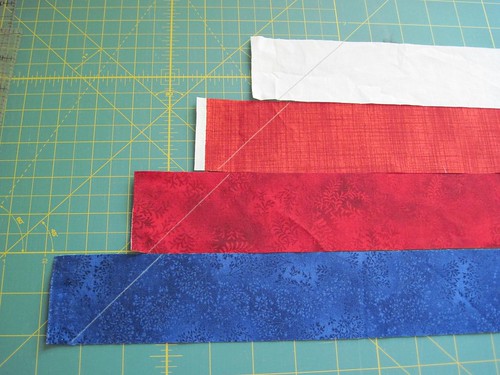
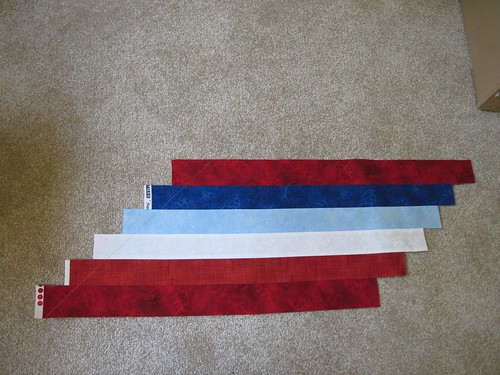
Strip 1 -- dark red, light red, white, light blue, dark blue, dark red
Strip 2 -- light red, white, light blue, dark blue, dark red, light red
Strip 3 -- white, light blue, dark blue, dark red, light red, white
Strip 4 -- light blue, dark blue, dark red, light red, white, light blue
Strip 5 -- dark blue, dark red, light red, white, light blue, dark blue
Strip 6 (same as strip 1) -- dark red, light red, white, light blue, dark blue, dark red
To make this quilt, I'm using 2-1/8" wide strips in 5 colors:
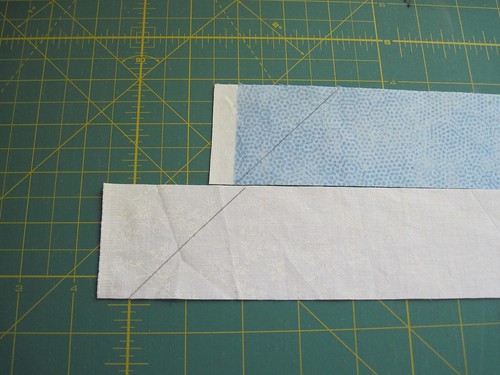
Once you have your strips cut from your fabric, cut the strips in half at the fold such that the length of your strip is approximately 22" vs the full width of fabric. This will make handling the sewn strips and pressing them easier.
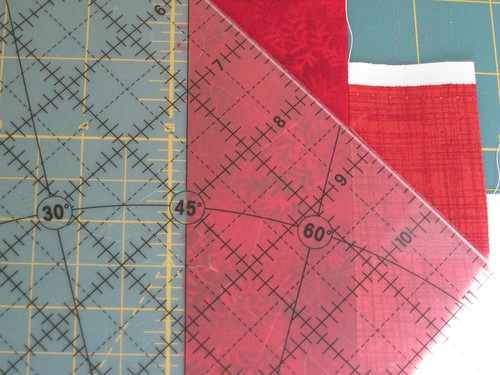
Line up your ruler on the 45-degree mark and draw a line as close to the end of the strip as possible. This is just a guide for being able to offset the strips the correct amount.
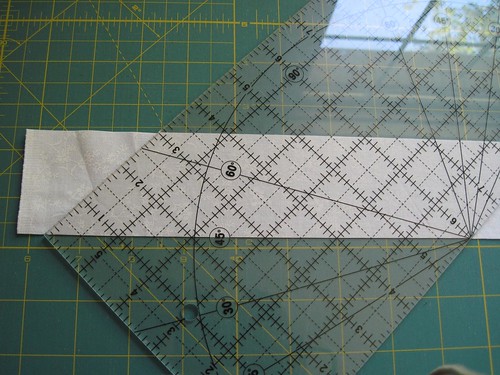
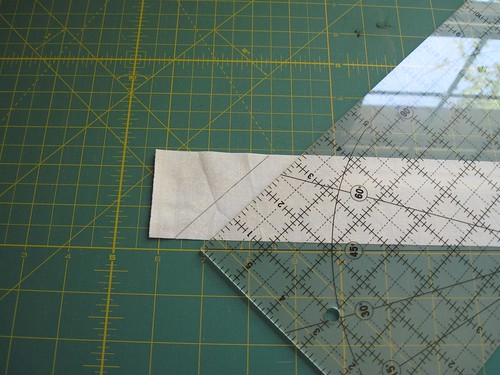
Draw the lines on all of your fabric strips.
To sew two strips together, you will want to offset them (see picture below). This will minimize fabric waste as later on you will need to cut strips at a 45-degree angle. When I offset my strips, at the upper right corner of the drawn line, I put a mark approximately 3/8" away from the end of the draw line. I then matched the drawn line on the 2nd piece (blue) with the 3/8" mark on the white piece. This 3/8" overlap ends up with the drawn lines almost perfectly in line.
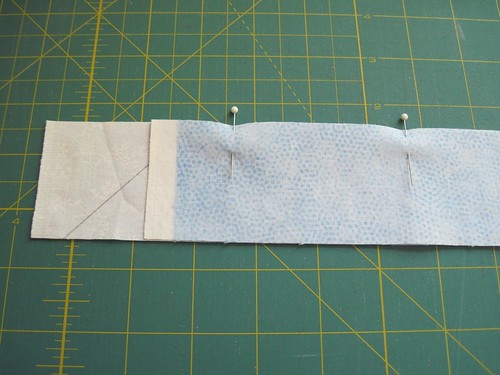
After you've offset your strips, flip the top one (blue) down onto the lower one (white). I used two pins just to hold the two strips in place at the beginning of sewing. You don't need to pin the entire length of the strip. This was just useful for me such that the strips wouldn't shift between my cutting mat and taking it to my sewing machine.
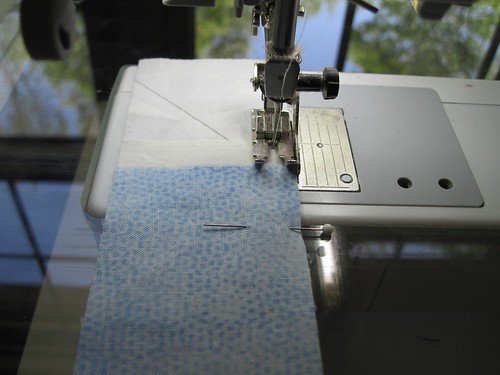
Take the pinned strips to your sewing machine and sew a 1/4" seam along the length of the strip.
After you've sewn your pairs of strips together, press all seams open. I don't normally like to press seams open and I try to avoid it wherever possible. However, you will definitely want to press them open for this design. If you don't, you will have a VERY thick seam at the center of the star that will be very difficult to quilt or to get to lay flat.
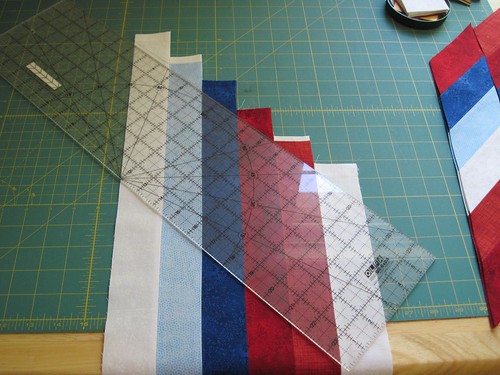
Continue sewing the pairs of strips together (make sure you have the order correct - trust me - I've made this mistake and had to rip out seams) and pressing the seams open until you have a strip set with all of your colors together. (just a note - I know the colors of the strips above are in a different order than the pictures below. When I took pictures, they were taken while making different strip sets; hence the difference in the color order.)

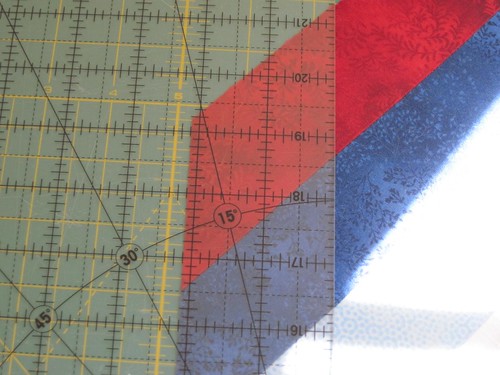
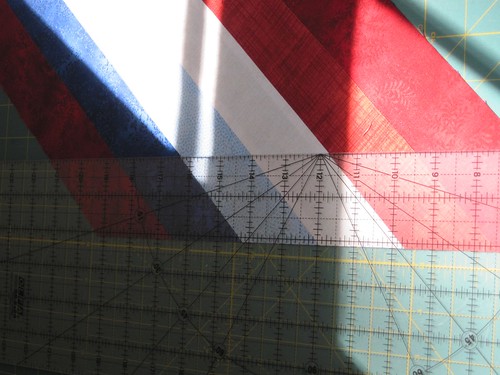
Once you have your full strip set, take it to your cutting table and line up your ruler at a 45-degree angle to the length of the strips.
Make your initial cut to get a straight edge at a 45-degree angle along the set of strips. Once that is done, turn your strip set and line up your ruler as shown below. Since our original strips were cut 2-1/8" wide, when we cut these "strips", they also need to be 2-18" wide. If you chose to cut your strips either wider or narrower, you just need to remember to cut these strips at the same width as your original strips.
Follow the above strips until you have made strip sets for all the sections in your diamond.
Next week, I will post the next set of directions on how to sew these cut strips together to actually make the diamond shape.
Happy Crafting!
~Sarah at upstateNYCreations
No comments:
Post a Comment