Tuesday, February 23, 2016

Ready for Spring

While this winter has been fairly mild as far as winters go, I was a bit sad to not receive a lot of snow this year.  Most of the first part of winter, we were above freezing temperatures and received rain for every storm that came through.  There have only been a handful of times that we had actual snow come down and stay for more than a day or two.  I think total, we're only at about 10 inches of snow so far this year (normally we are around 40 inches of snow).

That being said... we did have a weekend where the temperatures were absolutely brutal.  I LOVED my fireplace that weekend and had it roaring all weekend.  Our overnight lows for two days was -20F and the high was barely above 0F.  There was a nasty wind, too, so our windchill values were down around -40F.

Untitled


The only thing that came close to being as good as that fire that weekend was this:

Untitled

My oldest brother's girlfriend found out that I was into tea and that I loved an old tea pot that my parents had.  She found one and sent it to me as a post-Christmas gift.  I love it!

Untitled

It is one of those old ceramic pots that have a metal tea-cozy that is the exact size of the pot.  The cozy is lined with wool to help keep the teapot warm.  And since it has slots for the handle and spout, you don't have to take the cozy off in order to pour the tea!  Bonus!!

I'm ready for spring though at this point.  Its the end of February and I'm ready for it to start getting nice so I can enjoy being outside again!

How about all of you?  Ready for spring or wishing for some "real" winter?

Happy Crafting!
~Sarah at upstateNYCreations

Wednesday, February 17, 2016

Heat Wave - Paper Piecing

The Heat Wave quilt that I started a few weeks back is in full swing for creating blocks.  One of the larger block assemblies uses paper pieced corners.  I did one block with paper piecing many years ago and haven't done it in a while.  While you end up with accurate seams, it does take a while to get the blocks made.

I didn't take pictures for the first seam that I sewed on these blocks, but thought I'd give a little tutorial on what I found worked for me while making these simple blocks.

Untitled

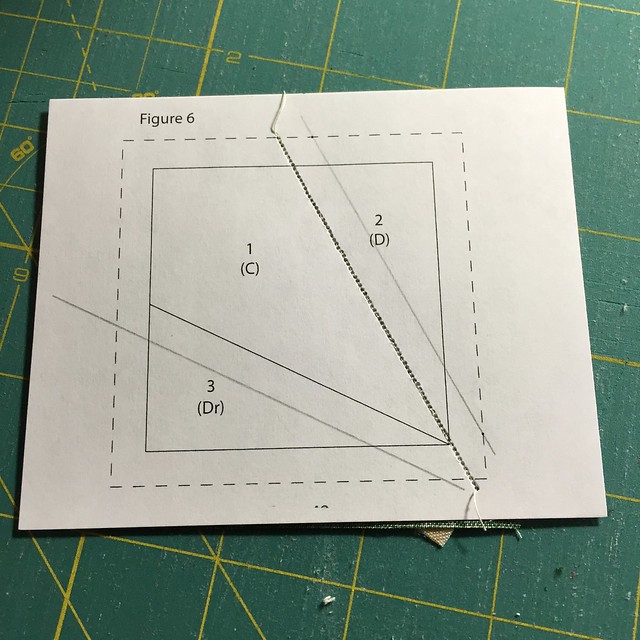
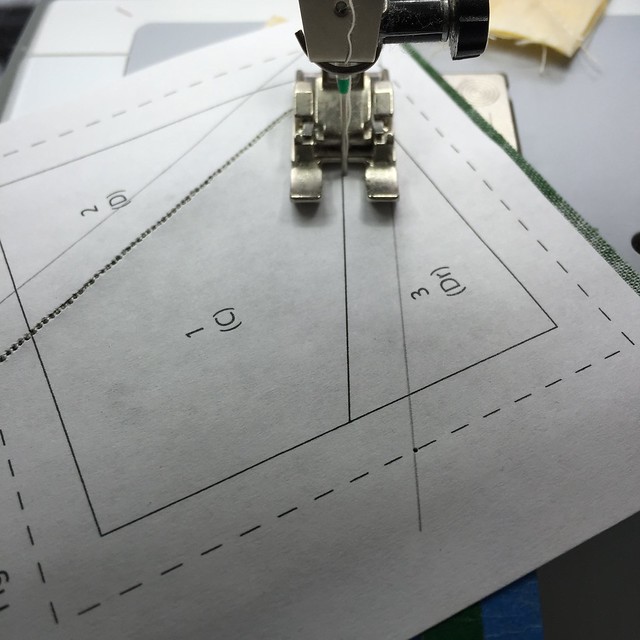
This is the paper side of the block that I needed to make.  The solid, angled lines are the stitching lines (one is already stitched) and I drew 1/4 lines to help with my fabric placement.

Untitled

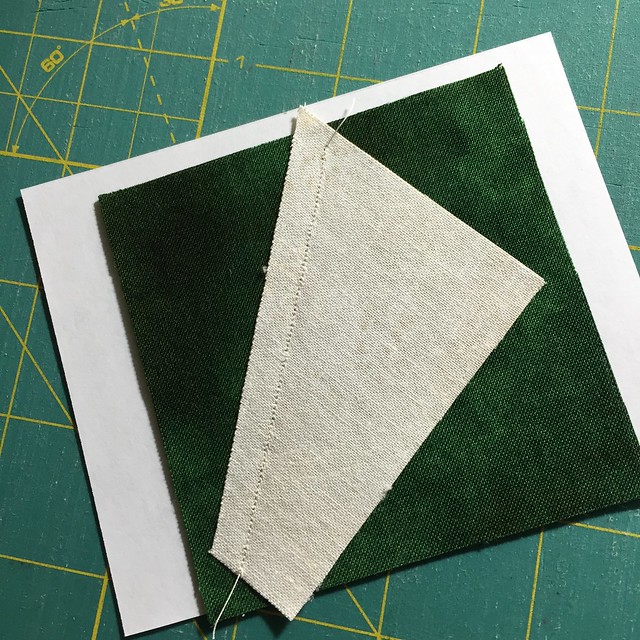
After sewing the first seam with fabric in place, flip your block over so you have the fabric facing up.

Untitled

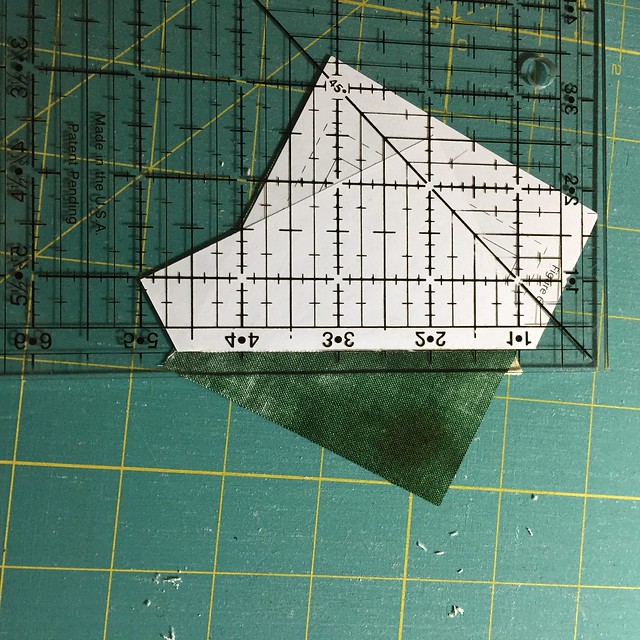
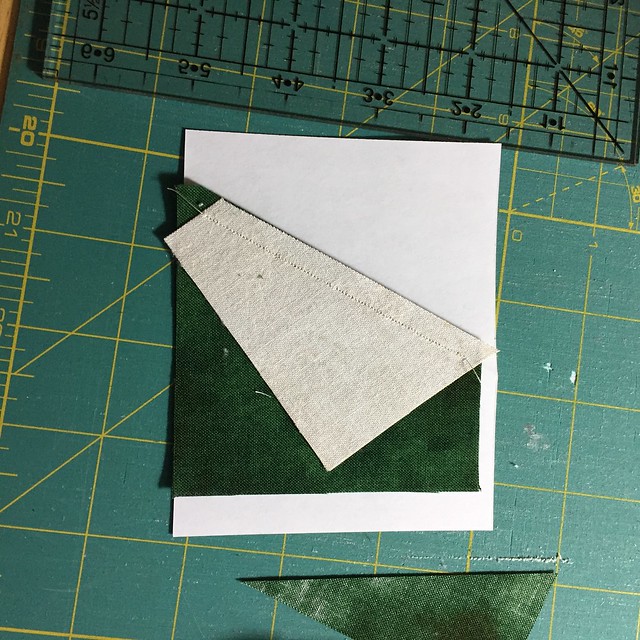
Fold the paper back along the stitched line and line up your ruler leaving a quarter inch between the sewn line and the edge of the ruler.


Untitled

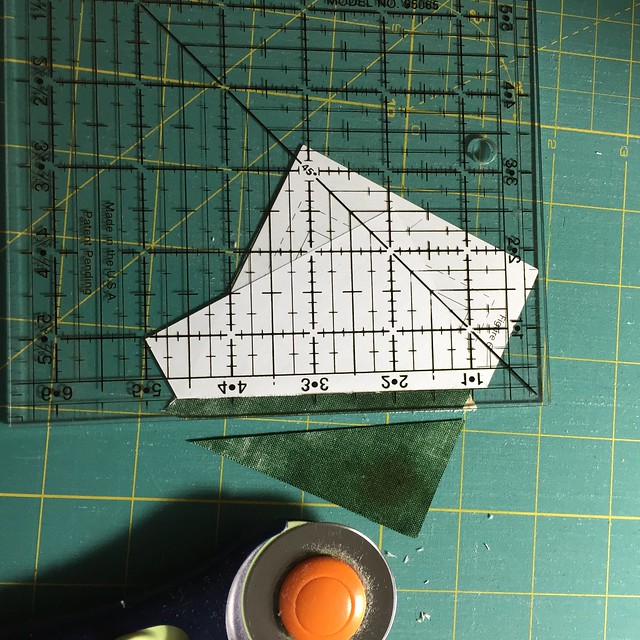
Cut along this line to remove the excess fabric that isn't needed.

Untitled

Flip everything over again and press your sewn fabric open so it all lays flat.

Untitled

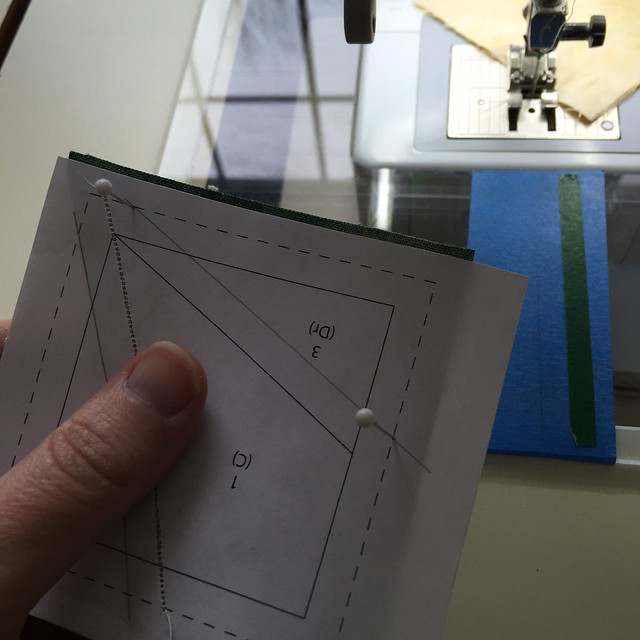
This is where I made my own little trick for getting the fabric placed correctly for the next sewing line.  On the paper side, place pins at the intersection points of your drawn line and the outer edge of the block.  I use the pin placement to guide where I want my fabric to be.

Untitled

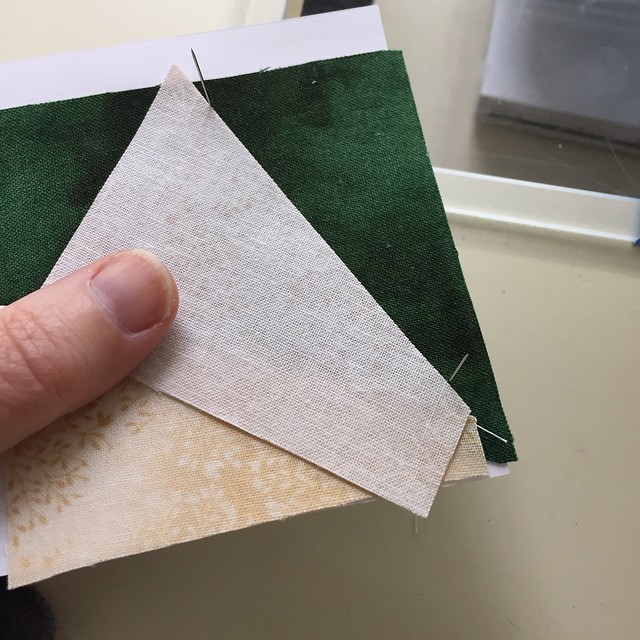
When I flip it over, I can see the pins sticking up and I place the edge of my next piece of fabric right next to those pins.  This makes sure that I have at least a quarter inch of fabric for my seam.  I then carefully full out the pins without shifting placement of the loosen fabric.  This gets placed under the pressure foot of my machine and I start sewing.

Untitled

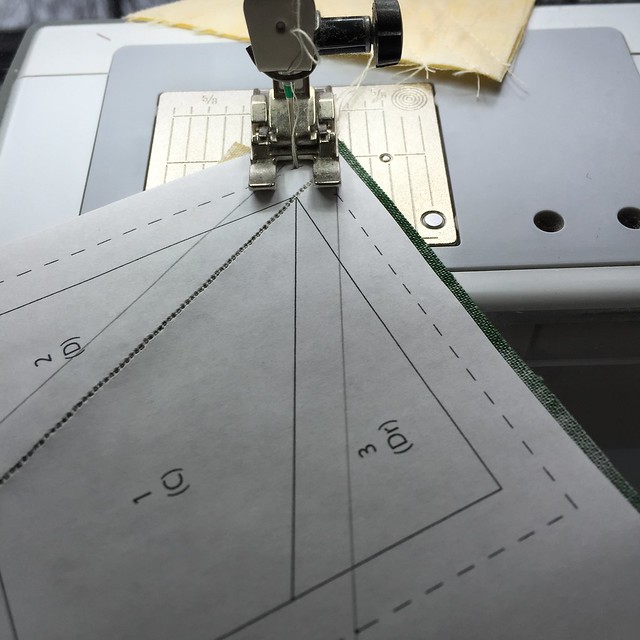
Line up your needle with the edge of the block and approximately in line with your sewing line.  Some people start right at the edge of the final block, but I found starting in the seam allowance made pressing easier for me afterwards.

Untitled

Sew down the solid line with your needle JUST to the right of the sewing line (towards to the seam allowance).  Sewing just off the line will allow space for your fabric to fold over the sewn line when you press it.

Similar to the initial steps, fold back the paper, trim your seam allowance and then press your block open.

Untitled

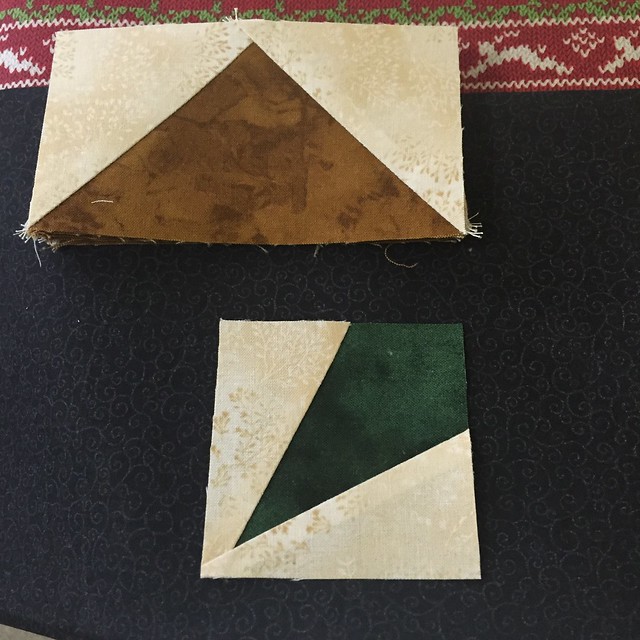
The cream/green block above is the final result of my paper piecing.  I had 48 of these blocks to make, which took a while, but they look great in the end.


Happy Crafting!
~Sarah at upstateNYCreations

Monday, February 15, 2016

Organizing and Cold

This year has been cold, but sadly, non-snowy for upstate NY.  If its going to be cold, it might as well snow and be done with it!  I think we've had a total of maybe...and that's a BIG maybe... ten inches of snow this year.  Its downright pathetic.

However, we have had cold, which makes it perfect sewing weather as there's no way I'm going outside when its well below freezing!  With all that cold weather, I did do a bit of organizing in the sewing room.  I realized that my various strips (ranging from 1.5" to 3.5" wide) were just all over the place and not organized in any fashion.  Its very difficult to get yourself to use your own pre-cut strips if you have a mis-mash of colors.

Untitled

So I spent a little time one weekend to organize my strips by color and make an attempt to be able to use them better in the future.  My 2" wide strips were able to fit into a smaller shoe-box sized bin.

Untitled

But my 2.5" strips are still piled up in the big bin.  Since this picture was taken, I did sort them by color as well, so they're all "prepped" and ready to be used in some pattern in the future.

I also was able to make some decent progress on the next quilt (Heat Wave), but that will be for another post.

This past weekend was just all about trying to stay warm.  Saturday night/Sunday morning we bottomed out at about -25F....and that was without the windchill.  I don't know the exact windchill values we had, but the forecast was for values around -35 to -40F.

Untitled

You can bet I spent my weekend by the fire as much as I could!

Happy Crafting!
~Sarah at upstateNYCreations