Thursday, February 28, 2013

Ceiling Progress

We made some good progress on the ceiling over the weekend.  All of the joints between the vertical boards and the flat, bottom boards were closed up with spackle and then sanded.  We then did the first coat of painting on the crown molding and got it nailed into place for 3 of the boxes on the ceiling.

IMG_2096

This is a different view that shows the crown molding a bit better.  It doesn't have the joints sealed yet, but that will happen this week and then its time to paint again.

IMG_2097


We have a definite move date for the pool table... March 15th.  So we have to make sure we at least get the main center section done before the pool table arrives.  ;-)


Happy Crafting! ~Sarah at upstateNYCreations

Wednesday, February 27, 2013

Note to Self....

.... when quilting, make sure you don't quilt your quilt to itself!  Oops!


IMG_2093

I felt the change when the needle hit the extra thickness and then realized I was quilting through too many layers.  Time to rip out those stitches!

Here's the back with the feather finished

IMG_2094


And the front (ignore the blue marks).

IMG_2095


The next day, I had started to remove some of the basting stitches and washed out a portion of the blue marks.  Here's what the corner of the quilt looks like now:

IMG_2099


IMG_2098


All those open spaces around the feathers will be filled with micro-stippling.  I have one corner partially done with the micro-stippling and it looks pretty cool.  I'll need to take a picture of it tonight. :-)


Happy Crafting! ~Sarah at upstateNYCreations

Monday, February 25, 2013

Make-A-List Monday

I hope everyone had a great weekend.  Here in Upstate NY, it was a bit of a cold and dreary weekend.  We had snow/sleet off and on all day Saturday.  Sunday evening we had a short burst of snow, but in general it was pretty cold and damp feeling.  At least it was outside, inside we had the fireplace going so it was nice and toasty warm. :-)

I was able to get a few things done last week and even got a bit of quilting done on Saturday.  I was going to go on a "tea" road trip with Yarnkettle, but we decided to post-pone due to the yucky weather on Saturday.

Here's the list from last week:
1. Finish sewing the Bento Box quilt pieces.  Done!  The blocks are sewn, but I need to press them before I do any more pictures.
2. Quilt the marked border for the Lone Star quilt.  Done! I even got a little bit quilted.

IMG_2094

3. Post pictures of the ceiling progress.  Done!  Its posted here.
4. Decide upon design to quilt Wildflower Fields.  Done!  I decided to quilt this using a panto called Bayside.

Here's the plan for the upcoming week:
1. Finish quilting the border for Lone Star.
2. Post pictures of ceiling progress (we should get all the crown up this week).
3. Press and photograph Bento Box pieces.
4. Setup Wildflower Fields for quilting.

Hope everyone has a great week!


Happy Crafting!
~Sarah at upstateNYCreations

Sunday, February 24, 2013

Stashbusting 2013 - Week 8

I was able to get a bit of sewing done this week.  I made some progress on the Bento Box quilt.  While I don't have everything pressed yet, the pieces are all sewn together.  The picture below was from earlier this week before I sewed the last strip to the blocks.


IMG_2087

Here are my numbers

Added This Week:       0.00 yards
Added Year to Date:    5.86 yards
Used This Week:          2.22 yards
Used Year to Date:       3.33 yards
Net Year to Date:         -2.52 yards

Go on over to Judy's blog to see how everyone else is doing with their stash.

Happy Crafting!
~Sarah at upstateNYCreations

Saturday, February 23, 2013

Bento Box Progress

Early this week I was able to get some sewing done.  In fact, it was while I got caught up on an episode of my latest addiction... Downton Abbey.  :-)

Nothing like having a relaxing evening of quilting, wine, and Downton Abbey.


IMG_2083

IMG_2086

I had a little bit of sewing to wrap up and then got all my remaining blocks for the Bento Box quilt pressed.  Here they are all stacked up:

IMG_2088

I still need to sew that last top strip to each of the blocks.

IMG_2087

I did get all the colored strips sew on after this picture was taken, but I still have the stack of white to go.  They are all paired up and ready to be fed through the sewing machine, so it should go pretty quickly.

Once I get those sewn, I'll probably set this aside for a bit to do some more quilting on the Lone Star quilt.  I need to get the borders quilted and the center star section quilted fairly soon.


Happy Crafting!
~Sarah at upstateNYCreations

Friday, February 22, 2013

Ceiling Project

We made some significant progress on the ceiling last weekend.  We spent all day Sunday working on the ceiling.  Here's where it was last week:


IMG_2060

And after working all weekend on the project:

IMG_2081

We have all the vertical pieces up in place and we spent some time this week after work shimming and nailing the vertical pieces all in place.

IMG_2082

We have crown molding that will go up in those boxes, too, and that's the project for this coming weekend.  Tomorrow (Saturday), we expect to get the molding and get it painted.  I'll be doing the painting while my husband spackles the gaps around the boxes on the ceiling.

Last weekend we also picked out the felt color for the pool table.  It should be delivered on March 15th, so we have 3 more weekends to get the center portion above the pool table finished.  We'll try to get as much done as we can, but we definitely need to get that center section done.  The rest of the boxes could be finished after the pool table is in place.

Happy Crafting!
~Sarah at upstateNYCreations

Monday, February 18, 2013

Make-A-List Monday

Whew!  What a week last week was.  I was definitely glad when the weekend rolled around.  The weekend was a bit of a late start for me though since I didn't leave work on Friday until 6pm.  Nothing like being one the last people in the office on a Friday evening.  Yuck!  At least it was quiet and I got some good work done.

Today is another quiet day in the office.  Presidents' Day is a floating holiday for us, which means that a lot of people take the day off and our hourly staff have it as a holiday.  The office is definitely quiet here today.  With this week being mid-winter break for the schools in the area, the entire week should be a little bit lighter.

Last week was a productive week, even though I spent a lot of time at work.

1. Mark the border quilting for the large outer border on Lone Star.  Done! I started and finished marking on Saturday morning.
2. Post pictures of needlepoint and coffered ceiling progress.  Done!  I posted about it here and here.
3. Post pictures of Bento Box progress.Done!  I posted about it here.
4. Post review of tea maker. :-) Done! Posted here.

I don't have any pictures to share today, but I'm going to be leaving the office a bit early today to make up for last week and I hope to get some quilting done when I get home. I did sew a bit on the Bento Box quilt over the weekend, but no pictures to show for it.  On Sunday, my in-laws came up to help us out with the coffered ceiling, so we made some good progress there, too.

So here's the list for this coming week:
1. Finish sewing the Bento Box quilt pieces.
2. Quilt the marked border for the Lone Star quilt.
3. Post pictures of the ceiling progress.
4. Decide upon design to quilt Wildflower Fields.

Hope everyone has a great week!

Happy Crafting!
~Sarah at upstateNYCreations

Thursday, February 14, 2013

Breville Tea Maker Review

Last week I commented that I had decided to purchase a tea maker made by Breville.  It had gotten good reviews from the individual who had previously bought the maker, so I splurged on it. :-)

First off, this thing is awesome!  It is a bit on the gadgety side, but it does make a wonderful cup of tea.  My first try was with green tea.  I'm not a huge fan of green tea, but now that I've made it with the tea maker, I may be doing more green tea.  It heats the water to just the right temperature and I think it was the best cup of green tea I've ever had.

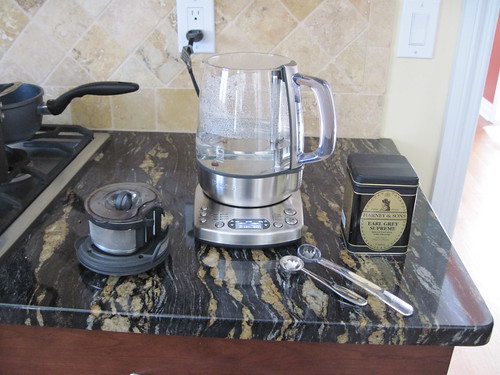
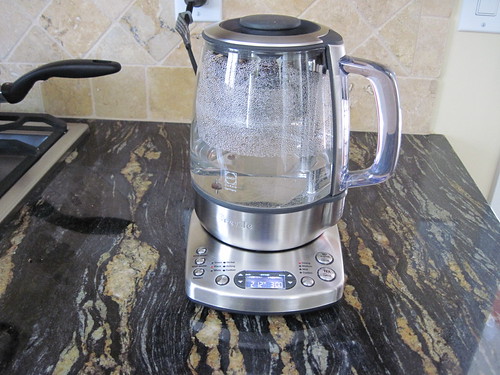
So here's my setup (this time with Earl Grey).  The glass container has markings on it for the amount of water to put into it and there's a handy little guide to tell you how much to put in to get a certain number of cups of tea.

IMG_2063

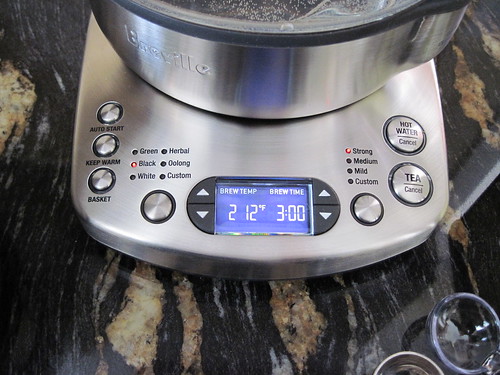
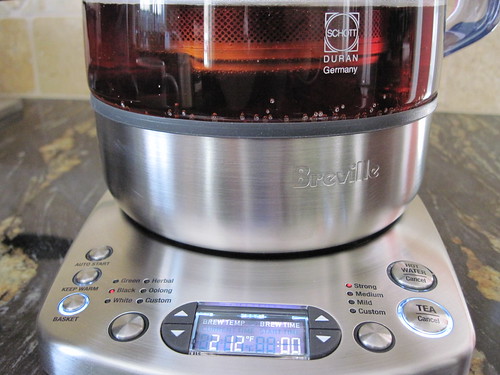
When you are ready to start your tea, you can select different types.  In the picture below, I selected black tea and because I like it strong, I selected the strong setting.  For black teas, you can see the brew temp is already set to 212F.  The brew time changes based upon how strong you want the team, and you can also set it custom and set whatever brew time you want.

IMG_2064

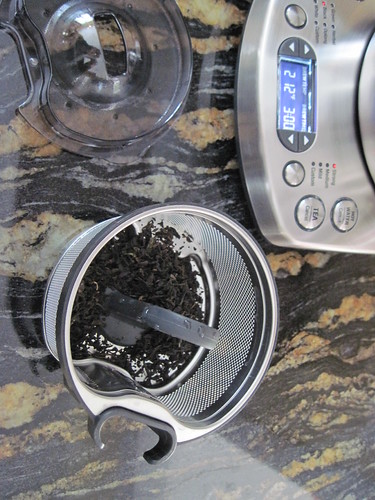
To add tea leaves, you measure out the appropriate amount for the water you have and you put the leaves into the little metal basket and then the metal basket gets set onto a slider inside the carafe.

IMG_2065

Here it is, ready to start going.

IMG_2066

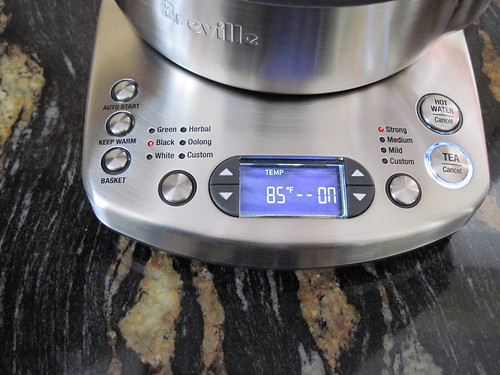
I pressed the button for tea.  As the water heats up, it tells you the current temperature of the water.

IMG_2068

In the picture below, you can actually see the water starting to boil.  This tea maker really brings the water to a rolling boil, which is pretty impressive.

IMG_2070

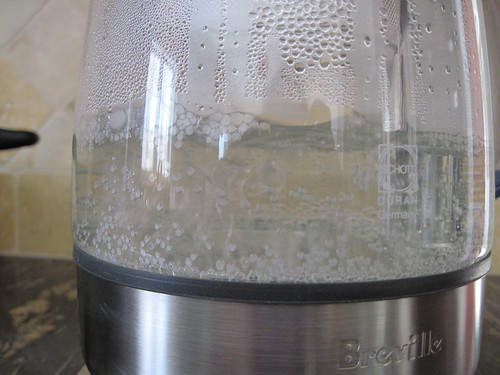
Once the water gets to the appropriate temperature (this case 212F), the basket lowers into the water all by itself.

IMG_2071

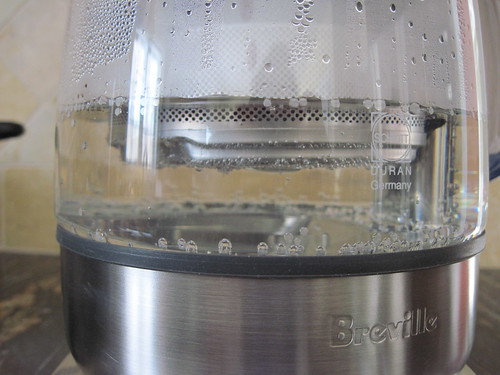
Once the basket is fully lowered into the water, the timer starts for the brewing process.

IMG_2072

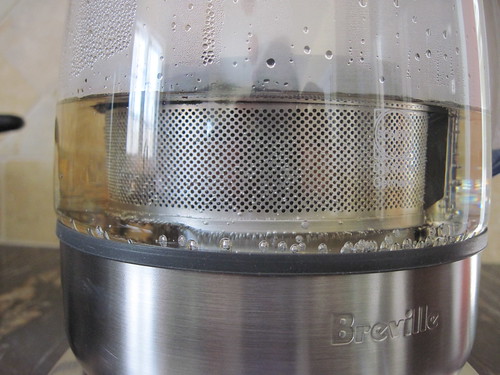
Once its brewed for the set time, the basket automatically lifts up and out of the water.  The picture shows it as partially lifted.

IMG_2073

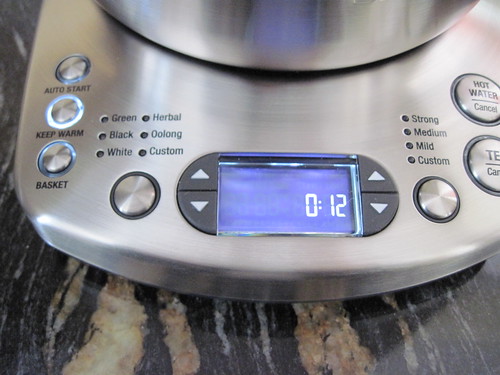
Finally, it even tells you how long the tea has been sitting there since you brewed it.  No 4-hour old tea!  :-)

IMG_2074

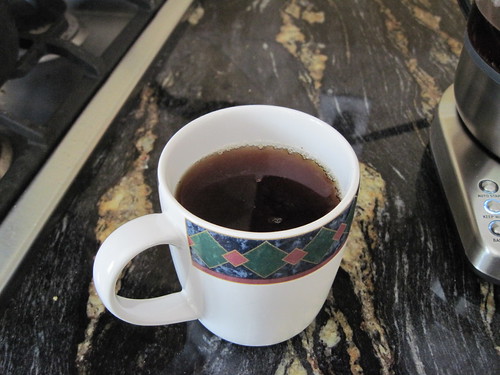
And my yummy Earl Grey all ready for drinking.  Yum!

IMG_2075

All in all, its a good product so far.  I definitely plan on bringing it to work and using it there to make fresh tea throughout the day.

The only complaint I would have is the cord length.  They purposely made the cord short so you don't have it dangling off a counter, but its only about 12" long, which doesn't really give it enough length to get out from under my cabinets.  I don't like having water boiling right under the wood cabinets since it would eventually cause a problem with the wood.  You can use the tea maker with any 3-prong extension cord, which is what I plan to do at work.

Cleaning the tea maker is actually really easy.  Just wait for everything to cool off and then rinse out the carafe and tea basket.  You can use mild soap on all parts.  The basket is even dish-washer safe.  They said the easiest way to clean the carafe is to actually remove the basket, fill it up with water and run it on a hot water cycle.  It boils the water to 212F and that will kill any little germies that are hanging out.  You can also add a bit of vinegar or baking soda to the water before running the boil cycle.  If there's a lot of build-up, you can also let the mixture sit overnight after running the boil cycle and just wipe down the inside of the carafe.

As I use this more and get a few months of use out of it, I'll try to remember to do another review.


Happy Crafting!
~Sarah at upstateNYCreations

Wednesday, February 13, 2013

Needlepoint & Bento Box

Most evenings, my husband and I get home from work and end up watching a little TV to unwind from the day.  I'm rarely able to just sit there and watch TV.  If I don't do something, I usually fall asleep! 

When I don't have binding to sew onto a quilt, I do needlepoint.  I started in high school and have gradually increased the complexity of the pictures that I sew.  Last year I completed a rendition of Starry Night.  Now I'm working on Water Lilies by Monet.  Here's how far I've gotten:


IMG_2059

And a close-up.  I've finally gotten a start of a bridge. ;-)

IMG_2058

This past weekend I also made some progress on the Bento Box quilt.  Here's the blocks up on my design wall:

IMG_2076

The batiks are all from a 2.5" strip pack that I picked up from my LQS last year.

IMG_2077

I'm really liking the purples and greens together.

IMG_2078

Sunday, I was able to spend some time cutting the rest of the strips to get them ready for piecing.  I love the looks of the stacks all neatly arranged and ready to sew.  I'm a bit OCD sometimes. :-)

IMG_2079

IMG_2080

I've already sewn the two stacks on the right together and they are ready for pressing.  Maybe I'll make some additional progress on it this week.


Happy Crafting!
~Sarah at upstateNYCreations

Tuesday, February 12, 2013

Coffered Ceiling Progress

We have a pretty significant house project that we're working on.  We're putting a coffered ceiling up into one of the rooms in our house.  We have a traditional center-hall colonial styled house so this would be where the formal living room would be.  However, we designed the house (with our builder) to have this room be large enough to fit an 8-ft pool table. 

After a few weeks of figuring out how to put the largest square inside that room and how to account for walls not being completely straight, we were able to put the anchoring boxes up on the ceiling.  We're definitely glad that we have a compressor with a nail gun and an impact driver.  This would have been MUCH harder without those two little tools.

Here's my husband up on the ladder putting painter's tape around the recessed lighting fixtures that we loosened from the ceiling. The ceiling will be painted the same color as the walls and all the molding created by the coffered boxes will be white like the molding around the windows and doorways.

IMG_2038

Here we are with the first coat of paint on the ceiling and putting up the flat boards on the bottoms of the boxes.  This was quite an endeavor and we ended up needing 4 people to do it.  We could have gotten away with just 3, but the 4th person helped with handing tools up to my husband so he didn't have to keep getting down from the ladder.

IMG_2057

We were able to get all the flat boards up on Saturday and I took this picture Sunday morning while we had some natural daylight in the room.

IMG_2060

We jokingly said we should keep it open like that and provide a way for the cat to get up there and walk all around the ceiling areas in those sections.  She would probably have a ball doing that. :-)

IMG_2061

So that's our progress so far.  We now have to route the bottoms of the vertical pieces, paint them and then nail them up to the anchor boxes to enclose everything.  After that, its time for crown molding.

We have a deadline of March 15 as some friends of ours sold their house and can't take their pool table with them when they move down south.  So we are purchasing their pool table from them.  However, we need to have the ceiling done before the 15th such that we're not trying to work around the pool table.  We're going to work from the center section outward when doing the crown molding and touch-up painting.  If we can get the center section done by the deadline, then we'll be OK as we'll still be able to get ladders up around the pool table after its in place.


Happy Crafting!
~Sarah at upstateNYCreations

Monday, February 11, 2013

Make-a-List Monday

The past week has been a fairly good week in terms of getting things done.  I made good progress at the beginning of last week, but petered out a bit at the end.  We did have a bit of snow come down on Friday with the N'oreaster that came up the coast and battered NYC and Boston.  Since we're quite a bit inland, we didn't get as much snow as they did.

These first pictures were taken at about 8am on Friday morning.  Just a little dusting on the ground:

IMG_2045

IMG_2046

It didn't really snow heavily though on Friday morning.  This is what we had by about 2 in the afternoon.

IMG_2047

IMG_2049

The snow did come down at a good clip during the night though as we woke up to 10" on Saturday morning.

IMG_2050

This last picture is from Sunday morning.  The sun on Saturday afternoon melted a little bit of the snow that was left on the sidewalk after shoveling and the sidewalk is now perfectly clean. :-)

IMG_2062


It was nice to see everything white again though.

So here was the list from last week:


1. Rinse out blue marks from Lone Star quilt and photograph. All the marks are rinsed out.  When you look at the close up pictures below, it shows all the straight-line stitching.  I plan on doing more custom free-motion quilting in the open areas, but I want to get the other borders done and then come back and fill-in afterwards.

IMG_2053

IMG_2054

2. Start quilting outside cream border on Lone Star quilt. Not done. :-(  I got lazy.
3. Post photos of needlepoint and coffered ceiling progress. Done...sort of.  I do have photos of both the needlepoint and coffered ceiling, but I'm going to spread them out through a few posts. :-)

So this coming week, I hope to get a few more things done and log a few more posts.
1. Mark the border quilting for the large outer border on Lone Star.
2. Post pictures of needlepoint and coffered ceiling progress.
3. Post pictures of Bento Box progress.
4. Post review of tea maker. :-)

Hope everyone is having a great Monday!

Happy Crafting!
~Sarah at upstateNYCreations

Sunday, February 10, 2013

Stashbusting 2013 - Week 6

A bit of sewing did take place this week.  I did a bit of work on the Bento Box quilt and I also finished all the straight-line quilting on the Lone Star quilt.  The small amount of work on the Bento Box quilt makes up the ~1/2 yard of fabric used this week; however, I did also have to buy some backing material for a quilt, so that's getting counted towards the stash...in the wrong direction.

Here are the colors for the next blocks in the Bento Box quilt:

IMG_2055

And progress on the Lone Star quilting:

IMG_2054

I plan on doing a few more posts over the next few days showing the snow we received (about 10 inches) and the progress on a few other "projects".


Here are my numbers

Added This Week:       5.86 yards
Added Year to Date:    5.86 yards
Used This Week:          0.56 yards
Used Year to Date:       1.11 yards
Net Year to Date:         -4.75 yards

Go on over to Judy's blog to see how everyone else is doing.

Happy Crafting!
~Sarah at upstateNYCreations

Thursday, February 7, 2013

Snow!

I think I may have spoke too soon when I left a comment for Kiera at Simply, Kiera.  She had posted about the lake effect snow in western NY and I mentioned that I missed the snow since we haven't had a whole lot in the Albany area.

I think that's about to change....


 We're supposed to start getting snow Friday morning with it turning very heavy by Friday night.  I'm up in the hills a bit, so they expect us to be a bit on the higher of the 8-14" range.   

I'm glad its at least hitting on a weekend and I should be able to stay in most of the weekend. :-)

Happy Crafting!
~Sarah at upstateNYCreations

Wednesday, February 6, 2013

Definitely Ready...

... for a management position.

Last night, my husband came to me and asked me if I could help him figure out how to remove the plastic trim around our recessed lighting so we can paint the ceiling in the room where we're putting a coffered ceiling.


IMG_2036

Here's how it went down...

Me: Did you look on Google to see how to do it?
Him: No.  Why would Google have that? How do I search for it?
Me:  Google has everything.

Less than 5 minutes later, I found a site that said how to remove the trim.

Me: Here's how to remove the trim (read directions from site)
Him: OK. So I do this (he proceeded to do what I told him to do and was able to remove the trim)
Me: I fixed it!
Him: What do you mean you fixed it?  I did all the work.
Me: That's why I'm on the management track.  I tell you how to do the work and then when its successfully completed, I take credit for it!

We had a good laugh about it and anyone who has worked for a large company can probably relate!

I hope to have some more quilt-related things on here later this week when I actually get some sewing done. ;-)


Happy Crafting!
~Sarah at upstateNYCreations