Saturday, September 29, 2012

Monkey Wrench Quilt - Block Tutorial # 1

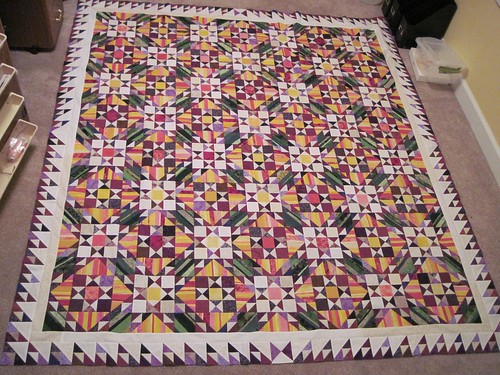
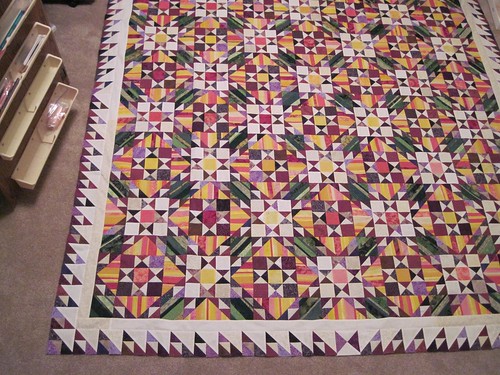
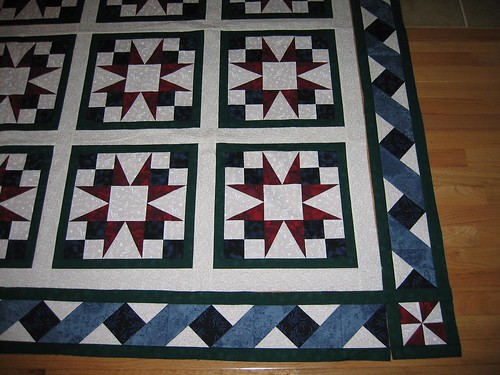
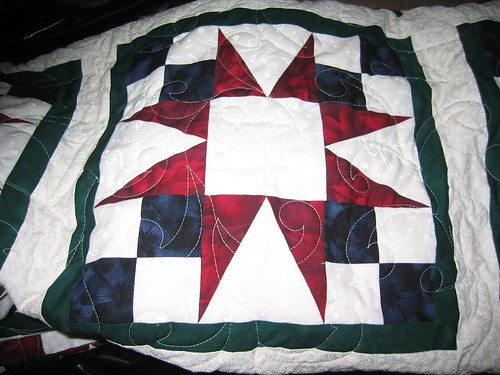
I have a quilt for client that I'm making and thought I would do a tutorial for how to make the main blocks for the quilt.  The block itself has a few names, but the two that I know are Monkey Wrench and Snail's Tail.  It is a traditional block.

The quilt itself is a total of 56" x 56" including borders, but the center portion that has the Monkey Wrench blocks is 48" x 48" and uses 16 12" blocks.

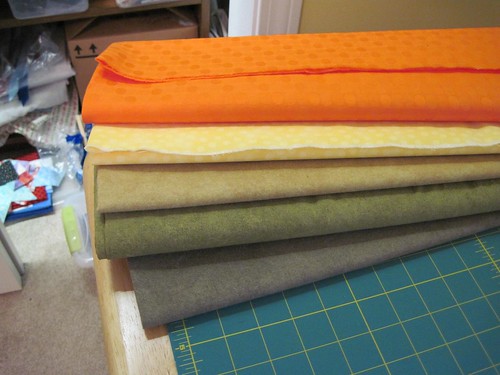
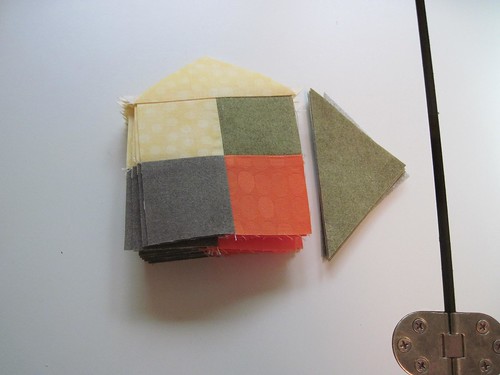
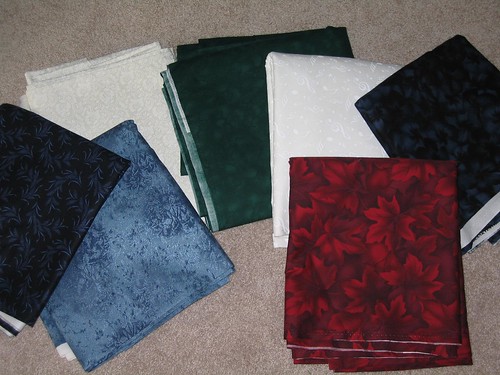
The fabrics for this particular quilt are to go along with a Jungle theme in the nursery.  I love seeing the fabric all pressed and folded ready for cutting, so I couldn't help but share this photo. :-)  The middle fabric is actually for the border, so the four colors for the blocks are the orange, yellow, medium green and dark green fabrics.

Client_Quilt_1-1

The cutting directions that I have here are for a total of 16 blocks to make the 48" x 48" center of this quilt.  The following strip widths and quantities need to be cut from each of the four colors.
  • 1 strip of each color cut 2" in width
  • 1 strip of each color cut 3-7/8" in width
  • 1 strip of each color cut 4-1/4" in width
  • 2 strips of each color cut 6-7/8" in width
  • 1 strip of each color cut 7-1/4" in width

Client_Quilt_1-3
 
When sub-cutting the strips into squares and triangles, set aside the remaining pieces to strips if you plan on making this full quilt.  The pieces for the corner blocks for the quilt can be cut from the remaining pieces of the strips.

The smallest strips can be cut into squares.  The rest of the strips are cut either once on the diagonal to obtain half square triangles, or twice on the diagonal to obtain quarter square triangles.
  • 3-7/8" squares - cut twice on diagonal
  • 4-1/4" squares - cut once on diagonal
  • 6-7/8" squares - cut twice on diagonal
  • 7-1/4" squares - cut once on diagonal
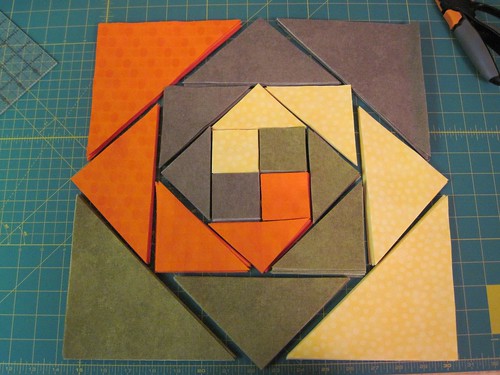
Here are all the individually cut pieces laid out in the pattern for the overall block.
Client_Quilt_1-2

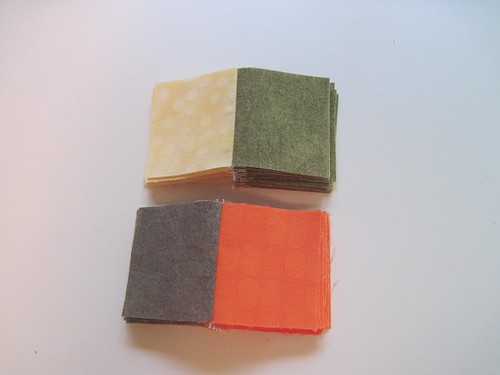
Start with the middle squares and sew them into pairs, pressing seams towards the darkest fabrics (the greens in the photo below).

Client_Quilt_1-4


Next, sew the pairs into four-patches and nest the seams while sewing.

Client_Quilt_1-5

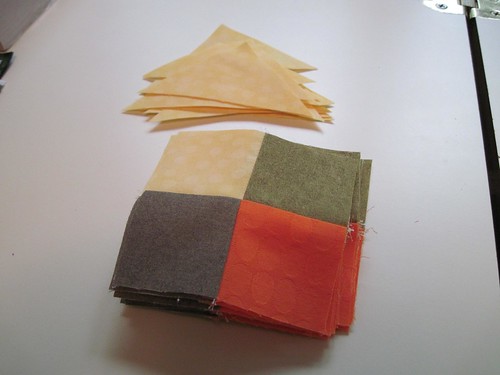
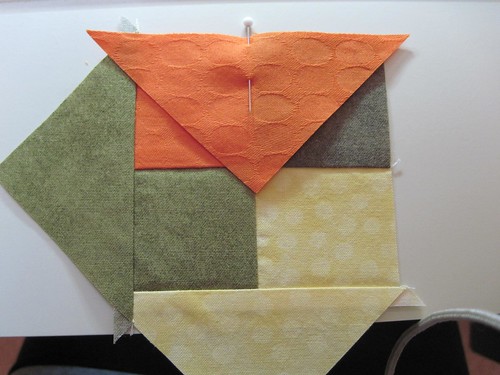
Next, you want to sew the triangles to the flat edges of the four-patch.  I have two different methods of doing this that I show below.  Either one works and it will really depend upon what you are comfortable with.  For this first set of triangles, I lined up the point of the triangle with the vertical seam (see 2nd picture below).  I also added one color at a time as I went around the blocks, pressing the seams after each triangle was added.

Client_Quilt_1-6

Client_Quilt_1-7


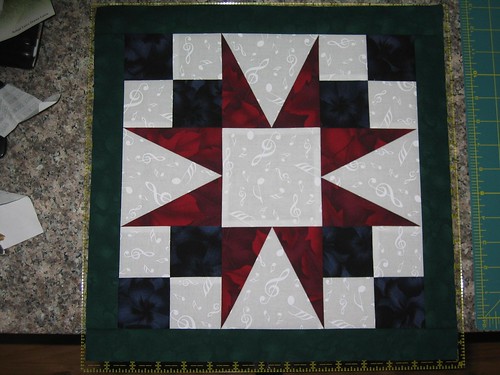
Here's a picture of the first square with all triangles added to the four-patch.  Make sure you square up your block at this stage.  You may not have a perfectly square block if your seams are off a little bit.  Obviously you want to get your seams as perfect as you can, but we're all human and we're not perfect! :-)

My blocks didn't end up perfectly square, but I did make sure that I trimmed my edges such that I had a quarter inch distance between the points and the edge of the fabric.  This will at least make your quilt appear to have perfect seams and corners.

Client_Quilt_1-8

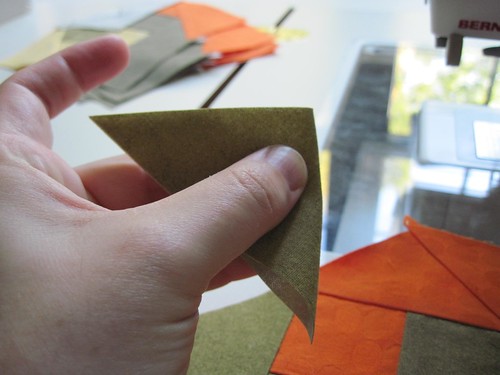
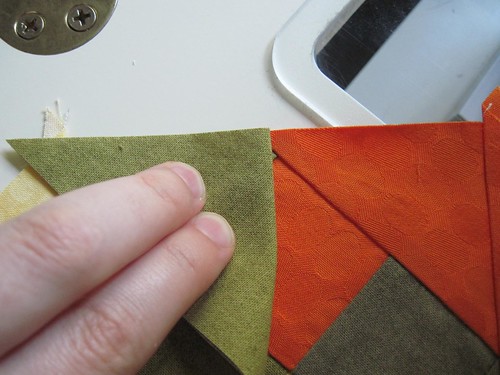
This is the other method I used for adding the triangles to the edges for the subsequent rounds.  First take your triangle and fold it in half with the right sides facing out.

Client_Quilt_1-9

Line up the folded seam with the intersection point on your block.  This will ensure that your triangle is properly centered on the straight edge without having to physically mark the centers of each of the pieces.

Client_Quilt_1-10

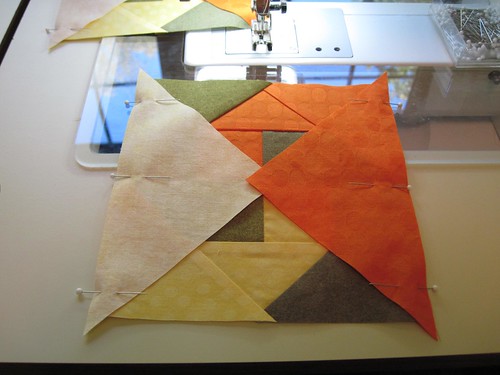
Unfold the triangle and pin it in place.  I've found it best to pin at the middle and again at the front edge where it first goes under the pressure foot.  Notice how the yellow and orange triangles in the picture below are right at the intersection points for the squares "under" them.  I can definitely say my block wasn't absolutely square, but because I took the time to trim the edge to be 1/4", the next piece I added was at the exact spot it needs to be to show that "perfect" corner.

Client_Quilt_1-11

What I also did on these additional triangles is to add the triangles on opposite sides of the square at the same time.  This reduced the number of times that I had to get the iron heated up to press the seams.  Its still the same number of seams to press, but it was faster this way.

Client_Quilt_1-12

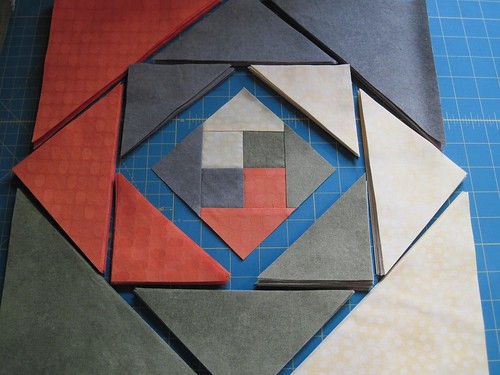
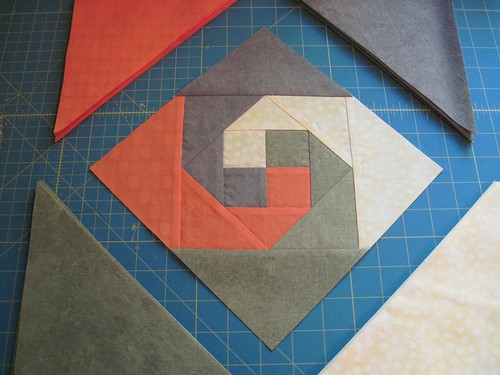
Here's a photo of the next-to-last round of triangles added to the center square.

Client_Quilt_1-13

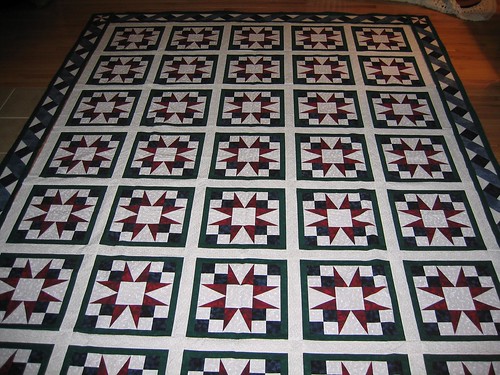
Keep adding the triangles around the block until it is finished.  Then square up your final block.

Client_Quilt_1-14

In the photo above, I still had to had the last two triangles to the square, I do have a picture at this point, but did not upload it yet.  I will add that picture once it is uploaded.

The next tutorial will show how to make the corner blocks and then the final border (piano key border).

Happy Crafting!

~Sarah at upstateNYCreations

Tuesday, September 25, 2012

Busy as a....

I've been really bad at posting the past two weeks!  I'll try to make up for it.  :-)

Last week I had to make a trip for work up to Bangor, Maine.  It takes about 6-7 hours to drive there from where we're located.  It was a good trip (very productive), but it felt long even though it was only 3 days.  Part of it was that last Tuesday/Wednesday, some storms went through the northeast.  It hit Bangor sometime during the night and the power in the hotel we were staying at went off at 1:27am, came back on, then went off again at around 3am and stayed off.

The reason  I know the power went off?  My room was right next to those nice, heavy emergency doors that close in the event of a fire to keep the fire from spreading.  Well, those doors are held open by magnets, which switch off when they lose power!  So imagine yourself asleep in a strange hotel and at 1:30am hearing this huge BANG!  I think I jumped about 4 feet off the bed.  At least I was prepared for it when it happened the 2nd time at 3am.  ;-)

Needless to say, it was a very fitful night of sleep and then with no power in the morning, I ended up showering and getting ready to leave by using a flashlight that the front desk brought to my room.  No hair dryer that day!

I have been doing some sewing lately though.  I have a client quilt I'm working on.  Here's the fabric that I purchased for the quilt (its not getting counted as the stash since its coming in and going right back out):

Client_Quilt_1-1


The fabric looks so nice and pretty all pressed and folded waiting to be cut! :-)

I actually did get all the pieces cut for the blocks for the middle of the quilt.  The final blocks finish at 12.5", but from the picture below, it definitely looks like it will be bigger.  The top "dark" color is not a brown fabric like the picture looks.  It is a dark shade of green, but for some reason it looks like brown in the photo.

Client_Quilt_1-2

I do have a lot more pictures to share and I plan on posting a tutorial on cutting and making this block, but I wanted to get a post out today since I haven't posted in a while.

Happy Crafting!
~Sarah at upstateNYCreations

Monday, September 10, 2012

Make A List Monday

How the heck did it get to be Monday again??

It definitely seems like the weeks go by way too quickly.  I've noticed that when you're in grade/high school, the school year is long, but the summer goes by quickly.  Then in college, the time went by quickly just because you're too busy trying to make it from day-to-day with all the school work.  Semesters always seemed to fly by!

Now that I'm working, its even worse!  We all look forward to the weekend and pray for it to be here NOW and when you do that, the time just disappears on you.  Its not that I don't like my job, parts of it are really great, but its been so hectic the past year that I'm ready for a change.  I just don't know how to make that change yet or when the right time is to make the change.  When its this hectic though, you do tend to lose track of the weeks and somehow it gets to be the 2nd week of September and it feels like summer had just started.

Anyway - I did get some items done this week, but I did get sidetracked.... by a client commission. :-)  I found out on Friday the 31st that there was a potential quilt commission coming my way and by Wednesday of last week I was into full quilt planning mode.  The quilt needs to be ready by the 2nd week of November, which doesn't really leave a lot of time, but here's what I had planned and accomplished:

1. Post for Stashbusting on Sunday.  Done!
2. Quilt more of the Beginning Sampler and post photos of quilted blocks. Didn't touch this quilt.
3. Design quilting motif for Lone Star wall hanging. Didn't do this either, but I have a plan in my head of what I want.
4. Trim "leftover" bits from other quilts into usable pieces.  Got this completed.  I even washed 3 sets of FQs and cleaned up a good portion of my sewing room.  I needed to get everything cleaned up and ready to go for when the fabric for the client quilt arrives.
5. Photograph needlepoint and post picture.  Nope - didn't do.

I did get a little bit of sewing done and used up a little bit of stash last week.  I've also been making some fairly good progress on the needlepoint.  Plus, with the commission quilt planning that took up Thursday and Friday evenings, I'm surprised I got as much done as I did last week.

Here's the plan for this coming week:
1. Post pictures of client quilt fabric when it arrives.
2. Press FQs and get them ready for storage.
3. Draft up directions for client quilt.

Hope everyone has a great week!

Happy Crafting!
~Sarah at upstateNYCreations

Sunday, September 9, 2012

Stashbusting 2012 - Weeks 35 & 36

I missed posting last week, so its a double-post this week.  The biggest accomplishment is that I finished up Wildflower Fields!  This fabric was already counted, but I want to share the photos again.  The pictures don't really do the top justice.  Its so much prettier in person.  I'm going to have to try get really good pictures of it once I have it quilted.


Wildflower_Fields-8

Closer picture of one of the corners.

Wildflower_Fields-9

The other big news is that I officially have another commission quilt to make.  A woman my mother knows has a daughter who is expecting in January and she asked around for where she could get something special.  My mother happened to mention that I made quilts and this woman jumped on it.  We've already picked out the design and now its time to go fabric shopping!  Since this fabric will be used right up when I purchase it and its not for my own use, I won't be counting it in the stash reports.

I'm really excited about making this quilt and I hope the client loves it when I give it to her later this fall.

So I used a little bit of stash this week playing around with some blocks for the outer border of a scrappy quilt I'm working on.  I will have to wait to make more of the blocks though as I need more fabrics to throw into the mix.

Here are the numbers:
Added This Week:       0.0 yards
Added Year to Date:    18.54 yards
Used This Week:          0.12 yards
Used Year to Date:       21.12 yards
Net Year to Date:         -2.58 yards  

Go on over to Judy's post to see how everyone has done this week.


Happy Crafting!
~Sarah at upstateNYCreations

Wednesday, September 5, 2012

Quilt #7 - The BIG One!

In April 2008, I started my first really large quilt.  At this point, I had already made about a half dozen smaller quilts.  I knew if I tried to make a Queen+ sized quilt right off the bat, I would probably get discouraged by the process.  I'm definitely glad I made those smaller quilts first, because this one took a while.

Here's the fabric I used for the quilt.  I still have quite a bit of the green laying around.


Quilt_7-1


By the time July rolled around (some 3 months later), I was finally getting to the point of getting blocks made.  I had quite a bit of trouble with the triangle pieces and they didn't really want to come out right.  To this day, I still don't understand why I had so many problems with them.

Quilt_7-2


I finally got the finished top together by the end of October.  Making all the pieced blocks and the pieced border took a long time.  Just the sheer volume of sewn pieces was mind-numbing at times.

Quilt_7-3


Overall, the quilt turned out exactly like I had planned.  I had designed this quilt completely on graph paper and without any nice little programs like Electric Quilt.  Man! I would have loved to have that program back then. :-)

Quilt_7-4


Since there was absolutely no way I was going to be able to quilt this monster myself, off to the quilter in December.  I made sure to give her lots of time and told her it was NOT a Christmas gift and that she could push it to January or February of 2009.

Here is is, back from the quilter.  She did a lovely free-hand design that mimicked the music notes in the white fabric.  In each of the center blocks, she quilted a different music note or symbol.

Quilt_7-5


Here's the quilt on our bed.  It is definitely big enough to fall over the sides and cover the pillows.

Quilt_7-6


I'm really happy with this quilt and would definitely make it again if I needed to.

Happy Crafting!
~Sarah at upstateNYCreations

Tuesday, September 4, 2012

Make-A-List Monday... on Tuesday

Whenever there's a three-day weekend with the holiday on Monday, I get all screwed up in terms of what day of the week it is.  This time is no exception. :-)  Actually, I think it may even be worse because I took Friday off from work to make it a four-day weekend.

I was able to get some sewing done, but not a huge amount as both Saturday and Sunday were spent a my parents' and my inlaw's for two separate labor day gatherings.

Here was the plan for last week.

1. Post on Wednesday with project progress.  Work was crazy busy, so I didn't do this last week.
2. Finish adding the final borders to Wildflower Fields.  Finished!
3. Post about Quilt #6.  Finished!
4. Post a picture of the current needlepoint project. Oops - forgot to even take a picture.  I did finish the "page" I was working on and am onto the last page for the first row.  There's 42 pages total!  The first row when I'm done with it will have 30,000 stitches.  That's a scary number!.
5. Post for Stashbusting Sunday.  Wasn't home on Sunday, so I didn't get a chance to post.


So here's Wildflower Fields all completed (except final quilting and binding).

Wildflower_Fields-8

Closer picture of one of the corners.

Wildflower_Fields-9

I think it came out way better than I thought it would.  The pictures really don't do it justice as the colors are very vibrant in person and they just don't show up as well in the picture.  I can't wait to get this on the frame and quilted!

So this week, I'm not even going to attempt to be adventurous as its probably going to be another busy week.  In no particular order...

1. Post for Stashbusting on Sunday.
2. Quilt more of the Beginning Sampler and post photos of quilted blocks.
3. Design quilting motif for Lone Star wall hanging.
4. Trim "leftover" bits from other quilts into usable pieces.
5. Photograph needlepoint and post picture.

Happy Crafting!
~Sarah at upstateNYCreations