I have a quilt for client that I'm making and thought I would do a tutorial for how to make the main blocks for the quilt. The block itself has a few names, but the two that I know are Monkey Wrench and Snail's Tail. It is a traditional block.
The quilt itself is a total of 56" x 56" including borders, but the center portion that has the Monkey Wrench blocks is 48" x 48" and uses 16 12" blocks.
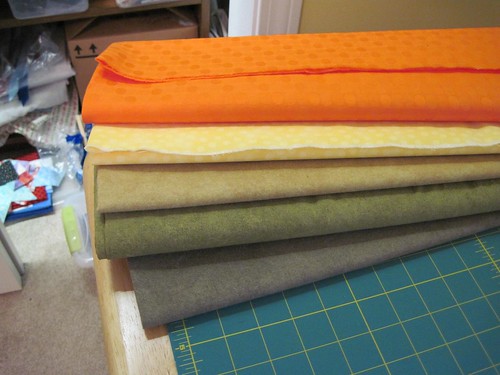
The fabrics for this particular quilt are to go along with a Jungle theme in the nursery. I love seeing the fabric all pressed and folded ready for cutting, so I couldn't help but share this photo. :-) The middle fabric is actually for the border, so the four colors for the blocks are the orange, yellow, medium green and dark green fabrics.
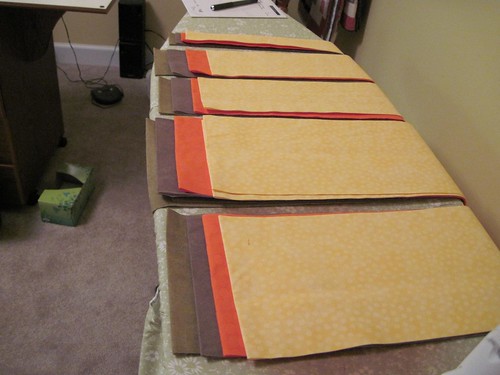
The cutting directions that I have here are for a total of 16 blocks to make the 48" x 48" center of this quilt. The following strip widths and quantities need to be cut from each of the four colors.
- 1 strip of each color cut 2" in width
- 1 strip of each color cut 3-7/8" in width
- 1 strip of each color cut 4-1/4" in width
- 2 strips of each color cut 6-7/8" in width
- 1 strip of each color cut 7-1/4" in width
When sub-cutting the strips into squares and triangles, set aside the remaining pieces to strips if you plan on making this full quilt. The pieces for the corner blocks for the quilt can be cut from the remaining pieces of the strips.
The smallest strips can be cut into squares. The rest of the strips are cut either once on the diagonal to obtain half square triangles, or twice on the diagonal to obtain quarter square triangles.
- 3-7/8" squares - cut twice on diagonal
- 4-1/4" squares - cut once on diagonal
- 6-7/8" squares - cut twice on diagonal
- 7-1/4" squares - cut once on diagonal
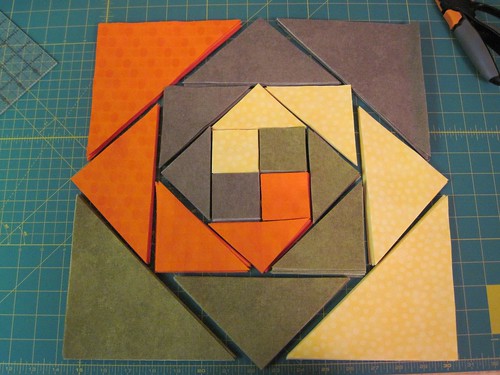
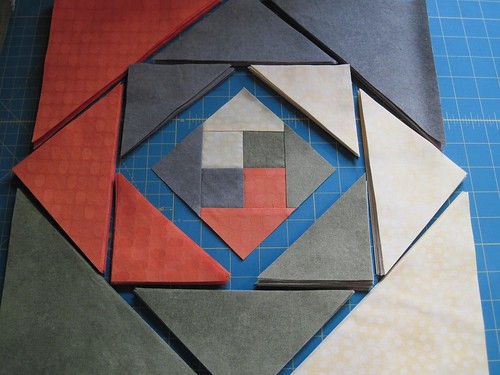
Here are all the individually cut pieces laid out in the pattern for the overall block.
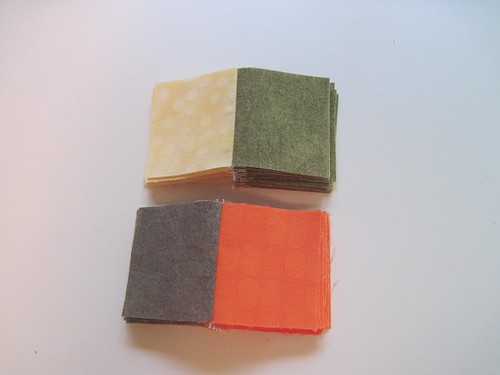
Start with the middle squares and sew them into pairs, pressing seams towards the darkest fabrics (the greens in the photo below).
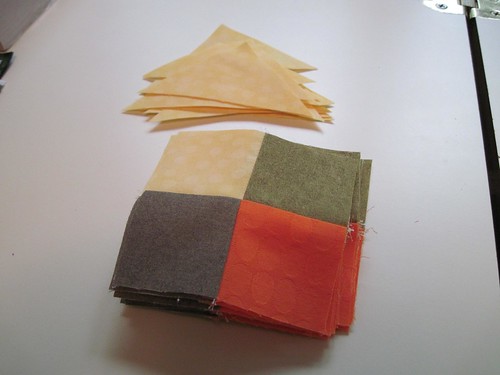
Next, sew the pairs into four-patches and nest the seams while sewing.
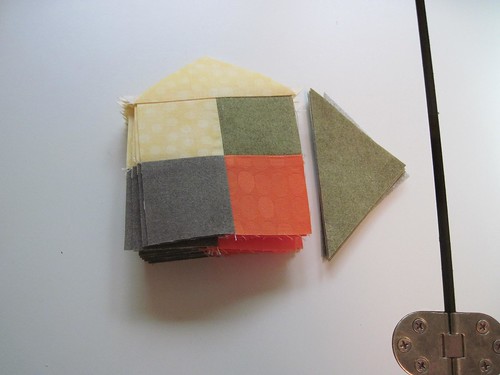
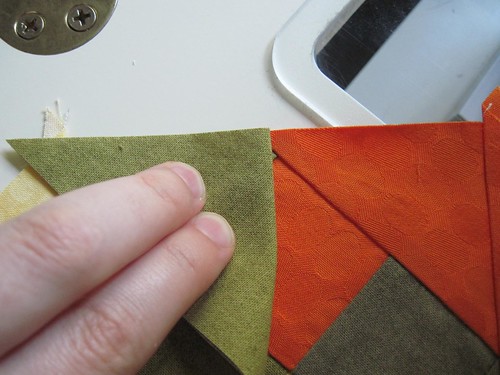
Next, you want to sew the triangles to the flat edges of the four-patch. I have two different methods of doing this that I show below. Either one works and it will really depend upon what you are comfortable with. For this first set of triangles, I lined up the point of the triangle with the vertical seam (see 2nd picture below). I also added one color at a time as I went around the blocks, pressing the seams after each triangle was added.
Here's a picture of the first square with all triangles added to the four-patch. Make sure you square up your block at this stage. You may not have a perfectly square block if your seams are off a little bit. Obviously you want to get your seams as perfect as you can, but we're all human and we're not perfect! :-)
My blocks didn't end up perfectly square, but I did make sure that I trimmed my edges such that I had a quarter inch distance between the points and the edge of the fabric. This will at least make your quilt appear to have perfect seams and corners.
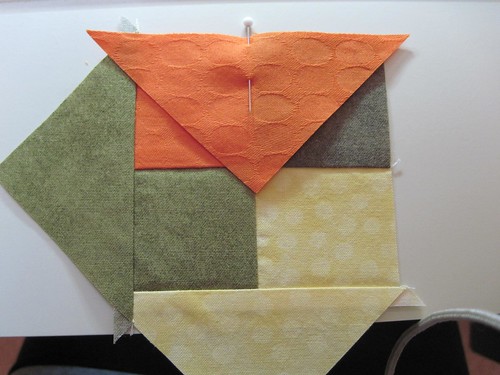
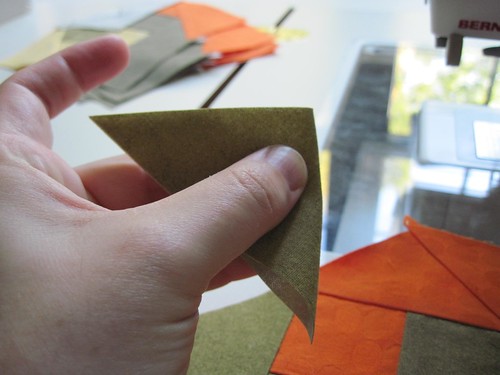
This is the other method I used for adding the triangles to the edges for the subsequent rounds. First take your triangle and fold it in half with the right sides facing out.
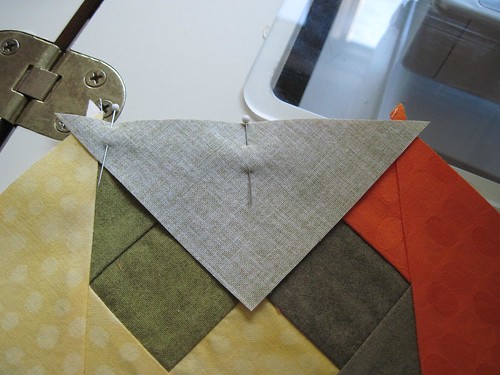
Line up the folded seam with the intersection point on your block. This will ensure that your triangle is properly centered on the straight edge without having to physically mark the centers of each of the pieces.
Unfold the triangle and pin it in place. I've found it best to pin at the middle and again at the front edge where it first goes under the pressure foot. Notice how the yellow and orange triangles in the picture below are right at the intersection points for the squares "under" them. I can definitely say my block wasn't absolutely square, but because I took the time to trim the edge to be 1/4", the next piece I added was at the exact spot it needs to be to show that "perfect" corner.
What I also did on these additional triangles is to add the triangles on opposite sides of the square at the same time. This reduced the number of times that I had to get the iron heated up to press the seams. Its still the same number of seams to press, but it was faster this way.
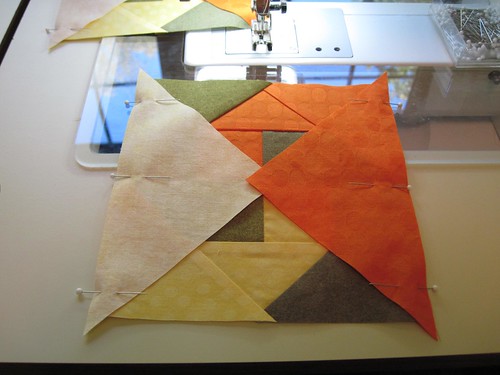
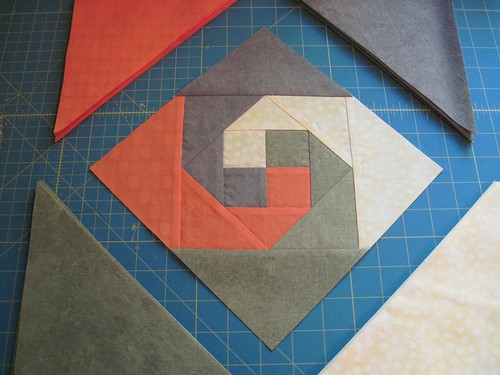
Here's a photo of the next-to-last round of triangles added to the center square.
Keep adding the triangles around the block until it is finished. Then square up your final block.
In the photo above, I still had to had the last two triangles to the square, I do have a picture at this point, but did not upload it yet. I will add that picture once it is uploaded.
The next tutorial will show how to make the corner blocks and then the final border (piano key border).
Happy Crafting!
~Sarah at upstateNYCreations

This comment has been removed by a blog administrator.
ReplyDelete