Wednesday, April 30, 2014

More Partial Seams

I'm finally getting around to the continuation of my last post on partial seams.  The prior post can be found here.  These pictures are all from the Jambalaya quilt pattern that I'm putting together with some quarter yard cuts of material that I got a year or so ago.

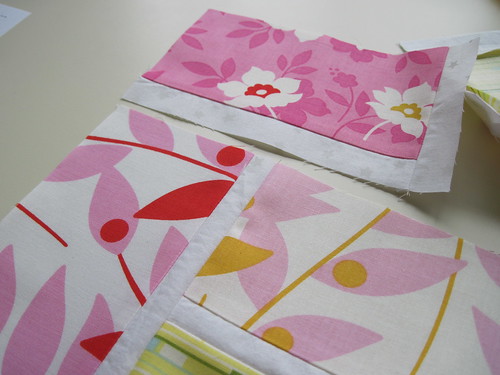
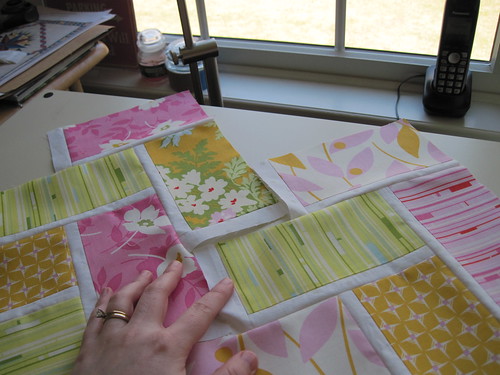
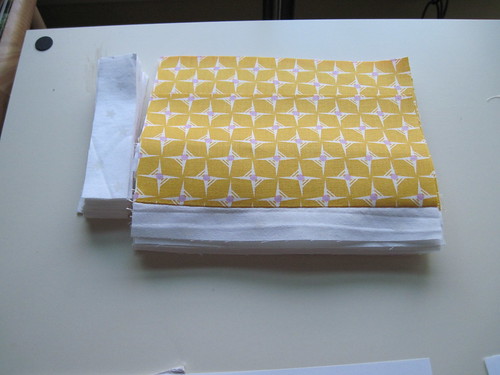
Once you have your columns sewn together as shown in last post, you'll want to put two of the columns next to each other so you can visualize how they nest together.
Jambalya 17

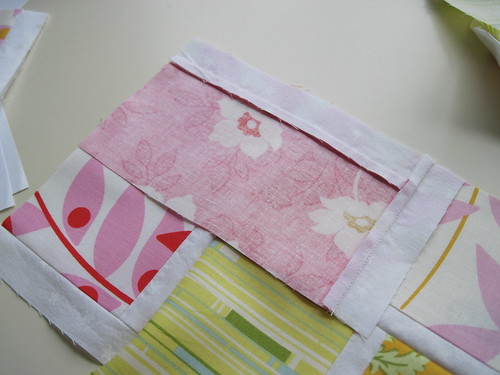
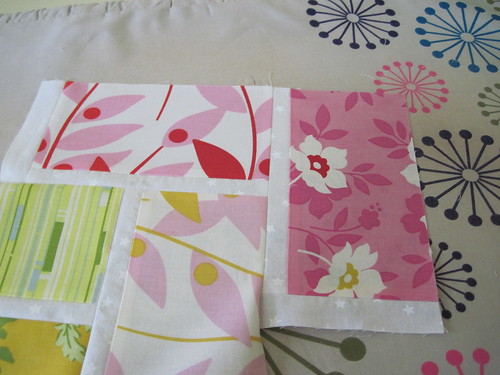
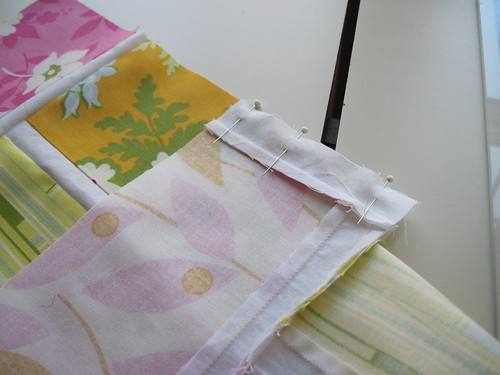
Flip the piece on the right over onto the left.  Take a look at the fabric placement in the above photo compared to that in the below photo.  The column on the left is stationary, the column on the right is flipped right sides together with the pink/white/orange piece on top of the mainly orange piece from the left.  I pin these seams to keep things aligned a bit better as I move things around.
Jambalya 18

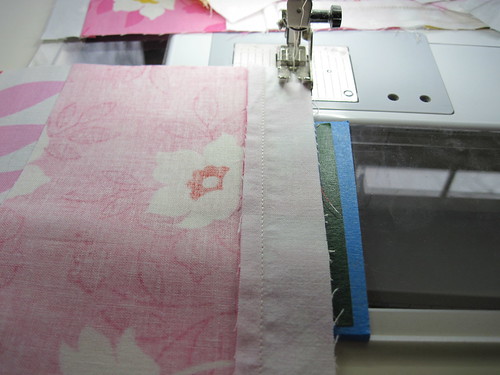
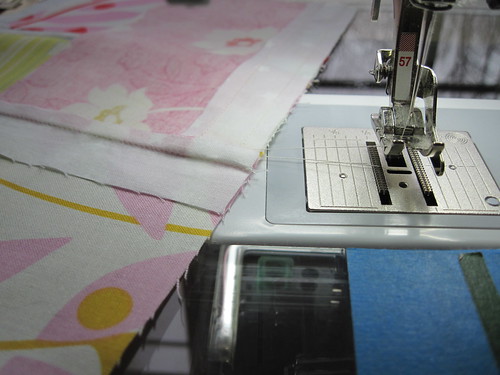
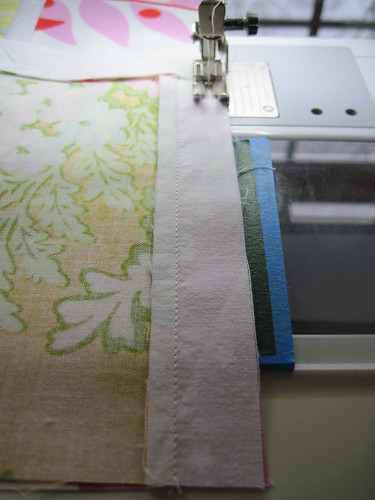
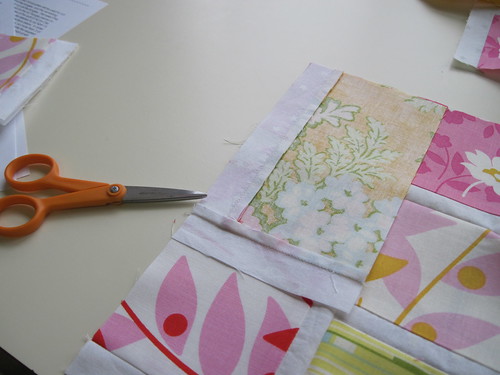
On this top section, you want to start with another partial seam.  The picture below shows my stitching line starting about 1" from the edge of the seam.  The line is sewn all the way to the free end.  This is the only partial seam you will need.  The rest of the seams are full seams.
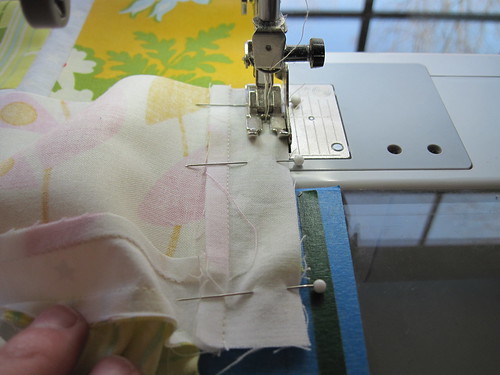
Jambalya 19

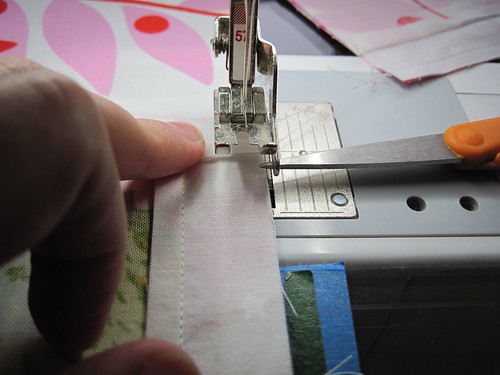
Here is what it looks like after that first seam is completed.  The next step is to sew the yellow striped fabric to the free side of the orange piece from the first seam.  Again,  I've found it easier to pin the seams to keep things aligned.
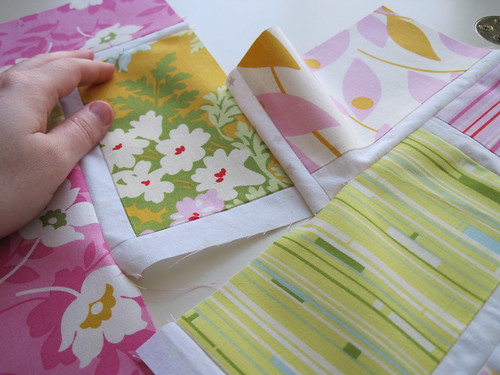
Jambalya 20

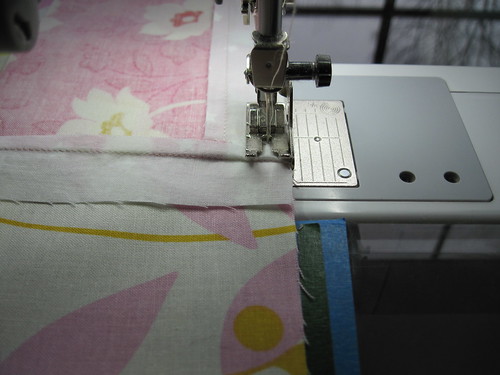
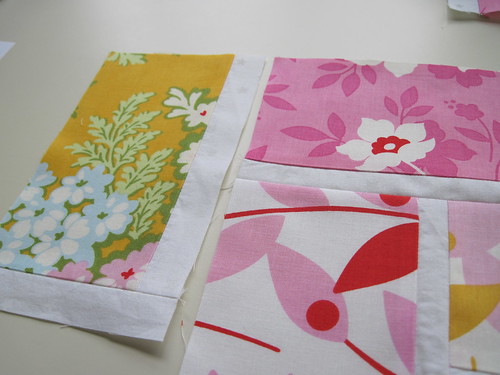
Here is a picture of the next seam ready to be sewn.  The yellow strip piece is now laying on top of the orange piece.  Sew this as a full seam.
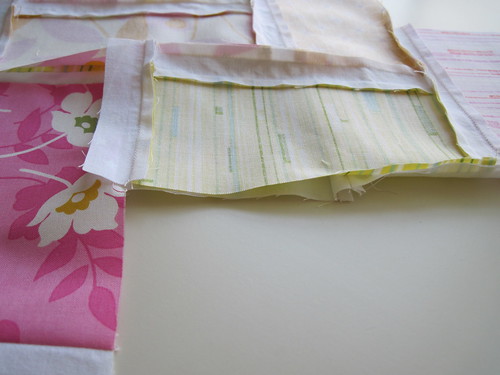
Jambalya 21

Keep sewing the seam (all of the full) until you get to the bottom of the column. There's no need to press between each seam you sew.  Simply finger press the seams enough to allow you to sew the next seam and then do a full press once you're done with the column.  Its easiest to press from the back side first to get the seams going in the direction you want them to go.  Once you have that done, you can do a good hard press from the front side.

I don't currently have a picture of the finished columns, so you'll have to trust me that its done. ;c)  The partial seams aren't too bad once you get accustomed to the method of doing them.  The only downside I found was that there was a lot of stopping and starting.  I keep a pile of squares next to my machine for a scrap quilt and used those to maintain my line of stitching as much as possible.  So the benefit was that I got a lot of these pieces sewn together when making this quilt.  LOL!


Happy Crafting!
~Sarah at upstateNYCreations

Sunday, April 27, 2014

Quilt Show - Empire Quilt Fest

A few weeks ago, my parents were up visiting and we went to a local quilt show that is held every other year. There are always some amazing quilts at the show.  Here's some really beautiful ones that struck my eye while I was there.


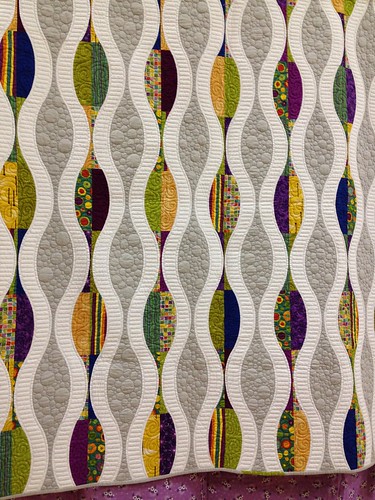
"Curves Ahead" by Sue Schoch.  The pattern was called Urban Pods.
Empire Quilt Fest 01

"Party Streamers" by Suzette Merendo-DuPont.  The pattern has the same name by Kate Mitchell Quilts.

Empire Quilt Fest 03


Empire Quilt Fest 06


Empire Quilt Fest 04

"Queen of the Magnolias" by Jennie Ozog.  The pattern is called Cathedral Window Quilts by Lynne Edwards.
Empire Quilt Fest 07

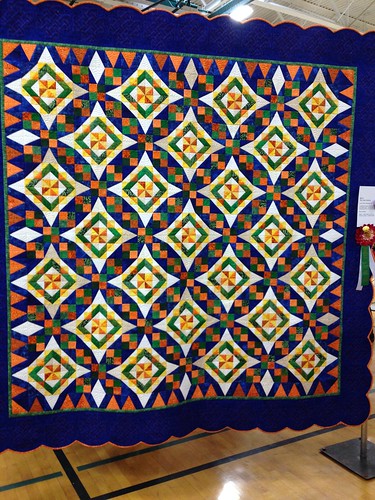
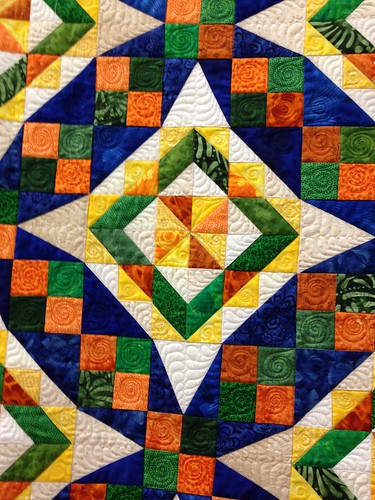
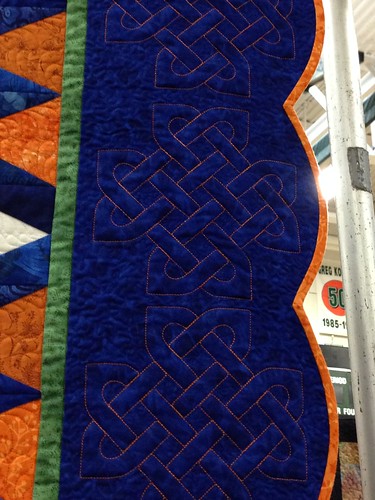
"My Celtic Solstice" by Laurie Collins.  The pattern is "Celtic Solstice" by Bonnie Hunter and Laurie made modifications to the borders to make it all her own.  I like how she modified the border and put a celtic quilting theme into it.
Empire Quilt Fest 09

The quilting was great on this one.

Empire Quilt Fest 10


Empire Quilt Fest 12

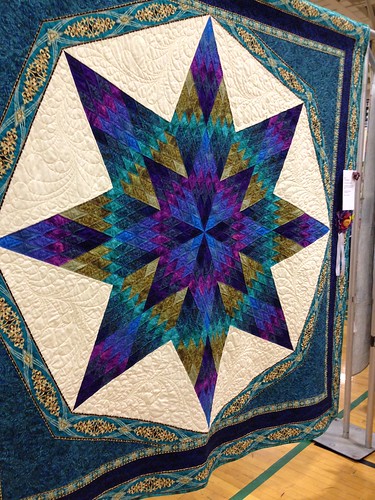
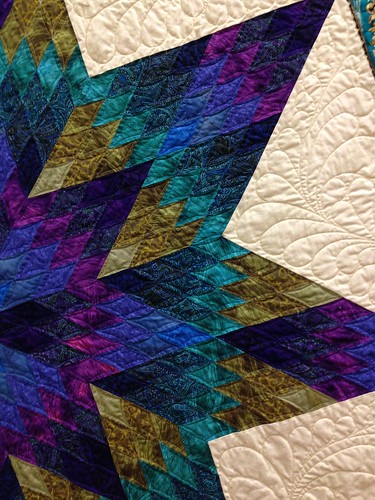
"Star Sapphire" by Monica Mottolese and the pattern is by Jinny Beyer.

Empire Quilt Fest 13


Empire Quilt Fest 14


Empire Quilt Fest 14

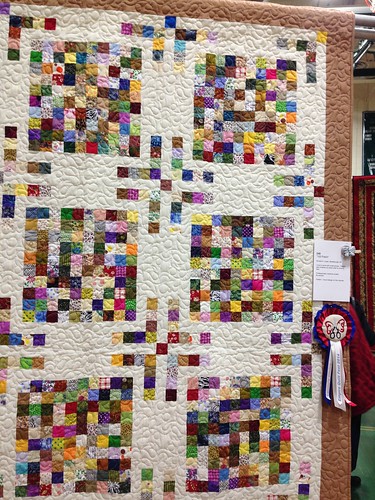
"100 Patch" by Ronald H. Lower.  This one would be a great pattern to use up lots of those little scraps that we never know what to do with.
Empire Quilt Fest 16


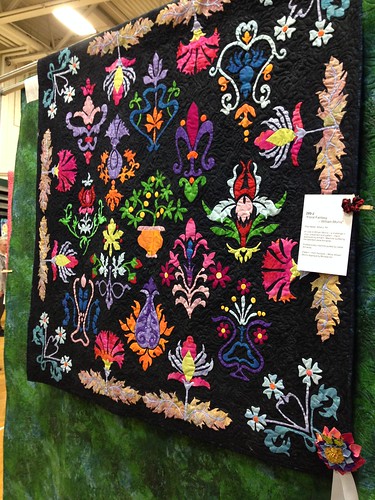
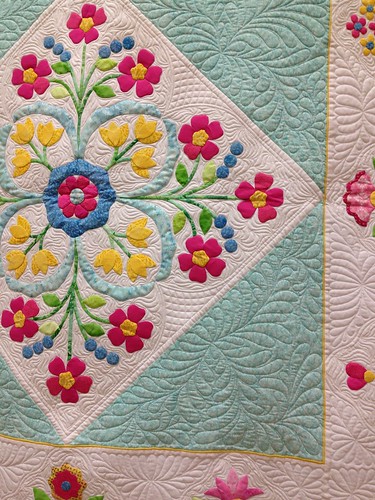
"Floral Fantasy - William Morris" by Rita Haldar.
Empire Quilt Fest 18


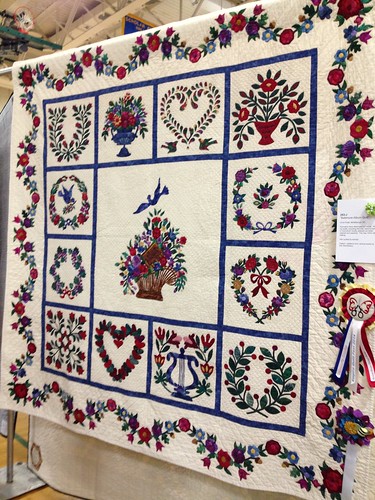
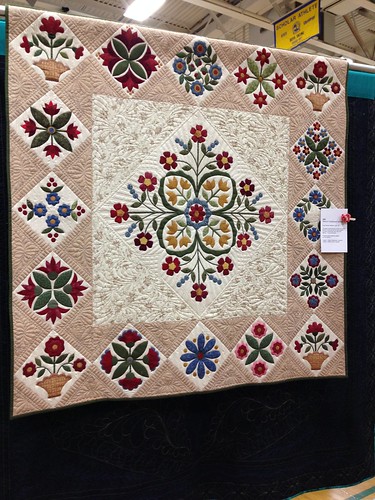
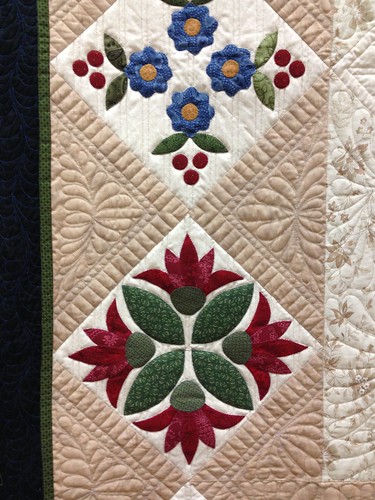
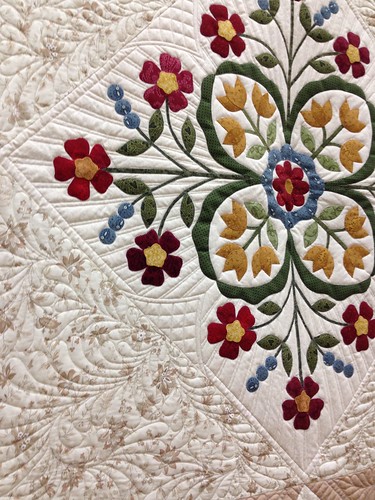
"Baltimore Album Quilt" by Chris Polak.  The patterns were taken from various books by Elly Sienkiewicz.
Empire Quilt Fest 20

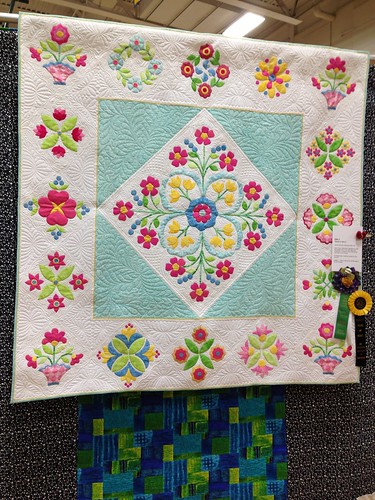
"Mimi's Traditional Garden" by Carol Swota.  Pattern is "Mimi's Bloomers" by Erin Russek.
Empire Quilt Fest 22


Empire Quilt Fest 23


Empire Quilt Fest 24

"Bella's Mimi" by Janet Palombo.  Pattern "Mimi's Bloomers" by Erin Russek.
Empire Quilt Fest 26


Empire Quilt Fest 27


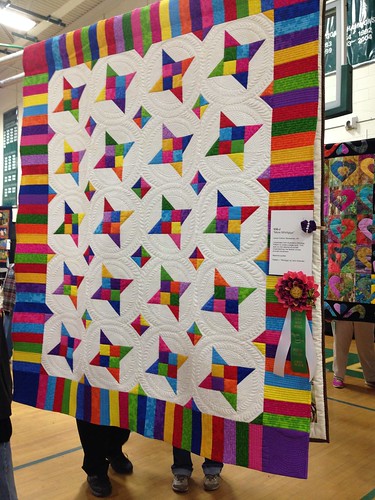
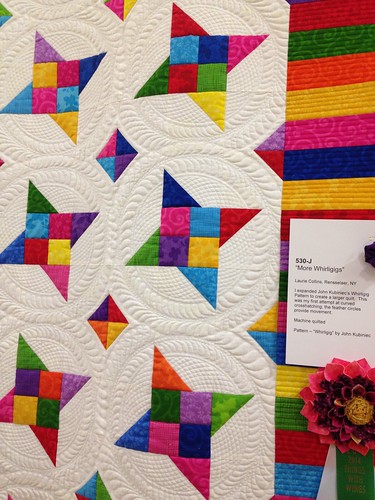
"More Whirligigs" by Laurie Collins.  Pattern is "Whirligig" by John Kubiniec.
Empire Quilt Fest 30


Empire Quilt Fest 31


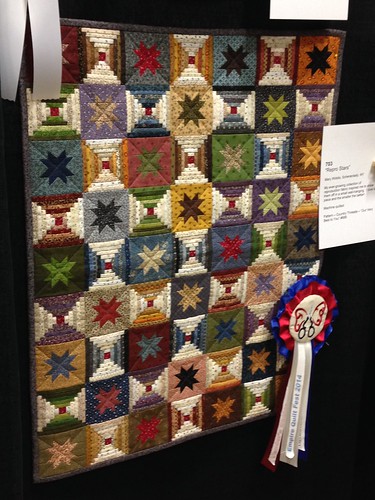
"Repro Stars" by Mary Widdis.  Pattern is from County Threads.  This quilt is actually very small.  The log cabin pieces were only 1/2" wide finished.  The individual did an amazing piecing job with this one.
Empire Quilt Fest 33

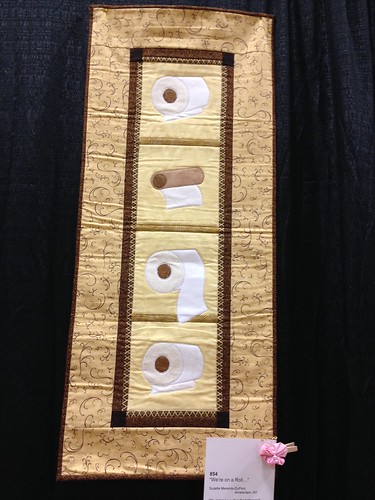
"We're on a Roll...." by Suzette Merendo-Dupont.  The pattern is by Karen Brown of Java House Quilts.  I couldn't help myself with this one.  Its just so cute and funny.
Empire Quilt Fest 38

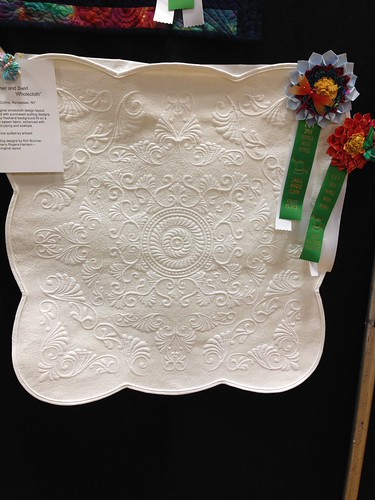
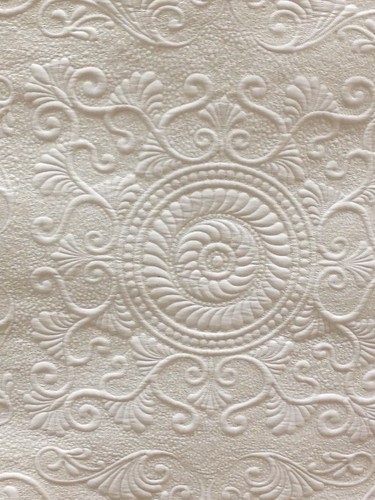
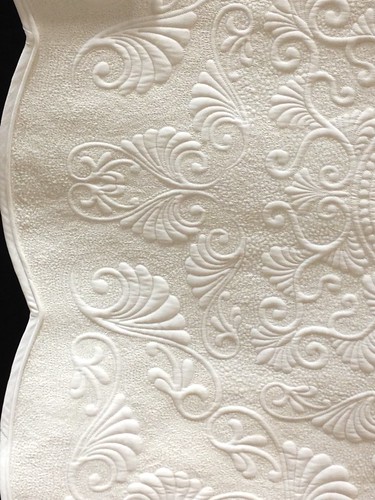
"Feather and Swirl" by Laurie Collins.  This last quilt was one of the few whole-cloth quilts in the show.  It is a masterpiece.  I can't imagine the number of hours it took to quilt this.
Empire Quilt Fest 40


Empire Quilt Fest 41


Empire Quilt Fest 42

Next time I'm hoping to enter a few quilts into the show.  I always end up forgetting to do so and finally remember it about a week before the show opens, which is obviously too late to enter anything.  I really need to start planning ahead a little bit more. :c)

Happy Crafting!
~Sarah at upstateNYCreations

Tuesday, April 8, 2014

Partial Seams

When I first started the Jambalaya quilt, I was a little put off by the partial seams.  I didn't realize it was partial seams until after I had purchased the pattern and started reading the directions.  However, I really wanted to make the quilt as I liked the overall design.

It took a little bit to get used to the partial seams, but in the end, it hasn't really been that bad.  They definitely aren't as difficult as they seem to be. :c)  Here's a quick little tutorial on partial seams for braided designs:

In the photo below, I've already started a column of pieces.  The first few blocks follow the same pattern as the other blocks in the column.  Take the piece that you want on the "right" of your sewn pieces and line them up as shown.


Jambalya 06

Next, flip the fabric over and align the raw edges.

Jambalya 07

For this orientation, you start with the seam all the way to the edge of the fabric as shown:

Jambalya 08

Sewn down the length of the seam and stop about 1" from the end.

Jambalya 09

Remove the fabric from under your pressure foot.  This is a good time to use something from a "leader and ender" project.  Simply put set of fabric under the pressure foot and sew the seam and you don't ever have to break the thread.  This ends up saving thread in the long run, but I find it also simpler since I don't have to worry about loose thread tails getting tangled.

Jambalya 10

Lightly press your seam that you sewed.  I tend to press the full end heavily to get it nice and smooth, but as you get towards the partial seam end, you don't want to press the fabric much.

Jambalya 11

For the next piece, again, align the fabric along the edge of your sewn column.

Jambalya 12

Flip the fabric over and align the seam edges.  The scissors below are point to where the partial seam starts.

Jambalya 13

In this case since you want your raw edges on the right, you have to start on the partial seam.  Simply start you needle approximately 1" from the edge of the fabric.  The scissors are again pointing to the same spot from the picture above.

Jambalya 14

Sew this seam all the way to the end of the fabric and press lightly as you did before.

Jambalya 15

Keep adding blocks using the partial seams until you finish your columns.  The picture I have below is 3 columns finished.  I have 4 finished now with the 5th one in process and then I'll be sewing the columns together.

Jambalya 16

I'll also show some detailed pictures of sewing the columns together since that will be the trickier part with the partial seams.

Happy Crafting!
~Sarah at upstateNYCreations
Sunday, April 6, 2014

Another Project... LOL

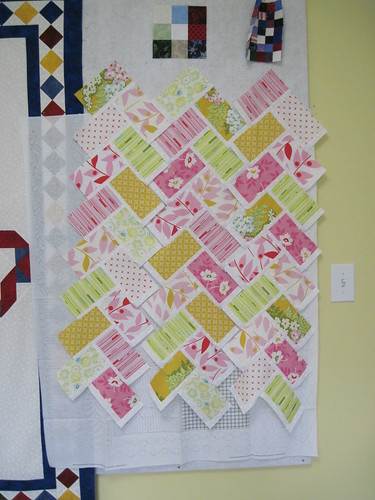
Not that I needed another one, I decided to start a new quilt project this past week.  This pattern is called Jambalaya by Prairie Sky Quilting.  The pattern is designed for using fat quarters, but I used a set of quarter yard cuts that I had instead.  I had a bit more waste that I cut into pieces for other scrap quilts, but it used up some of my stash.

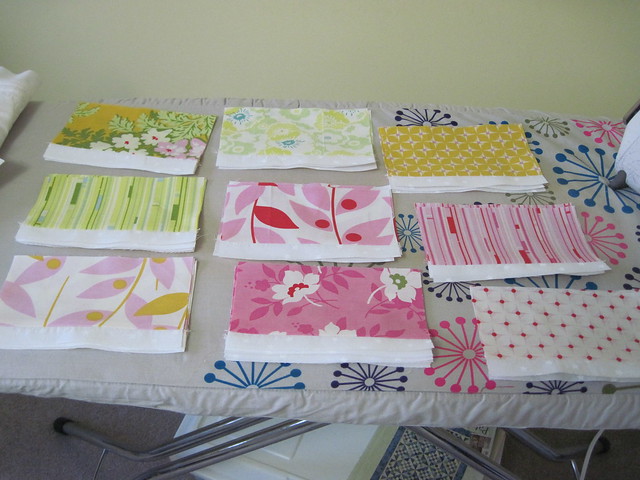
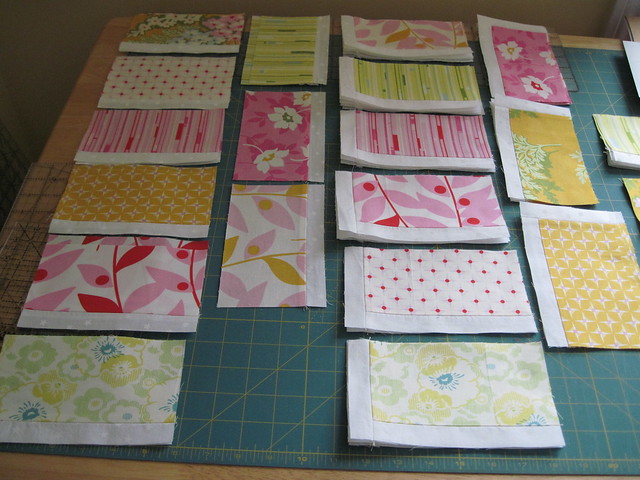
Here is the first set of blocks ready to be sewn.
Jambalya 01

And all of the "plain" blocks required for the pattern.

Jambalya 02


Jambalya 03

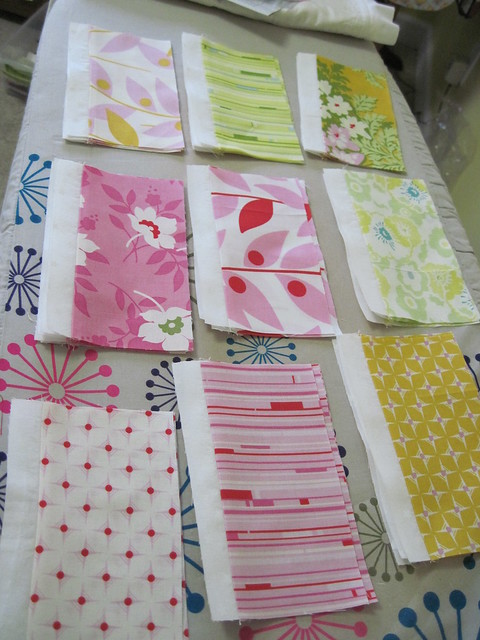
This next photo has the plain blocks and one of the other blocks next to each other.  I ended up spreading them all out and then putting equal numbers of the blocks into the columns for the quilt.  I wanted to have an even mix of all the fabrics.

Jambalya 04

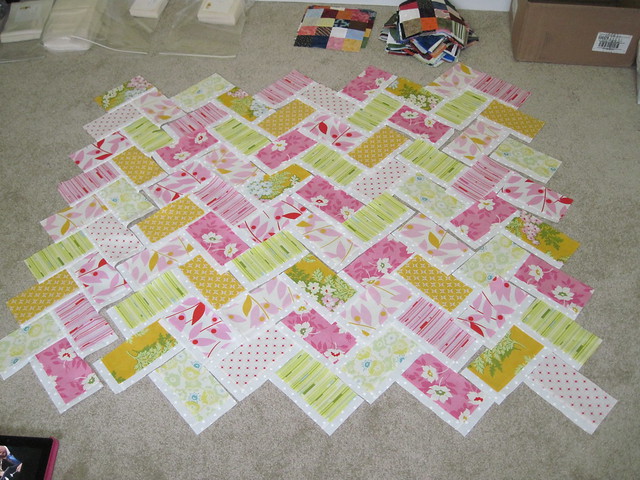
I then laid them all out on the floor so I could make sure I had a good mix of the fabrics.  There were a few fabrics that I had more of the blocks in that particular color, so I had to make sure I was intermixing those so I wouldn't end up with a clump of blocks all the same color.

Jambalya 05

I decided to start this pattern as I wanted to try something new.  This quilt requires partial seams due to the nature of how the blocks align.  So its new to me as I haven't done partial seams before.  I have most of the columns sewn at this point, but I haven't started trying to join the columns together with the partial seams yet.  We'll see how that goes.  ;c)

I hope everyone is enjoying the weekend.  Here in upstate NY, the weather is finally nice.  Most of our snow is gone, though we still have piles of it in certain places.  It is supposed to get up to 55F today with a high later this week of 65F.  We don't have any plants growing yet, but spring is finally here. 

Happy Crafting!
~Sarah at upstateNYCreations
Tuesday, March 25, 2014

Time....

....is the one thing I wish I had more of lately.  That and maybe some extra energy! :c)

Its been another hectic two weeks here in upstate NY.  Just after I posted last time (about 2 weeks ago), I ended up picking up a nasty cold.  I spent 4 days straight not doing anything but drinking tea, reading and sleeping.  I'm still fighting off a cough from the cold, but it seems to be getting better.

Work has also been crazy the past few weeks.  Its the time of year that we have to do appraisals.  Originally, we didn't need to get them done until the end of April, so we (myself and two other managers) had plenty of time to get things written up and then to hold the meetings with the individuals.  Then on March 10th, HR told us that we needed to have EVERYTHING done by the end of March!  So I have 30 reviews that I had to write up and then schedule meetings and I only had about 2 weeks to do it.

Sadly, the reviews have not been going well.  The prior managers were very generous with the appraisals and the average for the group was 4.7 out of 5.... not really an average.  So this year the manager of the group decided he wanted to "fix" it...so all the ratings are lower.  We have some very unhappy people now simply because the number changed.  The text of the appraisals still say they're doing a good job, but people like to focus on that number.

Needless to say, its been stressful trying to get through these reviews.  I have 4 days (counting today) left of reviews and I'll be done by lunchtime on Friday.  Friday afternoon can't come fast enough at this stage!

I'm hoping that I can get back to some quilting soon.  Due to dealing with the reviews, I have been neglecting my quilting in the evenings.  In fact, I don't really get anything done in the evening but try to relax so that I can sleep at night.

I have some projects in the works.  Not that I needed another project, but I bought this applique quilt kit from Quilting by the Bay.  It looks really cute and I needed something that was fun and not too terribly difficult to piece.  All the appliques are fused, so it should come together rather quickly.  Plus, the overall design has some really great opportunities to do some custom quilting on it.


I also have some smaller projects in mind and a few finishes that I'm almost done with.  I have some binding to sew onto a few things and then they are done.

Hope everyone is enjoying the start of spring.  Its been cold here in NY still, but we have spurts of spring every now and then.  Hopefully the 50-degree weather later this week will help get rid of the 6+ inches of snow we still have on the ground.


Happy Crafting!
~Sarah at upstateNYCreations
Sunday, March 9, 2014

It's Been A While....

...since I last posted.  I can't believe its been 3 weeks already!

Work has been insanely busy the past two weeks as we had visitors from Mexico.  This meant getting into work earlier and staying much later to get everything done.  Plus, most evenings we took them out for dinner or other things, so I wasn't getting home until after 8pm most nights.

I haven't been doing a lot of quilting lately due to the insane hours I've been putting in at work.  However, I did get a small quilt on the frame this week.  Sadly, I think this is going to be one of the most epic fails and will likely be either thrown away or finished up with tying it so my cat can use it.

It started out pretty promising (the 2nd item in the picture below), but yet again, my quilting frame has failed me.


The quilting frame I have is an older generation frame for a Viking Mega Quilter.  It can be setup in 2 sizes, either a 5-foot length or a 10-foot length.  Unfortunately, where the pieces come together in the middle, it has a small step in the joint.  We've spent hours trying to smooth that you and adjust the frame over and over again to get rid of it, but it still lingers.  So when I try to do some custom quilting with it....the quilting ends up looking terrible, which is what has happened with the Winding Ways wall hanging.

I'm not sure at this point whether I will scrap the whole thing or attempt to rip out the stitches that are currently in it.  I'm seriously tempted to just scrap the whole thing and never think about it again...that's how frustrated I am with it.

I would love to upgrade to a better frame and machine.  While I could afford to do it, I still have a hard time justifying the cost, especially if I don't use it for a business or something of that sort.  For now I will do what I've done in the past.... quilt simple pantographs on the frame and anything that needs custom quilting will be basted on the frame and then quilted using my regular sewing machine.

Happy Crafting!
~Sarah at upstateNYCreations
Friday, February 14, 2014

Quilt #15 - Rainbow Skies

2009 was really a year that I started making a lot of quilts.  I did a lot of baby quilts that year as well as some good-sized lap quilts.  Early in 2009, I decided to make a quilt for my husband's grandmother.  She was an avid garment maker her entire life, but had never made a quilt.

She had recently moved into a senior community, and while it was a very nice place, it seemed to be lacking some color.  I opted to make a quilt that had every color of the rainbow in it.  I actually had a lot of fun picking out the fabrics and loved seeing them all spread out together.


The layout of the quilt was very simple and consisted of all squares.  This was before I knew the benefits of strip piecing, so I cut each square out and sewed them back together in the order per my design.  I was very "ordered" at the time and made sure all my pieces lined up properly.  I had fun putting the strips into an order such that each strip had one additional color added to it.  I know...I'm a bit crazy.  :c)


Here's what the layout really looked like:


And the layout for the full quilt (minus borders):


It didn't take took long to piece the top together.  I did make sure to pin all my intersections though, so that took some time to do.  I wanted to make sure that all my corners lined up just right.


I opted for a very simple black border around the quilt.  I wanted something that would hide the dirt (so it wouldn't require a lot of washing).


I started quilting it during the summer on my domestic sewing machine.  This was long before I had my frame, so it involved marking each square and quilting it.  I had a lot of trouble with skipped stitches and bobbin thread poking through to the top, but I worked through it.

My little "helper".... "what you want to quilt this thing?"


"but this is my cozy bed.  Can't you tell I have it just so ... and I have a little pillow too!"


"Fine!  You want to take pictures of me?  HERE I AM!!"  Ellie was very helpful with quilting this quilt.  At least I know its a good quilt since it was cat approved.


So several weeks later (notice the Christmas tree on the left of the picture), the quilting was done and the binding was complete.  I took these pictures just before I wrapped up the quilt to give as a Christmas gift.


Some of my quilting... not my best work, but it was a learning experience.  I even switched threads based upon the colors of the squares.  I think I had 5 different thread colors that I used for the quilt.  I don't recall the bobbin thread I used, but in the top, I used several different variegated threads from Superior Threads.  These were all from the King Tut line.


I really love the happiness of this quilt.  Even looking at the pictures makes me smile and thing of spring and warmer temperatures.  Speaking of that... we just got through another nasty storm here in upstate NY.  Last night we had another 16" of snow come down.  Sure glad I didn't have to go out today!

Happy Crafting!
~Sarah at upstateNYCreations

Monday, February 10, 2014

Quilt #14 - Stars & Hearts

Back to my history of quilts... :c)

This is another lovely from 2009.  It was actually my very first applique quilt.  I had a great pattern that I found for this quilt (sadly I don't recall the name off the top of my head, but it was a published pattern).  I think it may have been called "A Star is Born".

I don't have any pictures of it in progress, but I recall it taking a while to figure out my stitch settings for the satin stitches around the appliques.  The fabrics were a bunch of fat quarters that I purchased specifically for this quilt.  The only yardage was the white background, the blue dot fabric and the backing.


These pictures were also before i figure out how to take better pictures of quilts!  So I apologize for the not-so-great pictures.


It really is a cute quilt.  I did simple straight line quilting in the center sections of the quilt and then did some free-motion loops in the outer border.  I didn't do any quilting directly around the appliques.

And another picture of this laying flat on the floor.  The quilt was about 35 x 50 when it was all said and done.  This was before I purchased my mid-arm frame, so its quilted on a standard domestic sewing machine.


Happy Crafting!
~Sarah at upstateNYCreations