Monday, July 30, 2012

Make-A-List Monday

Last week was another fairly productive week.  I was able to get some sewing done on both Thursday and Friday nights, which made for a good week. :-)

Here's the list from last Monday:

1. Post photos of Shine on Bayou Cane's label and binding.  I machine stitched the binding and label on yesterday, but the actual hand-stitching is going to wait until it gets a bit cooler.  DONE!  See post here.


2. Sew rows together for Wildflower Fields. DONE!  See post here.
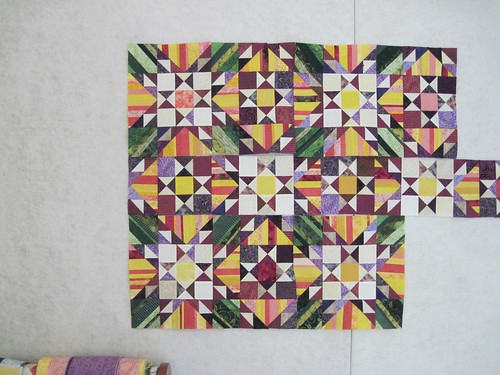
Wildflower_Fields-3

3. Post for Wanna Know Wednesday. DONE!  See post here.

4. Trim up extra pieces of fabric from backing of Shine on Bayou Cane to use in scrap quilts. Not done.

5. Post about Quilt #4 on the blog. DONE! See post here.

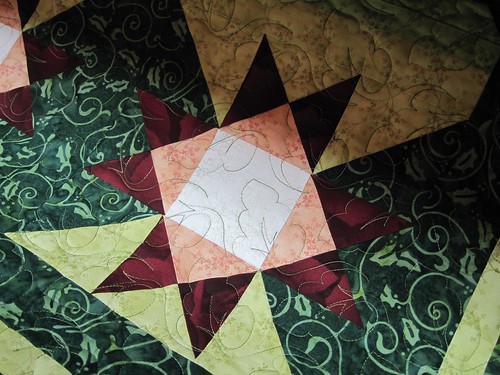
 I also started quilting on a quilt top that I did for a class last summer.  I have all the stitch-in-the-ditch quilting done and am now going to start the custom quilting.  I'm going to try out some new things with this quilt and hopefully use it as a sampler.

So here's the plan for this coming week.  Its a shortened plan as my hubby has to have knee surgery on Thursday morning.  He doesn't handle illness well and this will most likely be worse.  I will definitely be tied up on Thursday with that and we'll have to play it by ear on how he does on Friday and over the weekend.  Hopefully it won't be as bad as he thinks it will be.

1.  Plan stitching for Quilt Sampler and start stitching blocks.

2. Post for Wanna Know Wednesday.

3. Post about Quilt #5 on the blog.

Happy Crafting!
~Sarah at upstateNYCreations

Sunday, July 29, 2012

Stashbusting 2012 - Week 29 & 30

 Since there wasn't any post last week for stash busting as Judy implemented her new blog, I have two weeks posted here.  I did get a fair amount accomplished, but not a lot of stash used.  I made a label and added binding to Shine on Bayou Cane, but I counted the binding fabric when I cut it....back in 2010!

I have a bunch of pictures here, so please be patient with the page loading. :-)

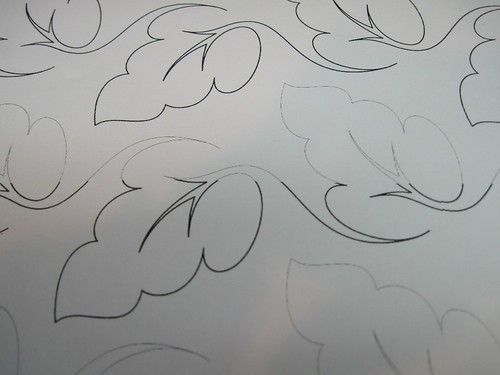
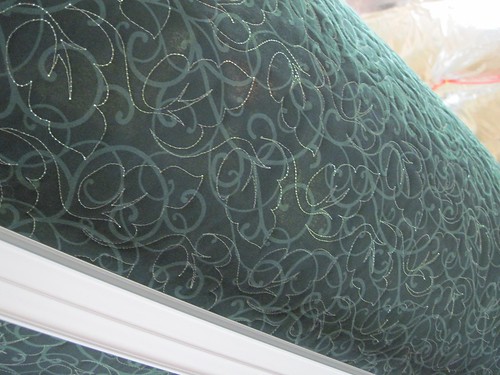
This is the panto that I used to quilt Shine on Bayou Cane.  I had a leaf pattern that I like from a picture online, so I was able to trace it and make it into a pantograph.  I also had to re-size it because the original picture was about 8" tall, but my throat space at the bottom of an 80" long quilt is just shy of 5".

Shine_on_Bayou_Cane-3

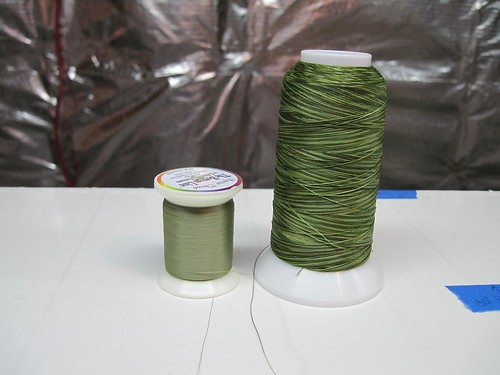
The thread I used on it was Superior Threads' Bottom Line in the bobbin and their "Lava" thread in Fern Grotto.  I also used Quilter's Dream Cotton batting in Select thickness.

Shine_on_Bayou_Cane-4

Here's a close-up of the quilting...


Shine_on_Bayou_Cane-5


And the backing....

Shine_on_Bayou_Cane-6

This is the best picture I have of the quilt as I was taking it off the frame.  Once I have the binding hand-sewn to the back, I'll post another picture of the fully completed quilt.  The binding won't be hand-sewn until this fall once it gets a little cooler.

Shine_on_Bayou_Cane-2

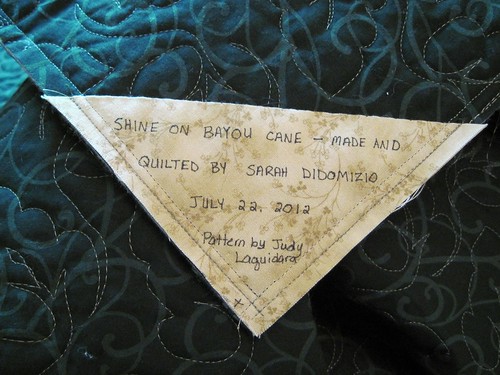
Here's the label I made for the quilt.  I didn't judge the thickness of my seam for the binding though, so a small amount of the text will be covered by the binding when its sewn down.  I'll correct that for the next one I do. :-)

Shine_on_Bayou_Cane-7

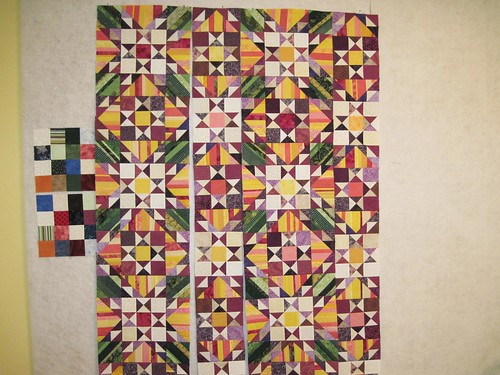
This is what else I've been working on.  On the far left are two blocks for my random scrappy quilt.  It will be made of 16-patch blocks that use 2" (finished) squares from every quilt I've made.  The other blocks/rows are from Wildflower Fields (Bonnie Hunter's Orca Bay pattern).  I have just under half of the rows put together. 

Wildflower_Fields-4

I probably won't have a lot of stash usage in the next few weeks as I've started quilting a quilt I started last year in a class.  I counted the backing and binding for that last year, too, so while I will get a finish done in the next few weeks, it won't change my numbers.  However, at least I'm in the positive again, which is definitely good.

Here are the numbers:
Added This Week:       0.0 yards
Added Year to Date:    18.54 yards
Used This Week:          0.42 yards
Used Year to Date:       20.14 yards
Net Year to Date:         -1.60 yards

Go on over to Judy's post to see how everyone has done this week.

Happy Crafting!
~Sarah at upstateNYCreations

Friday, July 27, 2012

Quilt # 4

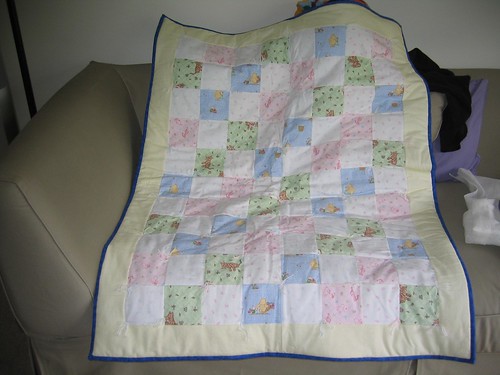
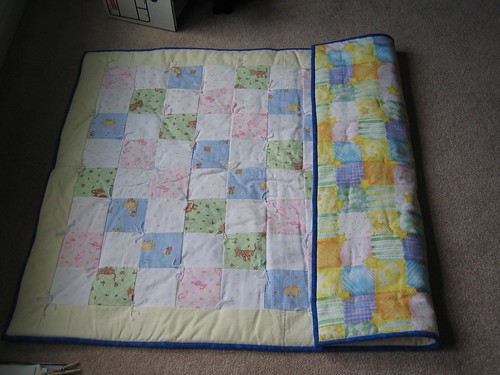
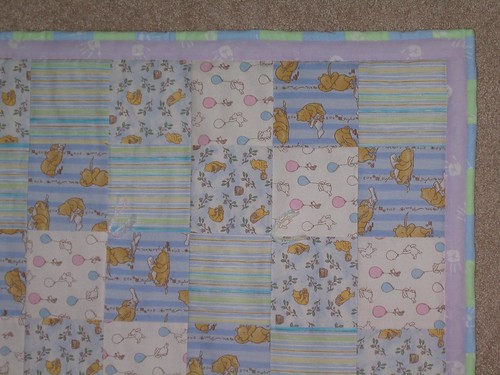
This quilt was a fun quilt to make.  I made this for my niece before she was born.  The fabrics are all very soft and snuggly flannels.  The prints on the darker fabrics are all from Winnie the Pooh.  Some of the light ones are also from Winnie the Pooh, but not all of them. 

Quilt_4-1

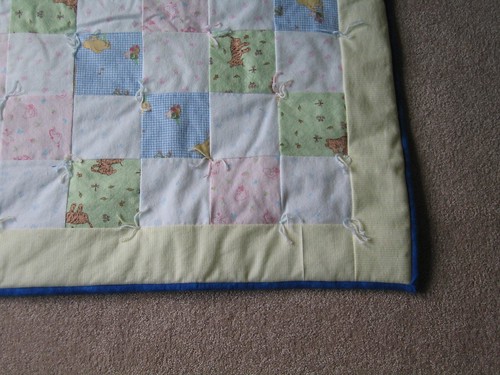
I was still learning at this point and I ended up only tying this quilt versus actually quilting it.  Part of the reason I also did that was that I used two layers of polyester batting.  At the time, I was big into using the polyester batting because they have such a high loft.  Now that I'm doing more quilting and have learned the differences between the materials for batting, I definitely prefer using the thinner cotton batting.

Quilt_4-2

I really liked the backing on this quilt, too.  The picture below shows the edge of it turned over so you can see the backing.  It was also flannel.  Its all one piece, even though it looks like it has multiple squares in it.  The print on it just made it look like it was quilted.  There's all sorts of "happy" colors on the back and its accented by stars with smiling faces on them.  This quilt was perfect for a child.

Quilt_4-3

I think the best part about this quilt is that my niece absolutely loves it.  She still uses it in the winter time (too hot for summer use) and she won't go to sleep without the quilt that "Aunt Sarah" made for her.  Its just the right size for her bed even though she's now 4 years old.  When she graduates to a standard-sized bed (probably a twin), I will make another quilt for her then.

Happy Crafting!
~Sarah at upstateNYCreations
Thursday, July 26, 2012

Quilting Services

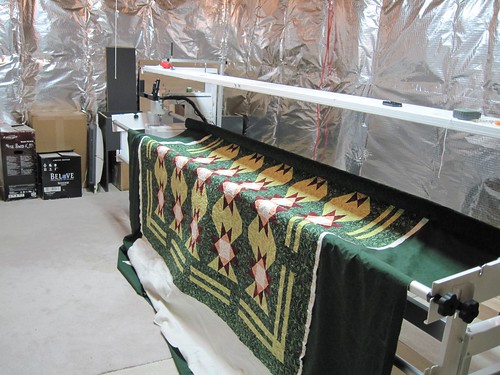
I've recently added a "page" to the blog for "Quilting Services".  Now that I have my quilting frame setup and tested on a quilt in the new house, I am able to start taking in quilts to quilt for others.

I have detailed pricing on the services page, but, in general, my services will include:
- pantograph quilting of a quilt top (I can provide backing, thread and batting if necessary)
- limited custom quilting of a quilt top
- machine sewing binding to the quilt back
- hand sewing binding to the front of the quilt (if asked)

If you are interested in having a quilt top quilted to finish up that UFO, please feel free to contact me.  I can provide pictures of quilts that I have quilted or if you are local, I can meet with you to show you some of my work.

Happy Crafting!
~Sarah at upstateNYCreations
Wednesday, July 25, 2012

Wanna Know Wednesday - A Little About Me

This week I'm departing from the usual techniques or tutorials that I've been posting.  This week I'd like to share a little bit about myself.

I have been quilting since late 2007 and have loved it ever since.  I first got hooked on "old fashioned" crafts when I was in high-school.  I started doing needlepoint and while those first few patterns were quick and rather simple, I have graduated to doing very complex patterns that take a long time to complete.  The last one I finished was a version of Van Gogh's Starry Night painting, which took me 3 years to complete.

Starry_Night

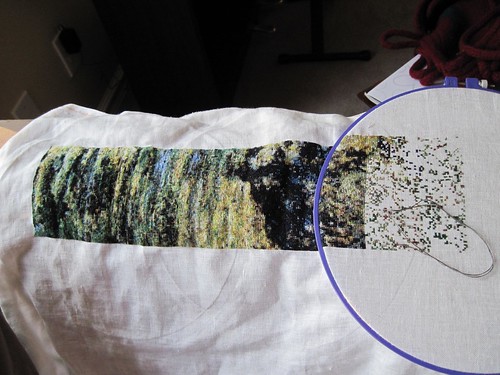
By my estimates, the next one I am working on may take me close to 6 years to finish because it is so large.  The row shown below is one row and there are 6 total rows on this picture, so its a fairly large image.

Water_Lilies-1

I am only a "part-time" quilter as I work in an office 5 days a week.  I work for a very large company and I am a technical leader for several engineers located in the US and in India.  My degree from school is a mechanical engineering degree and part of the reason I find quilting fun and interesting is that a lot of it is based upon math.  Quilting allows me to merge my engineering side (doing the math and figuring out the best way to construct something) with my more creative side.  My "real" work causes me to work ~50 hours per week and when I factor in my commute, I'm spending 55-60 hours away from the house during the week.

While I don't consider myself to be a great quilter, people who have seen my quilts say that I truly have a lot of talent and that my quilts are very professional in quality.  I think part of that comes from my engineering side and the fact that I am a bit of a perfectionist.  While I don't try to get every little corner and triangle point to line up just right, I do try to get them close.  If they are off a few threads, it doesn't really bother me.  if they are off by 1/8", I fix it.

Someday I would like to make quilting a business.  I think I would like to be able to quilt other quilters' quilts -- how many times can you put the word quilt in a sentence and actually have it make sense? :-)  -- at some point in the future.  I do have a mid-arm machine with a 6" throat space.  I am able to use some pre-made pantographs, but I also design my own to fit the available space that I have on my machine.  I would love to be able to do the quilting for others if they don't have the desire or means to do it themselves.  I see a huge market for this as I know many quilters who love to piece their tops and then just don't want to deal with man-handling a quilt under the small throat of a regular sewing machine.  I also know that in my area there are a few people who do quilting for others, but there always seems to be a waiting list.  It would seem that if there's a waiting list, there is a demand for the craft.

I may do a few other of these types of posts in the future to mix it up a little with the techniques/tutorials that I plan to put on here.

Happy Crafting!
~Sarah at upstateNYCreations
Monday, July 23, 2012

Make-A-List Monday

Last week was a fairly productive week for me on the quilting front.  I think a large portion of that was due to the fact that I actually left work reasonably on-time.  I just was not going to put in 50 hours last week after coming back from vacation.

Here's the list from last Monday:
1. Post for Wanna-Know Wednesday. DONE!
2. Finish quilting Shine on Bayou Cane. DONE! Finished on Thursday evening.

Shine_on_Bayou_Cane-2

3. Post for Stash Busting Sunday. Stash posts were not held this week as Judy had her blog re-done and it was not available for most of Sunday.
4. Post entry for other quilts I've made besides the first quilt. ;-)  DONE!


I actually got all of the items accomplished last week, which is a minor miracle. ;-)

So here's the plan for this week...

1. Post photos of Shine on Bayou Cane's label and binding.  I machine stitched the binding and label on yesterday, but the actual hand-stitching is going to wait until it gets a bit cooler.

2. Sew rows together for Wildflower Fields.
Wildflower_Fields-3

3. Post for Wanna Know Wednesday.

4. Trim up extra pieces of fabric from backing of Shine on Bayou Cane to use in scrap quilts.

5. Post about Quilt #4 on the blog.

Happy Crafting!
~Sarah at upstateNYCreations
Wednesday, July 18, 2012

Wanna Know Wednesday - Quarter Square Triangles

After posting a few Wednesdays with the Lone Star tutorial, I'm finding it hard to determine something to write about this week.  It is hard to follow-up a tutorial!  I think this will be a simple post on Quarter Square Triangles to go with my Half Square Triangles post.

The traditional way to make QSTs is to add 1.25" to the finished size of your square.  For example, if you want a 3" finished QST block, you'll want to cut your squares at 4.25".  Unlike the HSTs where you traditionally added 7/8", adding 1.25" is an easy measurement on a ruler.  However, many times I still find that my QSTs are just a tad bit smaller than I wanted them to be.

The method I've found that works quite well is to add 1.5" to the finished size of my square.  If I want a 3" finished QST block, I'll cut my squares at 4.5".  Once your block is sewn together, its a little on the large side, but its so much easier to cut excess material off than to try to add material back onto the square.

This method is a tiny bit wasteful (all those little pieces being trimmed off), but for my own sanity, its definitely worth it!  Having blocks the right size makes it a lot easier to assemble your quilt top...and limits the amount of tears shed! :-)

Here are the steps for creating these quarter square triangles:

  1. Cut your light and dark squares 1.5" larger than your finished size of the square.
  2. Draw a diagonal line from one corner of the square to the other of the light material.
  3. Layer 2 squares (one light and one dark) with right sides together and sew a scant 1/4" away from the diagonal line that you drew.
  4. Press the entire square before cutting it apart in order to set the stitches.
  5. Cut your squares apart on the diagonal line that you drew (this cut will be between the two stitched lines).
  6. Press seams towards the dark material.  At this point, you will have two squares that look like half square triangles.
  7. Line up two sets of the half square triangles and layer them together such that when you sew your next seams, it is perpendicular to your pressed seams.  
  8. Pin the blocks together such that they won't shift during sewing.
  9. Draw a diagonal line from one corner to the other of the top square.  
  10. Sew a scant 1/4" away from the diagonal line.
  11. Press the entire square again before cutting it apart in order to set the stitches.
  12. Cut your square apart on the diagonal line that you drew (this cut will be between the two stitches lines).
  13. Press seams toward one side.
  14. Trim the excess material off the block to make sure that it is perfectly square and you'll have two quarter square triangles.

Below is a table of example sizes of finished squares and what size square you need to cut to achieve that final size.


Finished Size of Square
Cut Size of Squares
1.5”
3.0”
2.0”
3.5”
2.5”
4.0”
3.0”
4.5”
3.5”
5.0”
4.0”
5.5”
4.5”
6.0”
5.0”
6.5”

Happy Crafting!
~Sarah at upstateNYCreations
Tuesday, July 17, 2012

Quilts #2 and #3

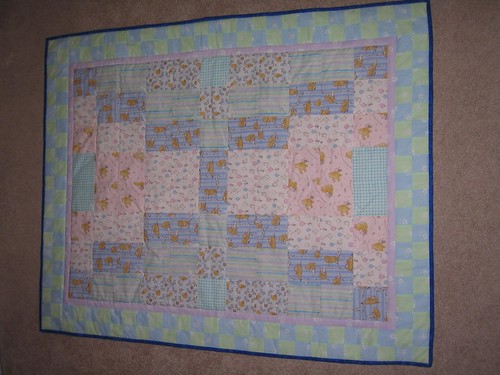
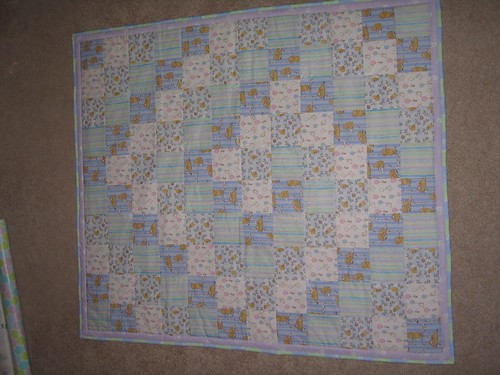
This is the 2nd post in a series showing some of the quilts that I have made. The two quilts here were made in during early spring of 2008. My husband’s co-worker’s wife was expecting twin girls, so I made two similar quilts for the babies. Both quilts used the same fabrics, but the pattern was different for each quilt to make sure they were individual.

I apologize that the pictures aren’t great, but it’s what I have from 4 years ago. The majority of the fabrics featured Winnie the Pooh. The purple fabric used as the inner border as well as the green and blue fabrics in the outer border feature little hand-prints.

Quilt_2-1

Quilt_3-1


I’m a little disappointed that I didn’t use more of the pink fabric in the spiral quilt as its kind of “dull” looking in the pictures. In real life, the colors were much better and weren’t so washed out as they appear to be in the pictures.

Since I was still very new to quilting, I kept the patterns simple. Both quilts are tied in the middle, but the borders are quilted with stitch-in-the ditch quilting. These were good learning experiences in making sure I had the layout correct before sewing everything together.

Quilt_2-2

Quilt_3-2


The above pictures show the fabrics in a little bit more detail as well as the ties that I used for the quilt. I used a variegated yarn in pastel colors that matched the quilts. I don’t remember the exact batting I used, but I believe I was using mostly poly-type battings at the time. Definitely another thing I would have changed. ;-)

Happy Crafting!
~Sarah at UpstateNYCreations