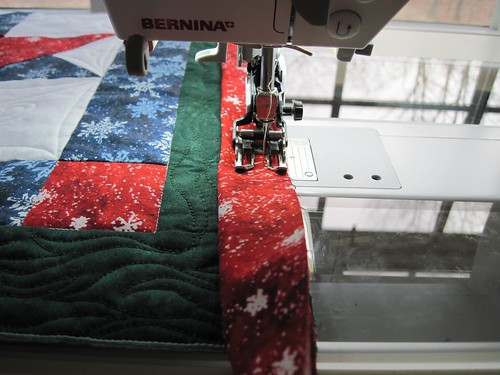
First, you want to start out machine stitching your binding to the quilt top. The example I have below is for a double-fold binding where I cut the strips at 2.5" wide. My seam allowance is a little more than a 1/4" as I wanted the binding to be really full. However, this technique works for any size binding...any seam allowance (and no math involved).
So line up your raw edges of your fabric to the raw edge of the quilt and start stitching with the desired seam allowance.
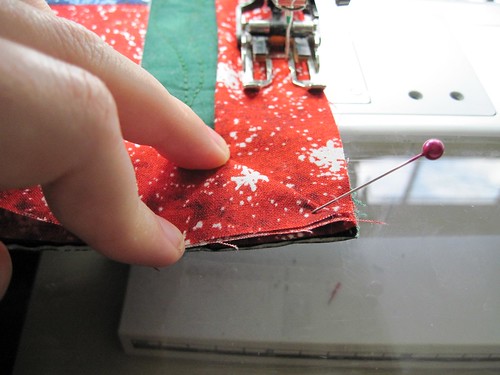
As you get closer to the corner, you'll want to stop stitching to setup for stitching to the corner. Now, most binding tutorials have you measure from the corner back towards your needle and make a mark to define where to stop stitching. The distance from the corner is the width of your seam allowance. The way this technique works is that before you get to the corner, stop stitching. Take your folded binding and fold it straight up towards your walking foot. You'll want the folded edge of the binding at the edge of the corner of the quilt.
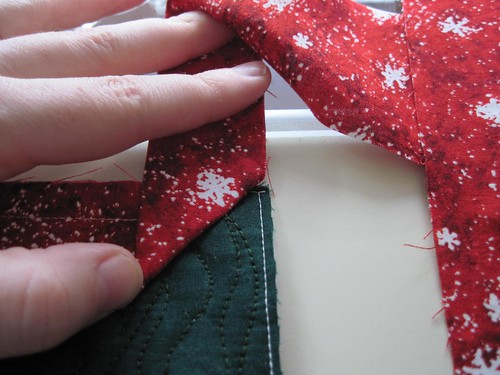
Next, while holding your binding folded upwards towards your walking foot, fold the binding again at a 45-degree angle towards the left. Take a look at the picture below. I've placed a pin in the folded section to help hold it in place while taking a photograph. You should be able to see the folded piece that makes the 45-degree angle.
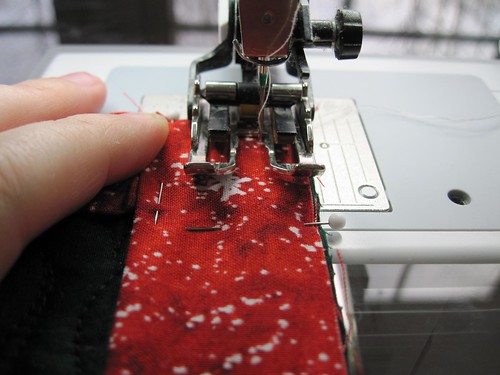
Next, while holding the binding in place, start stitching again and stitch as close as you can to that 45-degree line. When I get within a stitch or two of the fold, I usually stop the foot pedal and I manually advance the machine with the hand-wheel. I haven't had the needle catch the fold yet, and I hope it never does! :-) The picture below will show how close I get to the folded section.

Because we stopped EXACTLY where the 45-degree angle was, we automatically stop at a distance that's the same as our seam allowance from the edge of the quilt. It works EVERY time. I've tried it with up to a 1/2" seam allowance and I still got a perfect corner.
Once you get to the folded section, lift up the pressure foot and let the folded piece go straight again. Back-stitch with your needle to secure the stitches and cut your threads.
Next, fold your binding upwards like the picture below. This is how you "normally" do the binding corner.
Once its folded upwards on the 45-degree angle, you can fold the binding straight down towards you. The raw edge of the binding should be lined up with the raw edge of the quilt. Here's a close-up of the corner. I usually use some straight pins to hold things in place until I start stitching.
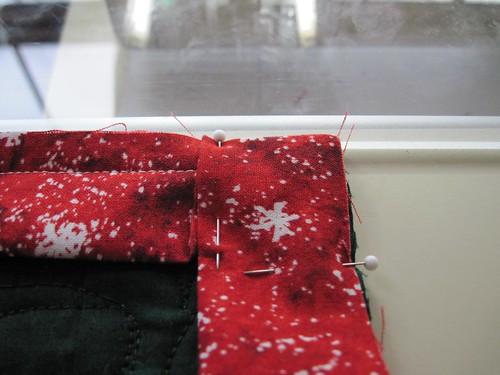
Finally, start stitching again by placing your needle in at approximately the location where the 45-degree angled piece starts underneath. It doesn't matter if you're a little over it, but I've found that if I start stitching from the edge, it makes it hard to turn the binding when I hand-sew it to the back.
Hopefully this was easy enough to follow. If anyone does run into problems (or has questions), feel free to contact me.
No comments:
Post a Comment