Tuesday, May 20, 2014

Sampler Quilt

Again, it has been a little while since I've posted again.  I've been slowly making progress on a few projects as well as getting outside to get the garden started.  Its finally warmer here, so I've been spending my weekends outside doing yard work.  We spread pellets onto the lawn that are supposed to repel/kill ticks and other little bugs.  So hopefully the tick population will stay in the woods and not stick to us anymore! :c)

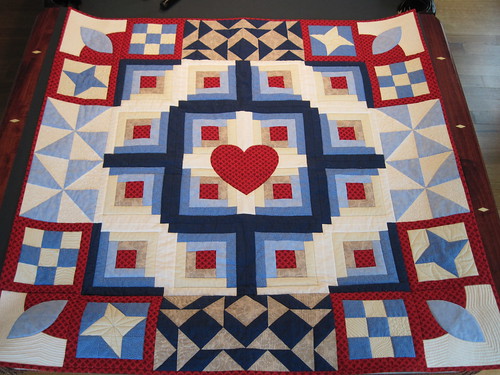
A few weeks back, I did finally get pictures of this sampler quilt that I did as part of a quilt class 3 years ago (yikes!).  I took the class mainly to meet a few other quilters, but also learned a few techniques while I was there.
Sampler 01

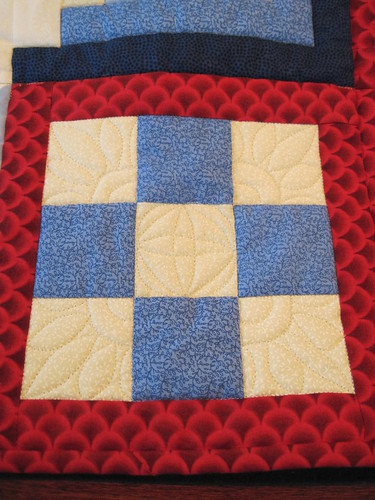
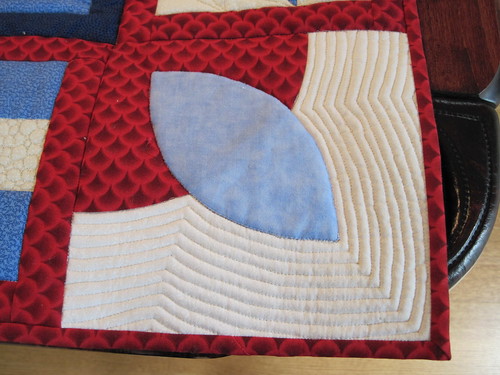
When I started quilting this, I wasn't quite sure how to do it, but then decided to just make it completely a sampler.  Most of the blocks have different quilting in them, but I did anchor the four corner blocks by doing the same quilting in them.

These are basically just echo-quilted around the appliqued shape.
Sampler 02

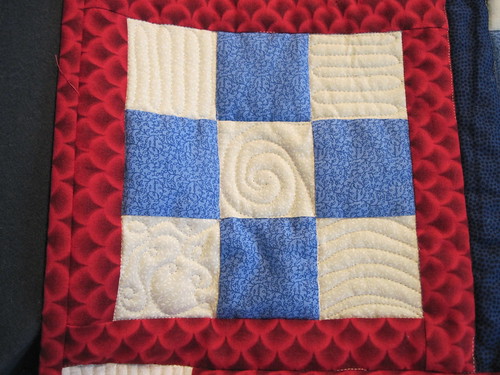
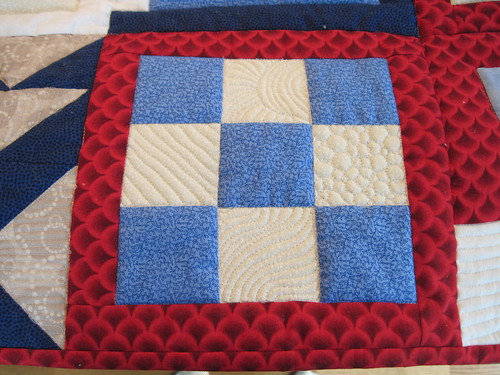
This one has four different styles in each of the white spaces:
Sampler 03

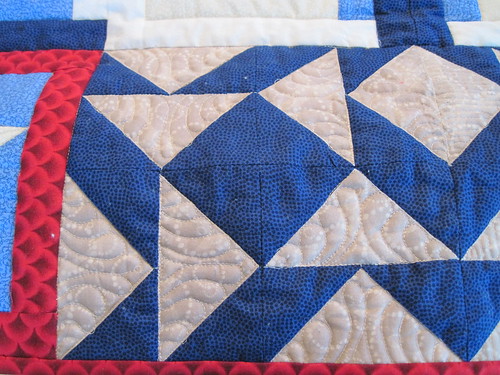
My attempt at keeping lines fairly straight without marking anything...
Sampler 04

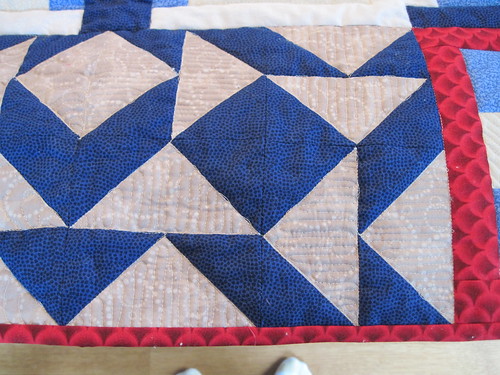
And this is probably the most ugly.  My "feathers" are pretty atrocious.  They look more like amoeba or something like that.  I'm definitely going to have to practice my feathers a heck of a lot more!
Sampler 05


Sampler 06


Sampler 07

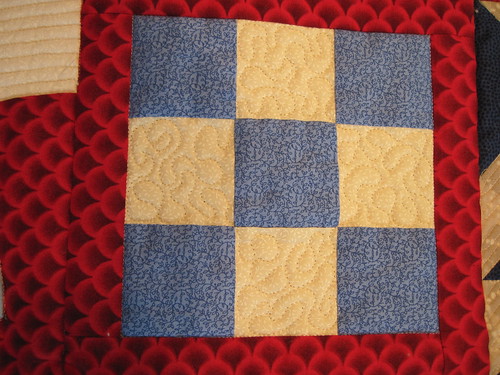
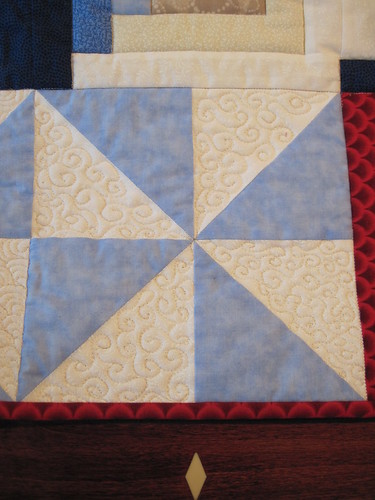
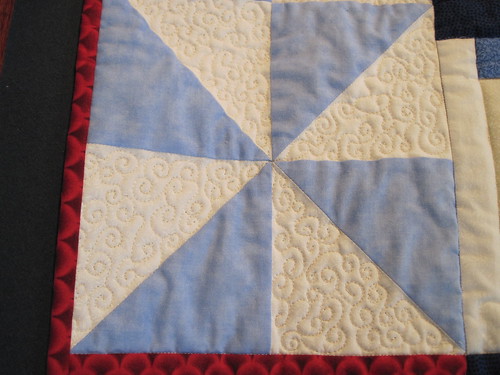
I actually like how these swirly shapes turned out.  The little curlicues are neat and give a lot of texture to the quilt:
Sampler 08

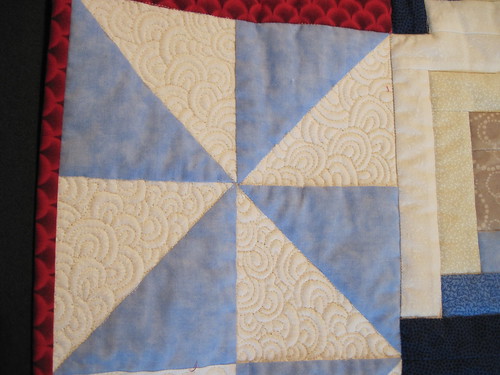
This one was also a lot of fun.  It was a little messy at first, but as I got used to it, I was able to find a rhythm that worked for me...
Sampler 09


Sampler 10


Sampler 11

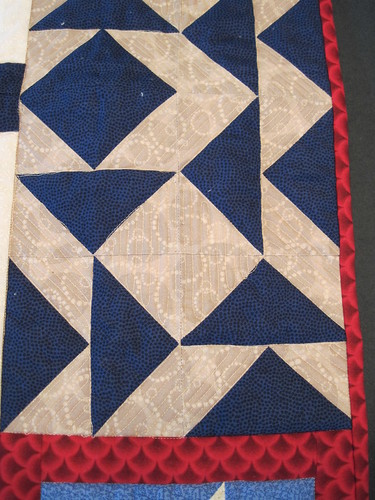
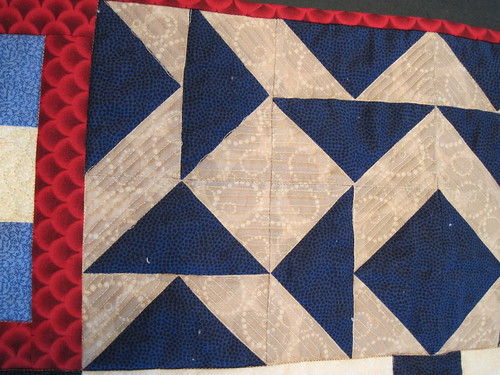
More straight lines that were done parallel to the triangles for the flying geese.  These lines are a lot better than the first ones...
Sampler 12


Sampler 13

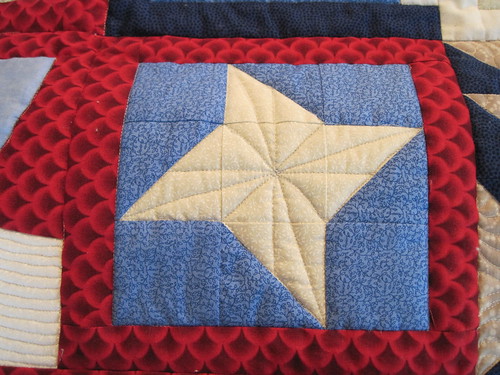
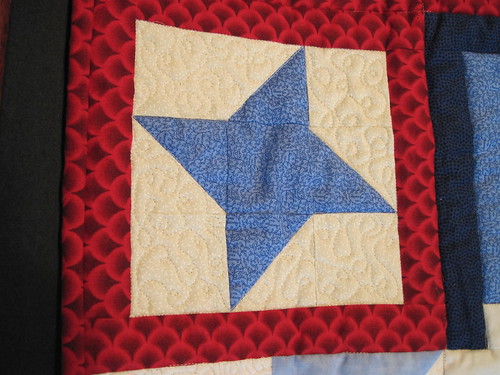
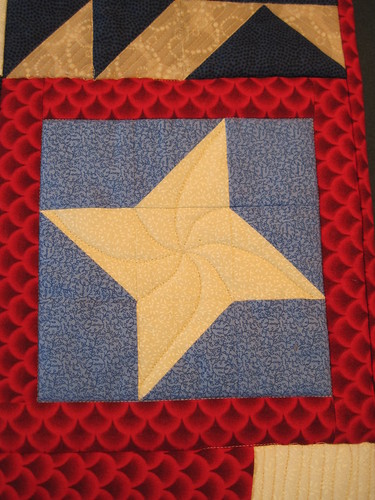
I really like the quilting on this friendship star block.  It has just enough spin to it that it makes it flow a bit and reminds me of ninja stars.
Sampler 14


Sampler 15

More evenly spaced curlicues....

Sampler 16

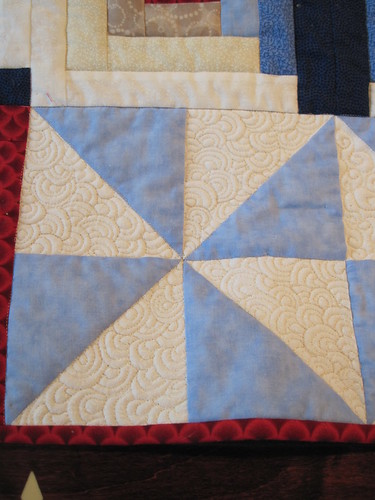
Same with the dense filler... better the 2nd time around...
Sampler 17

More flowing arcs in a reverse friendship star block. 
Sampler 18

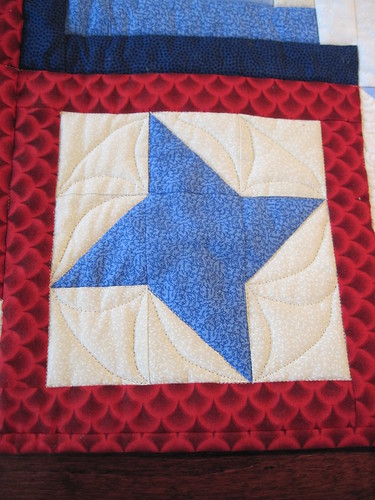
Its hard to see the quilting on the center area with the log cabin blocks, but I basically stuck to in the ditch quilting.  I did some free motion on the heart, but I couldn't get it to photograph since its red thread on red fabric.
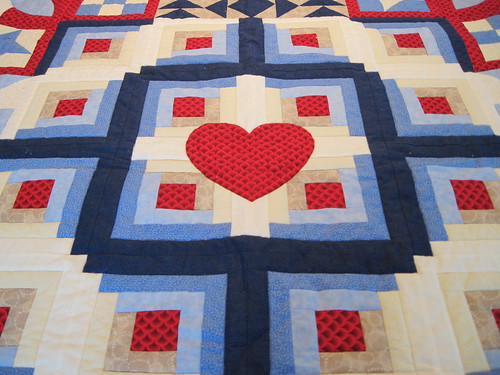
Sampler 19


Overall, I liked this quilt and being able to use sample quilting on the different blocks.  It allowed me to try out a bunch of different things in the blocks to see if I liked anything and where I need to practice a bunch more.

Hope everyone is enjoying their spring!

Happy Crafting!
~Sarah at upstateNYCreations

Sunday, May 4, 2014

A little of this... and a little of that...

The weather lately in upstate NY has been pretty miserable for spring time.  We have a lot of cold and rainy days so far this spring.  Most nights we're still down into the lower 40s and during the day, we've been lucky if we hit 60.  So my garden is very slow going this year and we haven't really been doing a lot outside yet since its been so yucky.

For anyone else in woodsy areas and areas prone to ticks, please remember to check yourself after being outside in the woods.  The tick population is definitely increasing here.  In the past 3 weeks, we've found 5 ticks on us after being outside.  My husband had two that were just crawling on him.  On one weekend in particular, I found 2 crawling on me while I was still outside and then found a 3rd one later that evening that had attached itself.  We gently pulled it free and kept it in a baggy (just in case) out in the garage. 

Aside from the very limited outdoor work, I have been doing quilting.  There isn't much to show for it, but I spent several hours today prepping a quilt for quilting.  It is the Mariner's Compass quilt that I plan on doing a lot of custom quilting on.  So today was spent marking some details in the corners of the quilt prior to layering it with batting and backing.  I've found that its easier to get straight lines marked when its just the quilt top versus all the puffiness of the batting.  I also had to cut and press backing material for the quilt.

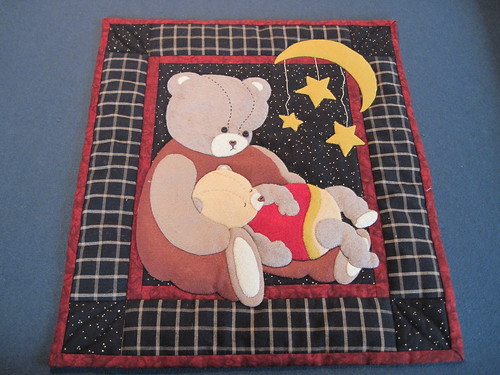
In the meantime since I don't have any recent pictures.  I realized I never showed a picture of my completed wool applique project.  Here it is below.  The stitching on the bears' heads is embroidered on as well as the dangling stars.

Bear Wool Applique

I quilted it very simply and outlined most of the bear shapes.  In the end, I didn't really care for doing the wool applique.  It turned out fine, but it just didn't spark anything for me.  I could see making something out of wool felt if you want to do a mat for a candle or something like that.  Otherwise, its pretty boring.

I hope to share some pictures later this week of another sampler quilt that I finished up the binding on earlier this winter.  I did a lot of custom quilting in different blocks to try out different techniques.  Some I ended up liking others...not so much.  Its all a learning phase though.

Hope everyone had a great weekend!


Happy Crafting!
~Sarah at upstateNYCreations

Friday, May 2, 2014

Lots O' Thread

Just before my birthday (which was this past Sunday), I finally got around to purchasing thread so I could do the quilting on the Mariner's Compass quilt.  As typical, I bought my thread from Superior Threads.  Their threads are great and are very low lint, which is good for your sewing machine.  I don't want to be a "thread snob", but I've tried a bunch of different threads in the past and these ones are definitely my favorites.  I have yet to have ANY issues with the Superior Threads, regardless of which line of threads I use.

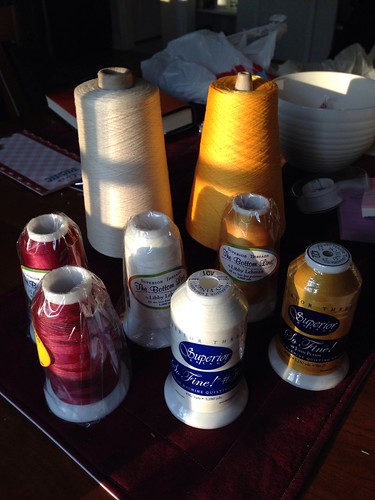
So the small cones in the picture below are actually for quilting the Mariner's Compass quilt.  I already had some great blues left over from the Lone Star quilt that I will use in the blue sections of this quilt.  The red will go in the large red sections of the quilt and the gold is going to be used in the pieced outer border where the fabrics switch from yellow to blue to red to green.
Thread 1

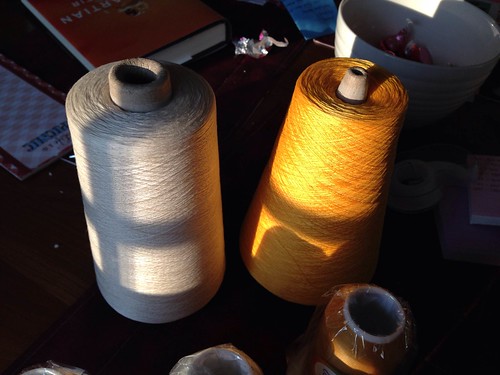
You may be wondering about those large cones in the back.  Since I was ordering thread anyway, I decided to indulge and get some very large cones of thread for piecing.  I use Masterpiece threads for my piecing, and typically use the cream color.  However, Superior had a great deal on some of their large cones, so I also picked up the gold/yellow colored cone.  It was originally supposed to be $107, but was on sale for $40.  Very hard to beat that kind of price.

Thread 2


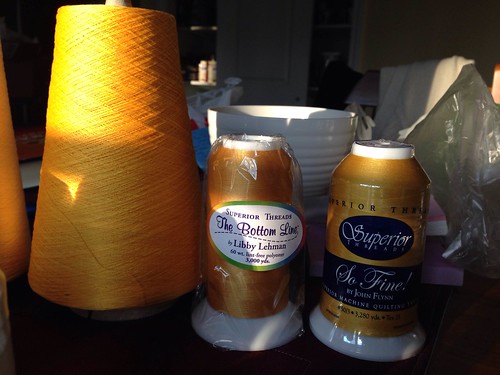
So if you're wondering on the actual size of the new cones....

The two "small" cones of So Fine! and The Bottom Line are both about 3,000 yards.  That big cone...a whopping 10,840 yards of thread!  :c)  The cream color cone is even larger at 15,000 yards.  I have a lot of piecing ahead in my future to use up these babies.  LOL!

Thread 3


I still have some prep work to do on the Mariner's Compass top before its ready to start quilting, but I'll be sure to share some pictures on here.  I have to mark some things on it prior to loading it onto my quilting frame for basting.  Because I have a small throat space on the machine on my frame, I will only baste it on the frame and then do the actual quilting on my regular sewing machine.

It may seem odd to some of you, but if you only have 5" of throat space on a frame and your quilting design is larger than 5" you end up constantly having to adjust your rollers and where the quilt is positioned.  I'd spend half my time just trying to move the quilt on the rollers and not mess up my stitching lines.  So the quilt gets basted on the frame and then detail work is done on the smaller machine where I can more easily continue my lines of stitching.


Happy Crafting!
~Sarah at upstateNYCreations
Wednesday, April 30, 2014

More Partial Seams

I'm finally getting around to the continuation of my last post on partial seams.  The prior post can be found here.  These pictures are all from the Jambalaya quilt pattern that I'm putting together with some quarter yard cuts of material that I got a year or so ago.

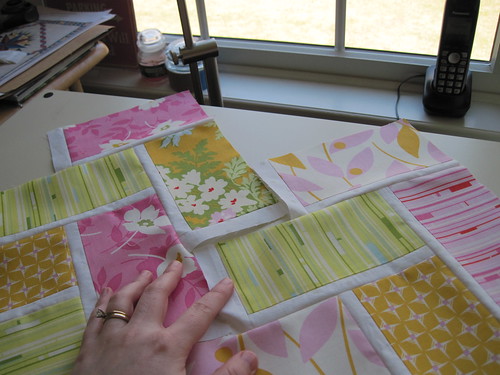
Once you have your columns sewn together as shown in last post, you'll want to put two of the columns next to each other so you can visualize how they nest together.

Jambalya 17

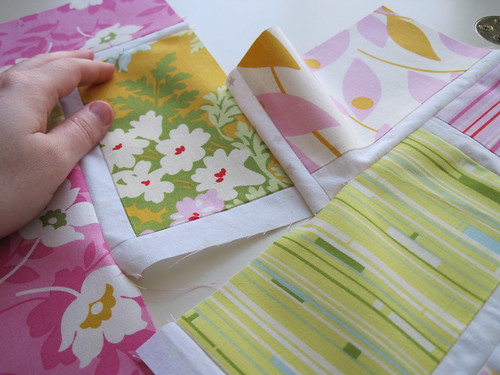
Flip the piece on the right over onto the left.  Take a look at the fabric placement in the above photo compared to that in the below photo.  The column on the left is stationary, the column on the right is flipped right sides together with the pink/white/orange piece on top of the mainly orange piece from the left.  I pin these seams to keep things aligned a bit better as I move things around.

Jambalya 18

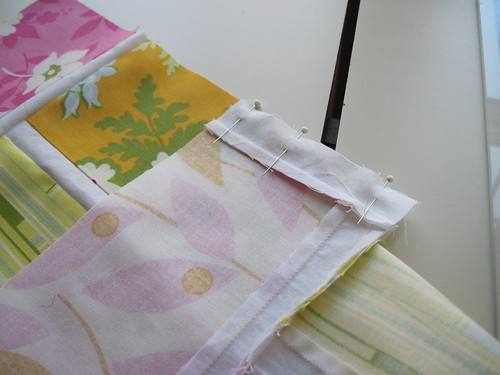
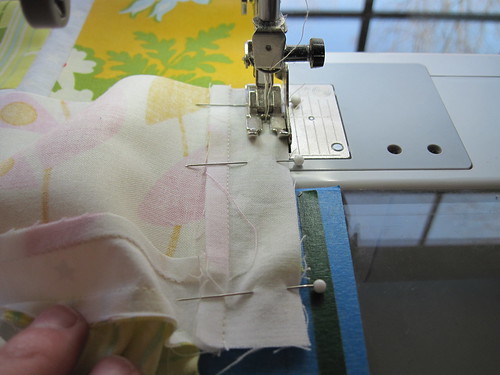
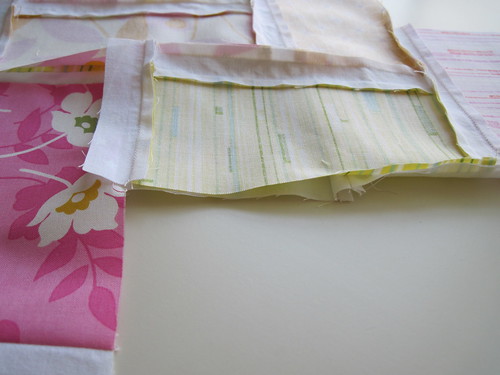
On this top section, you want to start with another partial seam.  The picture below shows my stitching line starting about 1" from the edge of the seam.  The line is sewn all the way to the free end.  This is the only partial seam you will need.  The rest of the seams are full seams.

Jambalya 19

Here is what it looks like after that first seam is completed.  The next step is to sew the yellow striped fabric to the free side of the orange piece from the first seam.  Again,  I've found it easier to pin the seams to keep things aligned.

Jambalya 20

Here is a picture of the next seam ready to be sewn.  The yellow strip piece is now laying on top of the orange piece.  Sew this as a full seam.

Jambalya 21

Keep sewing the seam (all of the full) until you get to the bottom of the column. There's no need to press between each seam you sew.  Simply finger press the seams enough to allow you to sew the next seam and then do a full press once you're done with the column.  Its easiest to press from the back side first to get the seams going in the direction you want them to go.  Once you have that done, you can do a good hard press from the front side.

I don't currently have a picture of the finished columns, so you'll have to trust me that its done. ;c)  The partial seams aren't too bad once you get accustomed to the method of doing them.  The only downside I found was that there was a lot of stopping and starting.  I keep a pile of squares next to my machine for a scrap quilt and used those to maintain my line of stitching as much as possible.  So the benefit was that I got a lot of these pieces sewn together when making this quilt.  LOL!


Happy Crafting!
~Sarah at upstateNYCreations
Sunday, April 27, 2014

Quilt Show - Empire Quilt Fest

A few weeks ago, my parents were up visiting and we went to a local quilt show that is held every other year. There are always some amazing quilts at the show.  Here's some really beautiful ones that struck my eye while I was there.


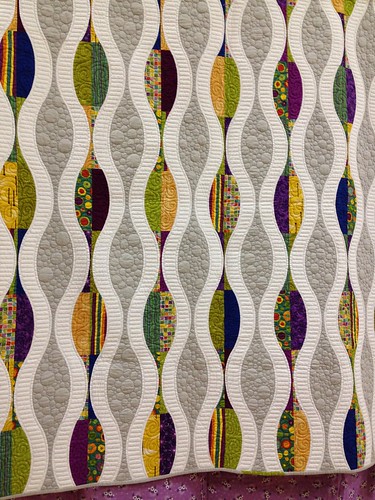
"Curves Ahead" by Sue Schoch.  The pattern was called Urban Pods.
Empire Quilt Fest 01

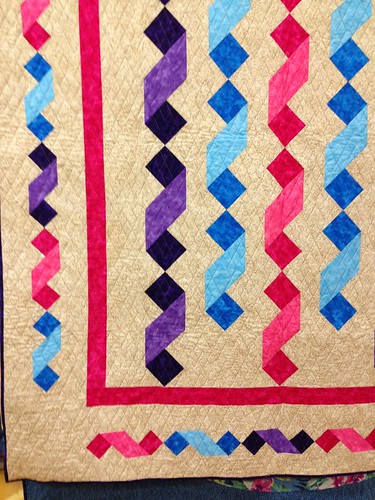
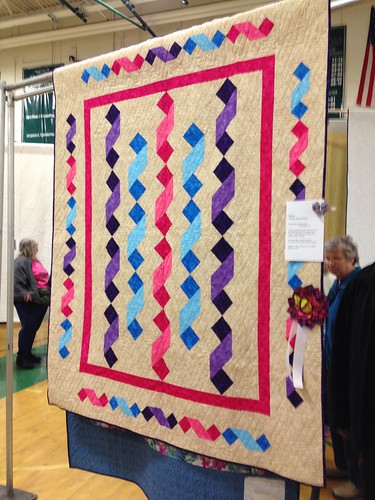
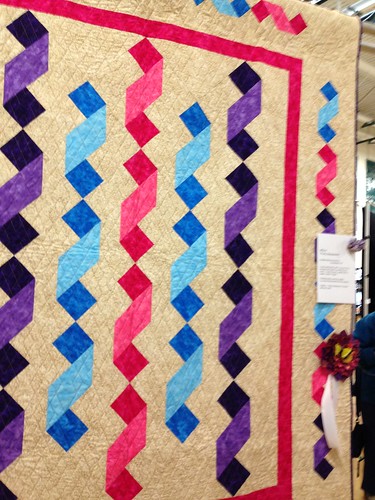
"Party Streamers" by Suzette Merendo-DuPont.  The pattern has the same name by Kate Mitchell Quilts.

Empire Quilt Fest 03


Empire Quilt Fest 06


Empire Quilt Fest 04

"Queen of the Magnolias" by Jennie Ozog.  The pattern is called Cathedral Window Quilts by Lynne Edwards.
Empire Quilt Fest 07

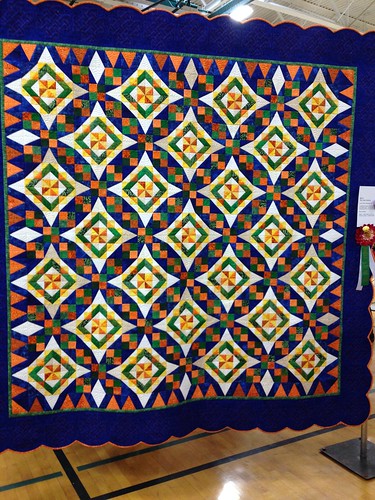
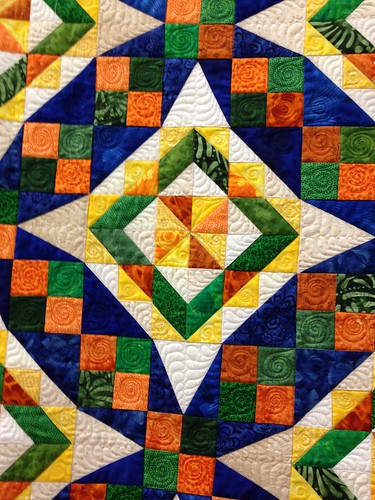
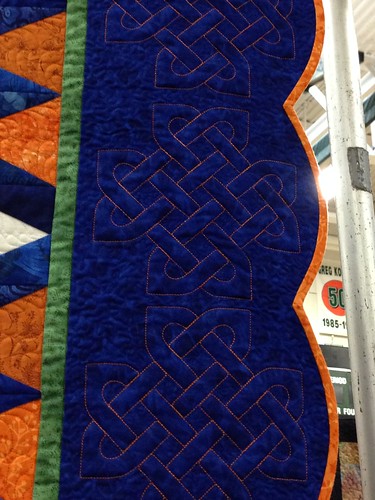
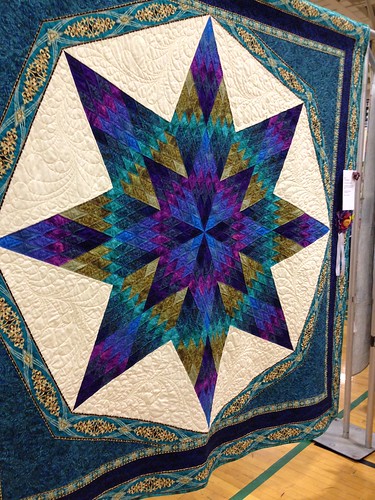
"My Celtic Solstice" by Laurie Collins.  The pattern is "Celtic Solstice" by Bonnie Hunter and Laurie made modifications to the borders to make it all her own.  I like how she modified the border and put a celtic quilting theme into it.
Empire Quilt Fest 09

The quilting was great on this one.

Empire Quilt Fest 10


Empire Quilt Fest 12

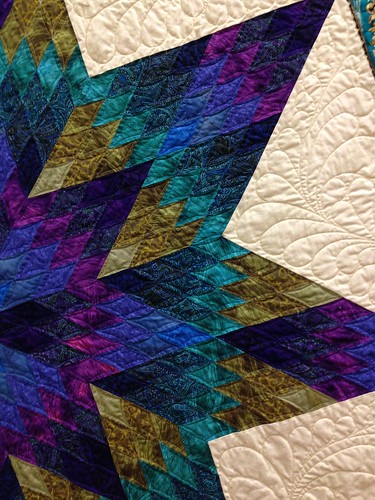
"Star Sapphire" by Monica Mottolese and the pattern is by Jinny Beyer.

Empire Quilt Fest 13


Empire Quilt Fest 14


Empire Quilt Fest 14

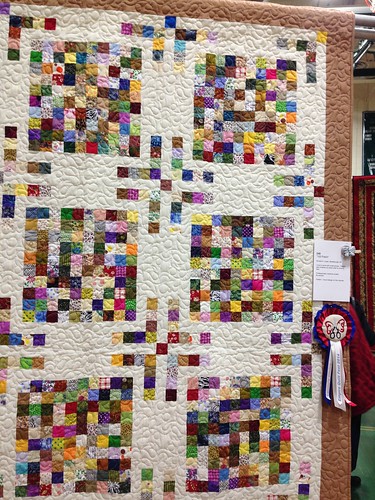
"100 Patch" by Ronald H. Lower.  This one would be a great pattern to use up lots of those little scraps that we never know what to do with.
Empire Quilt Fest 16


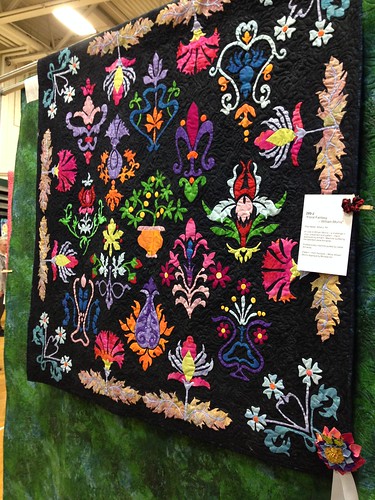
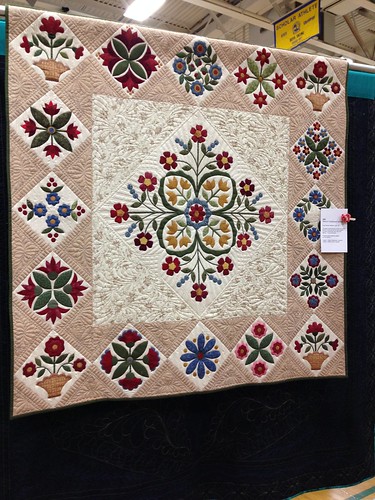
"Floral Fantasy - William Morris" by Rita Haldar.
Empire Quilt Fest 18


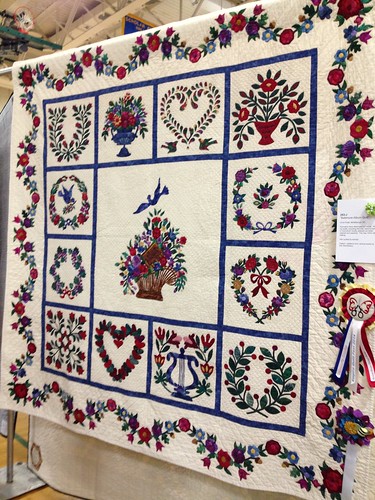
"Baltimore Album Quilt" by Chris Polak.  The patterns were taken from various books by Elly Sienkiewicz.
Empire Quilt Fest 20

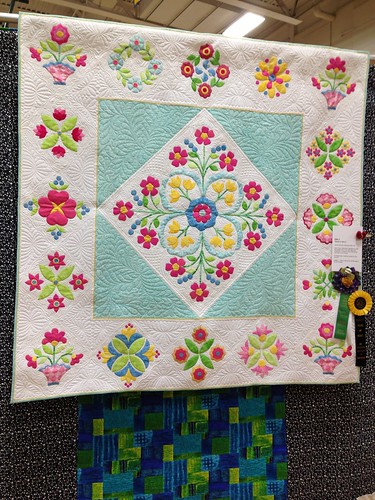
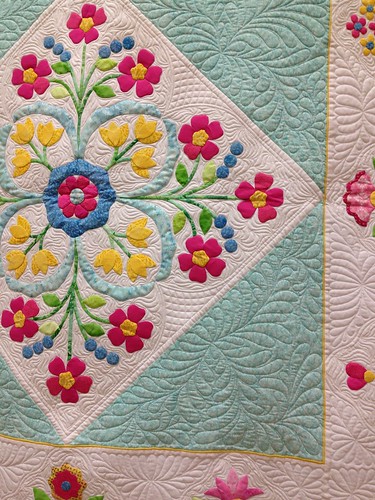
"Mimi's Traditional Garden" by Carol Swota.  Pattern is "Mimi's Bloomers" by Erin Russek.
Empire Quilt Fest 22


Empire Quilt Fest 23


Empire Quilt Fest 24

"Bella's Mimi" by Janet Palombo.  Pattern "Mimi's Bloomers" by Erin Russek.
Empire Quilt Fest 26


Empire Quilt Fest 27


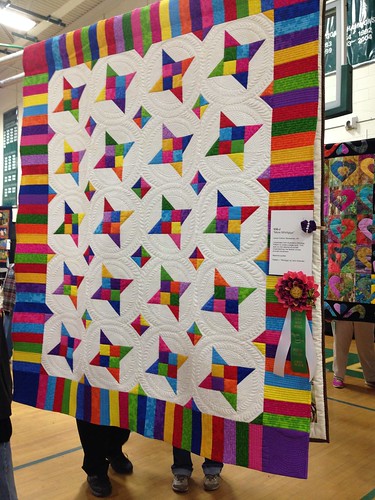
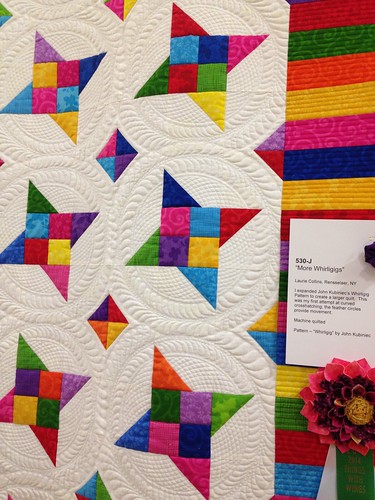
"More Whirligigs" by Laurie Collins.  Pattern is "Whirligig" by John Kubiniec.
Empire Quilt Fest 30


Empire Quilt Fest 31


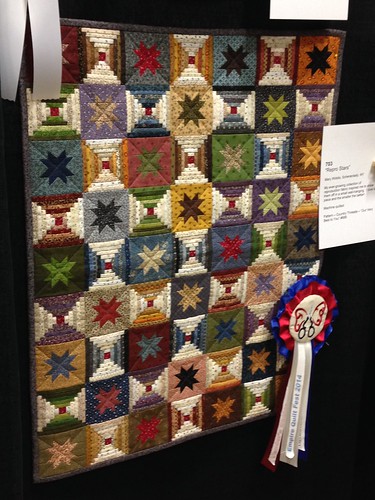
"Repro Stars" by Mary Widdis.  Pattern is from County Threads.  This quilt is actually very small.  The log cabin pieces were only 1/2" wide finished.  The individual did an amazing piecing job with this one.
Empire Quilt Fest 33

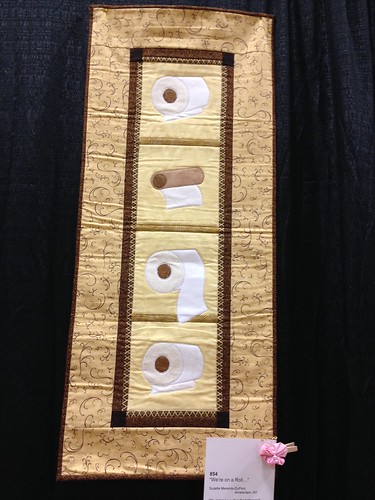
"We're on a Roll...." by Suzette Merendo-Dupont.  The pattern is by Karen Brown of Java House Quilts.  I couldn't help myself with this one.  Its just so cute and funny.
Empire Quilt Fest 38

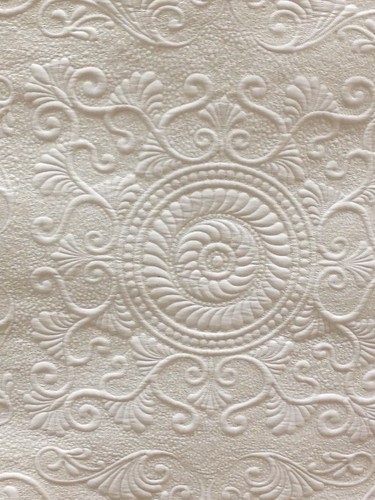
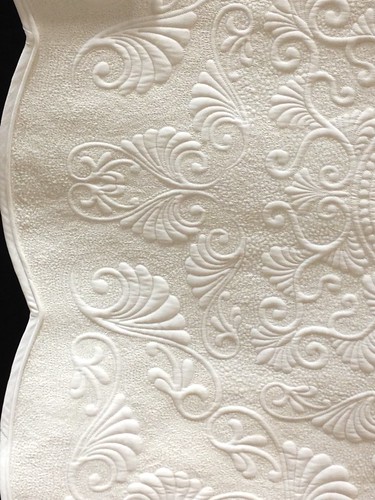
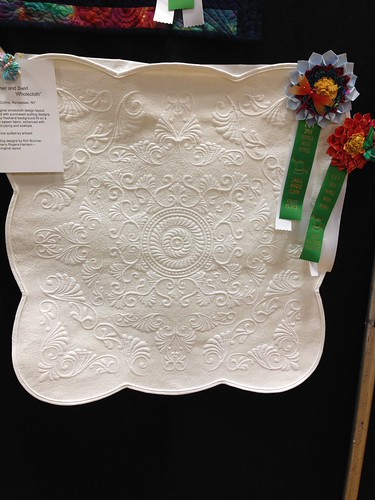
"Feather and Swirl" by Laurie Collins.  This last quilt was one of the few whole-cloth quilts in the show.  It is a masterpiece.  I can't imagine the number of hours it took to quilt this.
Empire Quilt Fest 40


Empire Quilt Fest 41


Empire Quilt Fest 42

Next time I'm hoping to enter a few quilts into the show.  I always end up forgetting to do so and finally remember it about a week before the show opens, which is obviously too late to enter anything.  I really need to start planning ahead a little bit more. :c)

Happy Crafting!
~Sarah at upstateNYCreations