Showing posts with label Mariner's Compass. Show all posts

Wednesday, April 8, 2015

Spring has Sprung...sort of

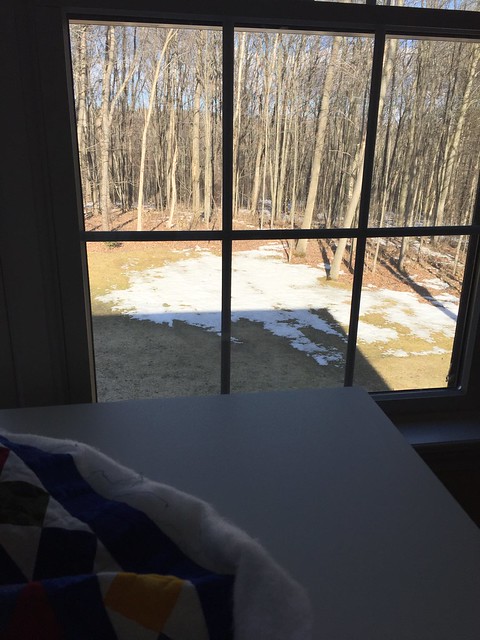
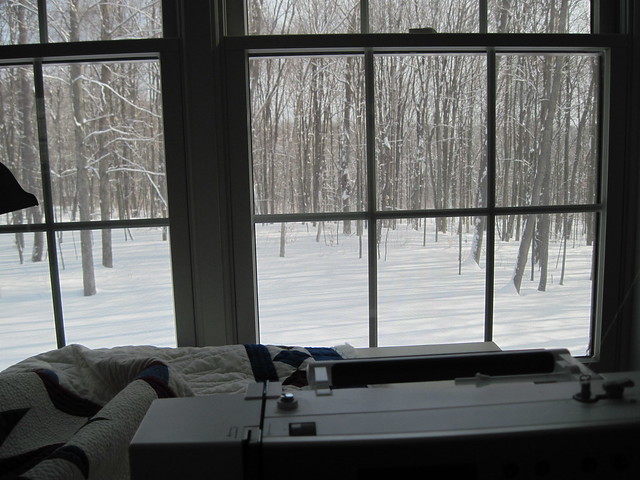
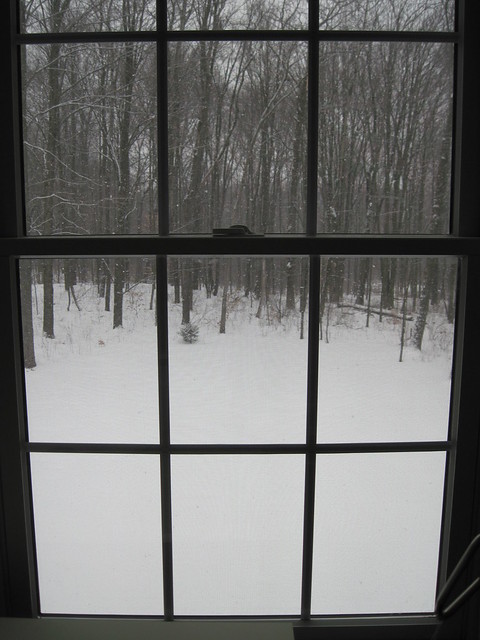
Spring has been a bit delayed this year in the northeast, so I've been enjoying seeing a lot of pictures from fellow quilters who are a bit further south and have their spring in full-swing.  I was sewing the other weekend (gasp - I know...it's been a while) and was able to capture this picture out my sewing room window:

Spring April 2015 -1

Just a small amount of snow left and at this point there isn't any snow in the backyard.  We do still have some piles in certain areas that are shady and had a thick snow-cover, but most of it is gone.  We had two days last week where we were near 60 degrees, and two days later we had a bit more snow.  Crazy!

I have been doing a mix of quilting on the Mariner's Compass quilt and also sewing some blocks for a BOM that I picked up last year.  I need the break from quilting, so its nice to do some piecing and applique between my quilting sessions.  I do it all on the same machine, so I typically wait until I finish up a bobbin for quilting and then I'll switch to piecing/appliquing something for a day or two, then load a new bobbin for quilting and do some more on the Compass quilt.

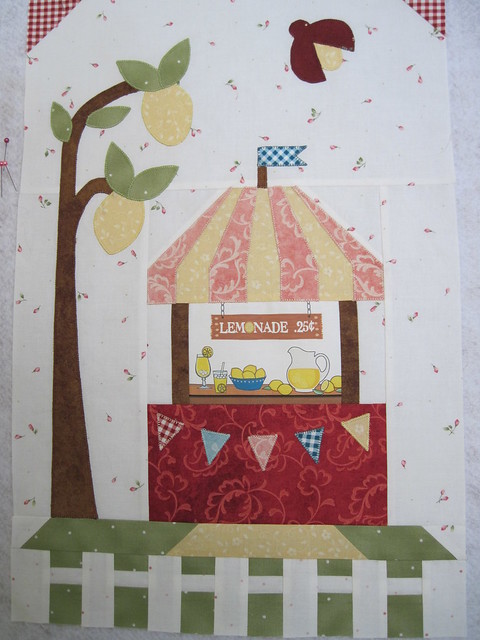
Here's the BOM that I've been slowing working on.  This is the 2nd block that I've completed out of 6.
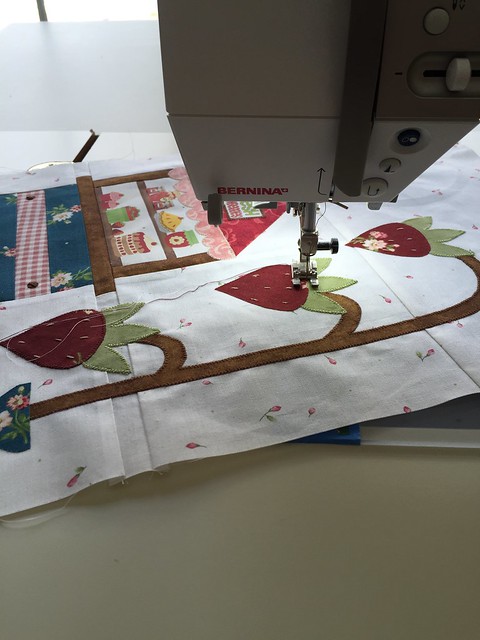
Summer sampler March 2015

And here's the progress on the 2nd corner of the Mariner's Compass quilt.  Not much started yet, but its started and I'll continuing filling in around the quilt.
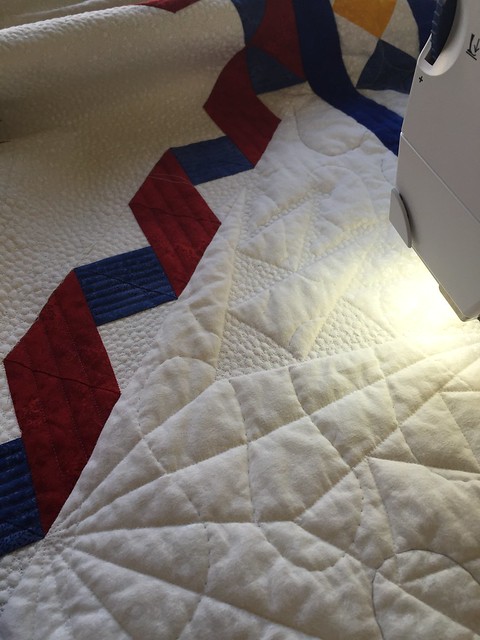
Mariners compass - April 2015 - 1

As I mentioned in my last post, we did have a big purchase earlier this winter.  Every year or so for the past 3 years we have toyed with the idea of buying a grand piano (or baby grand).  We both play and have been "limping" along on a digital piano.  The digital was very nice and has lasted us over 10 years of playing.  It was very handy for when we did a lot of moving around the first few years out of college.  Now that we're settled into our dream home, we wanted to get an actual piano.

Just before Christmas we had started looking around and didn't initially find anything that we liked (or liked and wanted to spend the money on).  We eventually found a local used piano dealer and fell in love with a piano he had.  It took us several weeks of trying out pianos and making sure it was definitely the one we wanted.  Then it took another 4-6 weeks for him to prep the piano and for the weather to clear up enough for it to be delivered.

And here she is!!!!
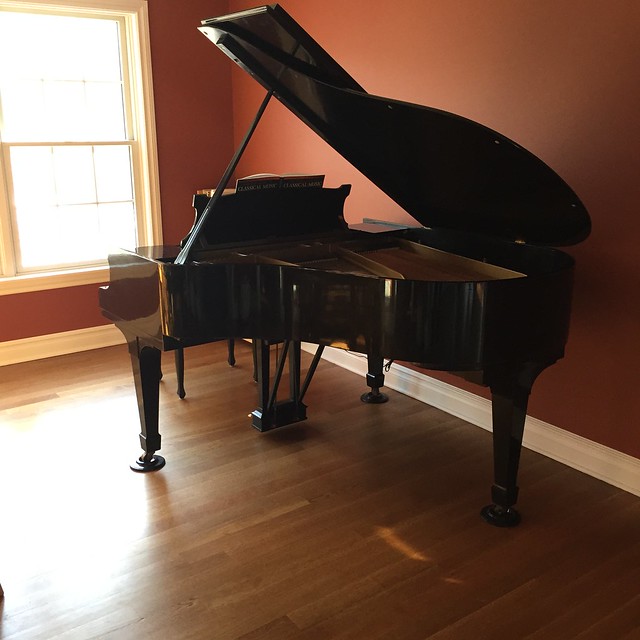
Grand piano

It is a beautiful piano... with how it sounds, how it plays and how it looks.  It is a Steinway piano (we weren't initially looking for a Steinway in particular, but this piano had the touch and sound we wanted).  The difference in this piano from other Steinway pianos is that it is a German made Steinway piano.
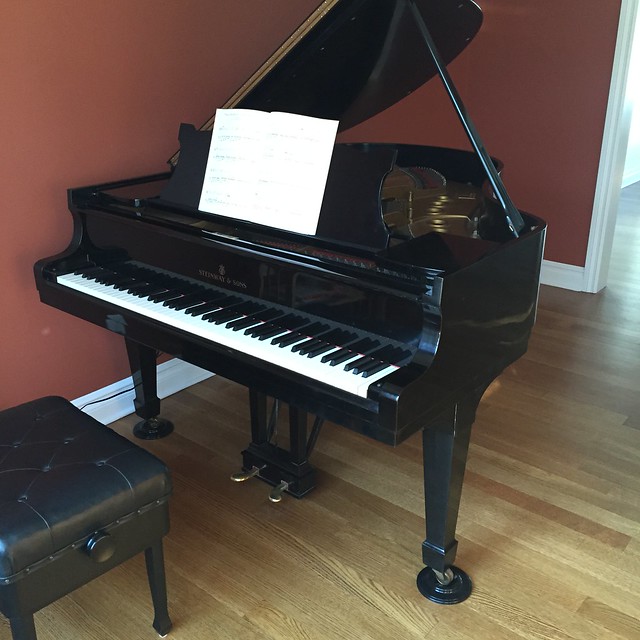
Grand piano

The piano was made in Hamburg, Germany in 1937.  It has been certified by Steinway in NYC that it is in fact a 1937 piano from Hamburg and that everything in it is original to the factory there.  No one knows how it came to be in the US, but it did... and we are glad that it did.

We love having it in the house and we play about 2 hours every night and more so on the weekends.  It truly is a special piano and we're so happy to have it.  The one and only downside is that I tend to play it more and it is taking away some of my quilting time.  :c)

Happy Crafting!
~Sarah at upstateNYCreations

Monday, March 9, 2015

More Progress...

Whew!  Another post and it hasn't even been a month yet.  ;c)

A weekend ago, we finally had the sun creep out for a bit during the morning and it made the outdoors look awfully inviting despite the snow.  We have had a lot of grey, cloudy days due to the cold and almost constant snowfall.  Here was the view out my sewing room the other weekend:

Mariner's Compass - February 2015 - 04

That was the day that I was finally able to start sewing on the outside corners of the Mariner's Compass quilt.  Here's a section that was partially done...

Mariner's Compass - February 2015 - 05

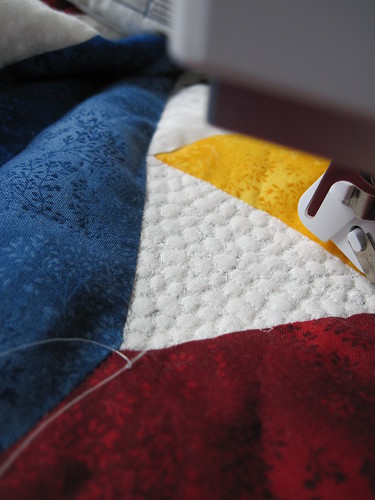
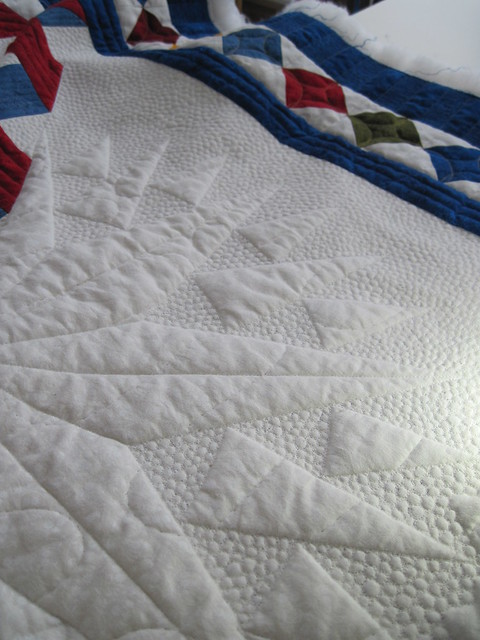
And a slightly different angle (and later on in the day) showing the texture created.  Some of the triangles still have some non-straight "lines" in them from the basting stitches.  Once I get this washed, those lines will disappear.

Mariner's Compass - February 2015 - 07

Up-close and personal with pebbles...

Mariner's Compass - February 2015 - 06


Mariner's Compass - March 2015 - 03


Mariner's Compass - March 2015 - 02

I love the overall texture and depth the pebbles are giving to this quilt.  Sometimes I think I should have gone with some more than just pebbles, but too late now!  I'm definitely not ripping out this much pebbling!

Mariner's Compass - March 2015 - 01

I'm still not quite done with this one corner, but very close.  Its probably another 1/2 hour of quilting or so and it should be done.  It takes me a bit longer as I try to break it up into manageable chunks and get myself up and moving in between.  I've found that I can do about 10-15 individual pebbles before I have to re-adjust my hands.  So after I do 3 or 4 re-adjustments, I typically will get up, walk around, etc.   It makes it so it takes longer to get the quilt done, but my body appreciates the break.

 Happy Crafting!
~Sarah at upstateNYCreations

Friday, March 6, 2015

Another Month Gone!

Once again, I have no idea where the month of February went.  It seems like time is flying by faster and faster and I'm not quite sure where its going.  We've had a lot of cold weather and snow here in the Northeast this winter.  While you would think that would equate to lots of quilting, it really hasn't.  It has been so cold that I've been spending a lot of time near the fireplace, which is far away from the sewing room.

We had almost 8 weeks of temperatures where it did not go above freezing....at all!  Just constant, sub-freezing temperatures all the time, not to mention the wind chill.  Brrrr!  I think we bottomed out at -27F with straight temperature.  We did have one day earlier this week where it was 37 and it felt absolutely wonderful! :c)

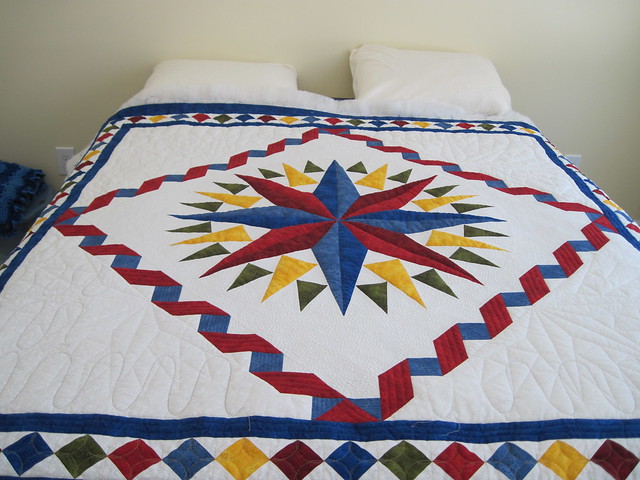
I did finally get the center section of the Mariner's Compass quilt fully quilted.  I still have to do the corners and in the white section of the pieced border, but I'm making progress.  Here's almost a full view of the quilt:

Mariner's Compass - February 2015 - 03

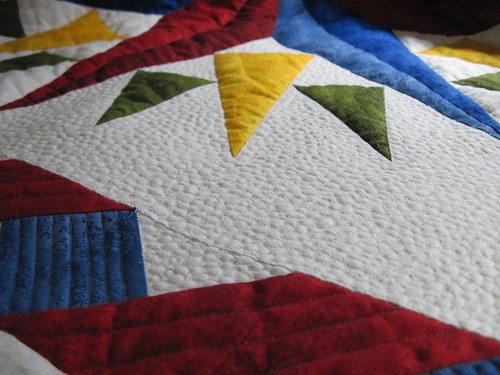
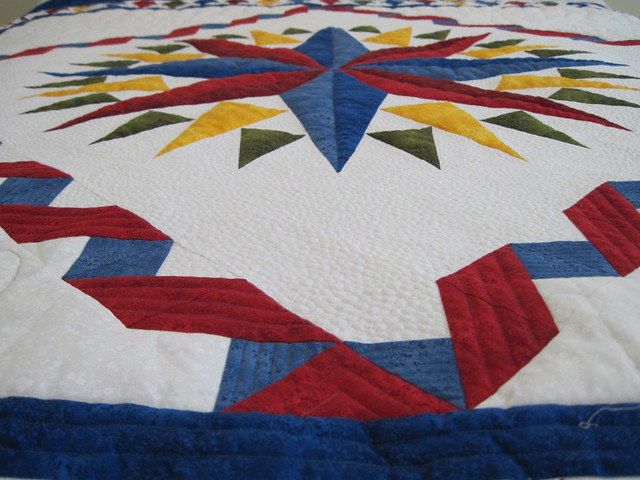
A little bit more of a close-up so you can see the pebble quilting.

Mariner's Compass - February 2015 - 02

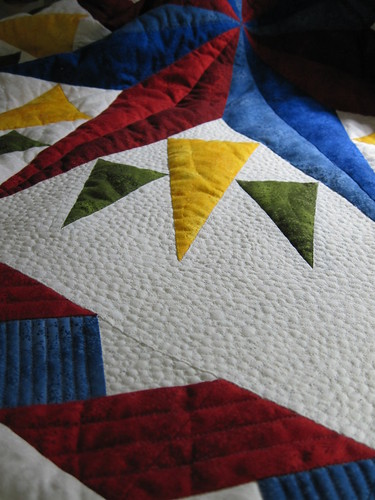
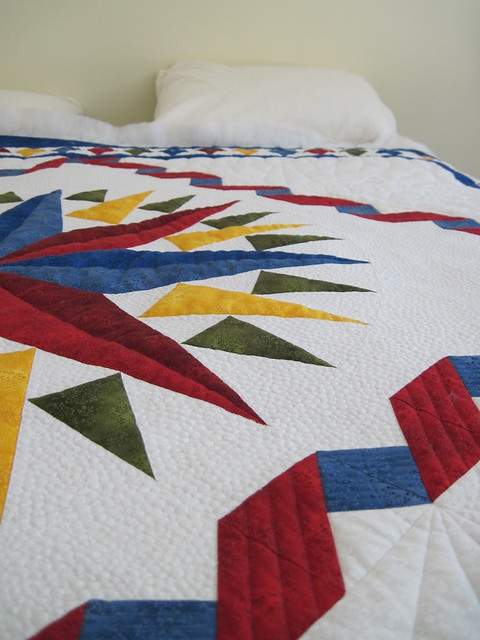
And getting right down at the quilt level to see the stitching and the texture it creates...

Mariner's Compass - February 2015 - 01


I'm really digging the texture this quilt has so far.  I've started on one of the corners and it is almost quilted and the design really pops out, but those photos are for another day (and hopefully not a month from now).

Happy Crafting!
~Sarah at upstateNYCreations
Saturday, January 31, 2015

Snowy Day of Quilting

Last weekend, I spent a little bit of time in my sewing room.  My husband had traveled the week before and was exhausted after arriving home late on Friday.  He slept most of Saturday, which meant I had time to play.  :c)

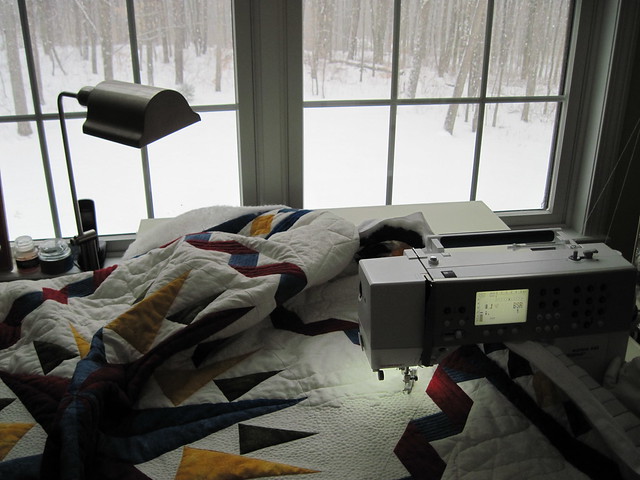
I was perfectly happy to be inside was we had snow showers on and off all day.  It was just before the "blizzard" hit New England last week.  This was the view out my sewing room window.  It is a little hard to see the snow, but it is coming down lightly.

IMG_2627

This next picture shows what it looked like with one of the snow squalls coming through.  Lots of white stuff in the air.

IMG_2626

As you can see, I was making progress on the Mariner's Compass.  It has definitely been slow-going and I'm sure the few people who read my blog will be bored of this quilt very soon.  Quilting small little pebbles all over a center portion of quilt just takes time and I haven't been able to devote as much time as I would like to it.

After doing pebbles for a few hours...yes, a few hours... I decided I needed a change of pace.  Last spring I purchased a quilt kit that was similar to a Block-of-the-Month (BOM).  In the fall, I was able to get the first block done and all the appliques fused in place, but I never actually got around to doing the stitches to actually applique them in place.  I decided that since I needed something different besides quilting pebbles, I would do the appliques on this piece.  It took about 2 hours with the thread color changes, but its done now and back up on my design wall.

Summer_BOM_2015_1

I've also been doing a lot of needlepoint lately.  Its nice to be able to do it and sit by the fire at night.  I don't have any pictures yet, but will share when I remember to take one.  LOL!

So the "blizzard" from last week didn't really impact us here in upstate NY.  On Monday night the weather folks were forecasting 8-14" of snow overnight.  We woke up Monday morning...without even a dusting of new snow.  There were a lot of disappointed kids that day!  However, we did end up getting snow during the day on Tuesday...about 6-8" worth of it.  It was just enough that we had to clear our driveway and the commute home was a little exciting for some folks.

With the AWD Subaru, I just don't worry about snow anymore.  It performs fantastically in the snow.  I've driven through 6" of snow on the roads without any issues whatsoever.  Its a standard shift car and it didn't even have any issues starting up on a hill (as anyone who has driven a standard shift car, that's usually the nemesis of driving a standard).  I absolutely love the car (and the heated seats are REALLY nice this time of year)!

I'm also trying to re-design the closet in my sewing room.  Right now its pretty much a standard bedroom closet that we added some free-standing bookshelves to such that I could store my fabric and patterns and thread.  However, its really not the best setup.  I want to have pull-out draws for my thread so I can more easily see the colors and to also keep dust off it.  I'd also like to have better shelving for the books/fabric as right now its not really enough and the shelves are bowed from years of having books on them.

I'll probably try to post some sketches on here for ideas/suggestions, but any thoughts on good storage options are definitely welcome!

I hope everyone is enjoying the winter and getting lots of quilting/crafting done!

Happy Crafting!
~Sarah at upstateNYCreations

Sunday, January 18, 2015

Quilty Update

I finally got back into my sewing room this weekend.  It is the first time in about two or three months that I've spent any real time in there.  It felt good to be sewing again.  :c)

I made some progress on the Mariner's Compass quilt that I've been working on.  The quilting is slow-going as it is lots of little tiny pebbles.  However, so far it has been worth the effort.  I used wool batting on this quilt from Quilter's Dream, which gives a nice puffiness to the minimally quilted areas.  I'm also using Superior Threads' So Fine in the top and BottomLine in to the bobbin.  The denseness of the quilted portions really allows the points of the compass to pop-up


I'm really loving the texture that the pebble quilting is giving on this quilt.  The little circles really offset the straight lines of the rest of the quilt.


Can't help myself... another close-up picture.  :c)


So aside from stressing about work the past few months and not getting into my sewing room.... I have actually been exercising a bit more.  I realize during the summer that I just wasn't happy with where I was in terms of body size, weight, etc.  I finally decided to do something about it.  It may sound weird, but I went out and purchased a FitBit.  I got the Flex version as I wanted something that was easy to carry around with me.  I always had trouble with pedometers that either clipped on the waist or went in a pocket as I don't typically have pockets on my clothing for work and the waist option was just annoying.

The first week or so I simply wanted to track how much I was actually walking without changing any of my existing habits.  I was surprised to find that I wasn't walking nearly as much as I thought I was.  All my "running" around at work was really just going from meeting to meeting and then sitting for an hour or more.  Since then I've paid attention to how many steps I was getting in each day and forced myself to get up more frequently.  Instead of picking up the phone, I would walk to someone's desk.  Instead of parking close to the building, I parked further away.

I'm happy to say that with tracking my walking and a few small changes to my diet, I've been able to lose almost 20 pounds since September.  I'm routinely walking about 7,000 - 8,000 steps a day and when I go to the gym (2-3 times a week), I'm close to about 12,000 steps those days.  In the fall when the weather was nice, I was really walking a lot and most weekends had close to 20,000 steps on both Saturday and Sunday.  I'm looking forward to the spring weather in another few months and I hope I can increase my amount of walking again.

I saw that Karen posted about recently getting a FitBit.  I've had success with it and really like the features that the Apps have.  You can challenge friends during the week and on weekends to meet step goals for a day or for an entire week or just a weekend.  Sometimes its surprising how much a little thing like an easy way to track steps can help, but for me, it helped a lot.  It made me aware of the fact that I didn't walk nearly as much as I thought I did, which made me want to walk more.  I look forward to each day when I get that little buzz towards the end of the day signaling that I met my step goal.

So while you are sewing...don't forget to get up and walk every now and then!  :c)

Happy Crafting!
~Sarah at upstateNYCreations
Sunday, October 26, 2014

Mariner's Compass Quilt

Over the summer, I didn't get a whole lot of quilting done, but I did make progress here and there.  The bulk of my quilting time was spent doing stitch-in-ditch and outline stitching on the Mariner's Compass quilt.  Once that was done (which was tedious, but worthwhile), I could finally get started on some of the more detailed quilting.

Here's what the overall quilt looks like again


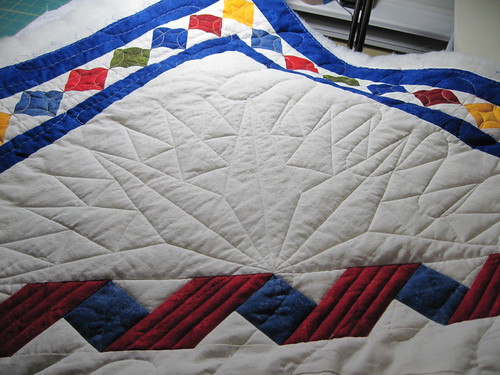
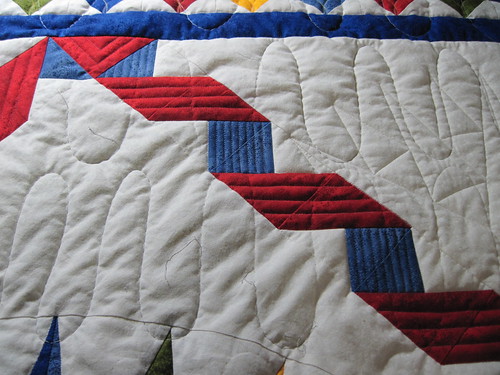
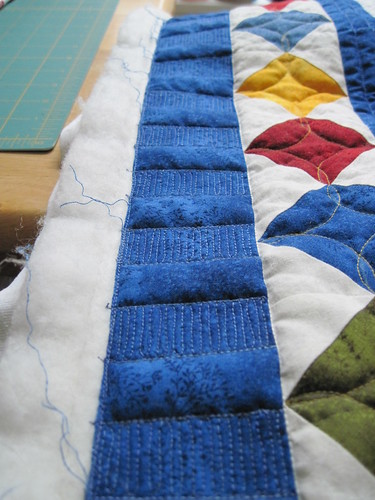
Here is the outermost border.  I did "piano keys" that are 7/8" wide and every other one has dense quilting in it to make the texture show up more.
Mariner's Compass October 2014 -1

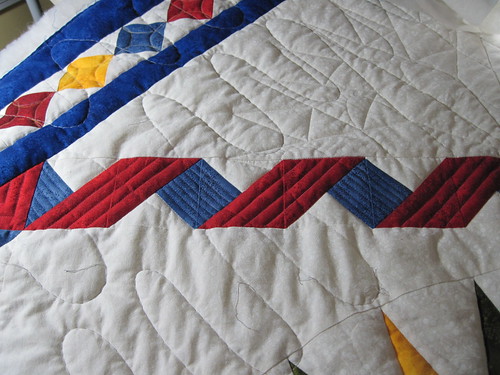
Here's a close-up of the ribbon border that's around the quilt:

Mariner's Compass October 2014 -2

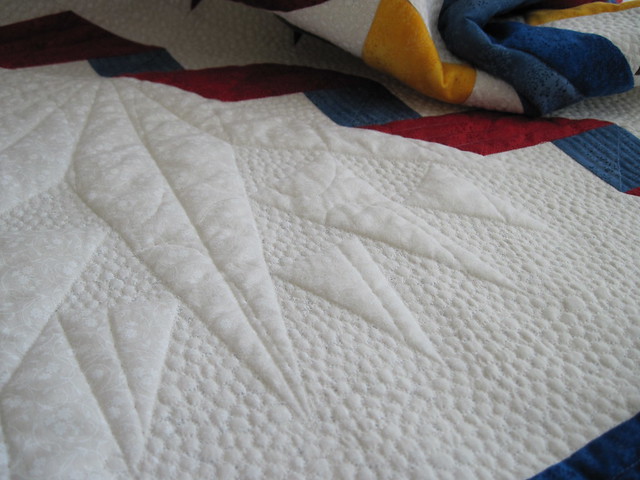
And here's the filler stitching that I've finally been able to start.  I decided to keep it simple with pebbles to showcase the straight lines of the piecing.

Mariner's Compass October 2014 -3

I was able to get about 1/8 of the center section done this afternoon.

Mariner's Compass October 2014 -4

Overall, I think I'm going to love the texture this creates on the quilt.  Since I used wool batting, the non-quilted areas really stand out.

Mariner's Compass October 2014 -5

Hope everyone is enjoying their Sunday afternoon.


Happy Crafting!
~Sarah at upstateNYCreations
Thursday, July 17, 2014

Mariner's Compas Progress

Despite not positing much about it, I have been making slow progress on the Mariner's Compass wall hanging.  Before loading it on my frame to baste it, I drew out the compass pattern I wanted to quilt in the large triangles in the corner of the quilt.  It was much easier to do the marking without the puffiness of the batting.

I'm using Quilter's Dream wool batting on this one as well as Superior Threads (So Fine, Bottom Line, and Lava).  The wool batting gives a very nice loft to it and once I have the filler stitching done, it will really make the designs pop out.

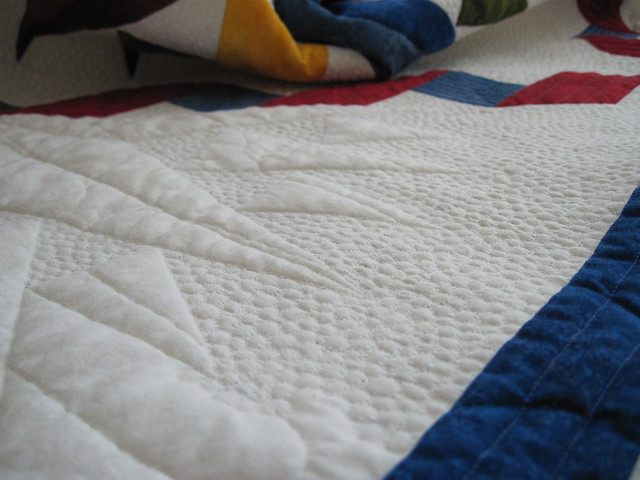
Here's one of the corner squares with most of the basting stitches pulled out.  I still have to do the filler stitching to make the compass motif stand out, but you can get the general idea of what it looks like.  There was a lot of stopping-and-starting on this one due to the straight lines and doing it on my regular sewing machine.  It was also a lot of maneuvering the quilt around, but it will be worth it in the end.


Mariner's Compass_July 2014 2

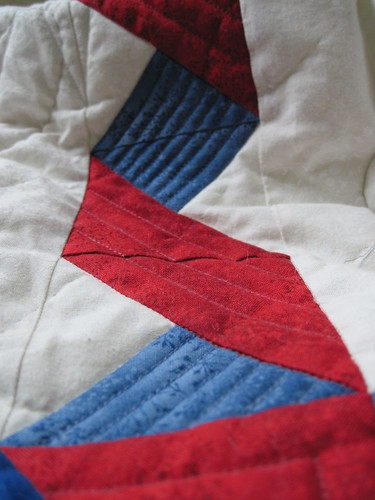
For the ribbon border around the center motif, I've decided to do a lot of straight line quilting to cause your eye to travel down the curling ribbon.  The red pieces have parallel lines spaced a half inch apart.  The blue pieces have parallel lines stitched a quarter inch apart.

Mariner's Compass_July 2014 3

Again, this caused a lot of starting and stopping (and lots of threads to bury), but I like the look of it.  The white triangles outside the ribbon will be stitched with dense quilting to cause the rest of the design to come to the forefront.

Mariner's Compass_July 2014 1

I've also done all the outline stitching around the center compass, around the outside borders and I've done some free-motion loops on the dark colored squares in the outer border.  I'm saving a lot of the dense quilting until the end.  The exact method of the dense stitching is still a bit up in the air until I get a little bit further in the rest of the quilting.  I'm debating whether to just do dense stippling or to do something like McTavishing or some other fill (circles, waves, etc).  I'll probably end up decided at the last minute.  LOL.

Hope everyone is having a great week so far!

Happy Crafting!
~Sarah at upstateNYCreations
Friday, May 2, 2014

Lots O' Thread

Just before my birthday (which was this past Sunday), I finally got around to purchasing thread so I could do the quilting on the Mariner's Compass quilt.  As typical, I bought my thread from Superior Threads.  Their threads are great and are very low lint, which is good for your sewing machine.  I don't want to be a "thread snob", but I've tried a bunch of different threads in the past and these ones are definitely my favorites.  I have yet to have ANY issues with the Superior Threads, regardless of which line of threads I use.

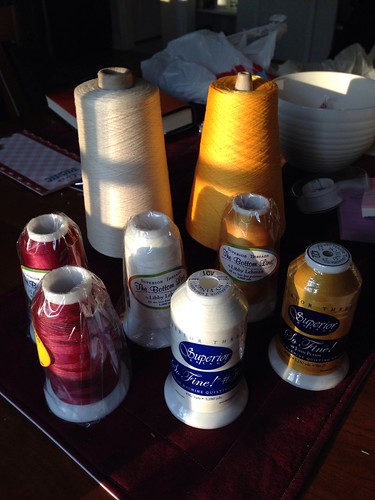
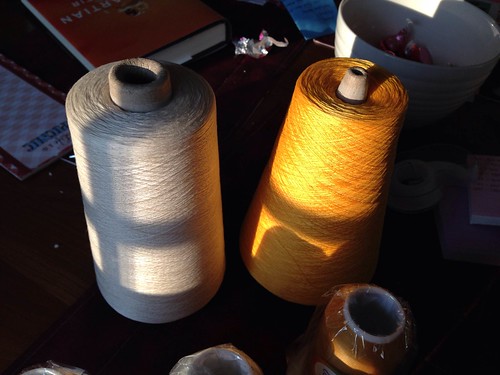
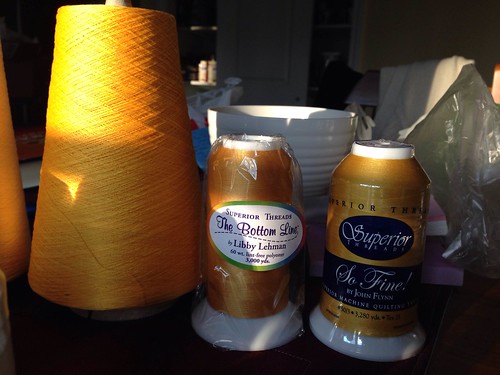
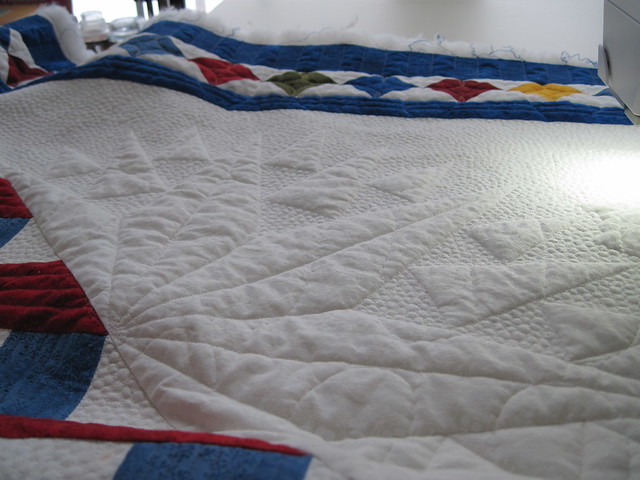
So the small cones in the picture below are actually for quilting the Mariner's Compass quilt.  I already had some great blues left over from the Lone Star quilt that I will use in the blue sections of this quilt.  The red will go in the large red sections of the quilt and the gold is going to be used in the pieced outer border where the fabrics switch from yellow to blue to red to green.
Thread 1

You may be wondering about those large cones in the back.  Since I was ordering thread anyway, I decided to indulge and get some very large cones of thread for piecing.  I use Masterpiece threads for my piecing, and typically use the cream color.  However, Superior had a great deal on some of their large cones, so I also picked up the gold/yellow colored cone.  It was originally supposed to be $107, but was on sale for $40.  Very hard to beat that kind of price.

Thread 2


So if you're wondering on the actual size of the new cones....

The two "small" cones of So Fine! and The Bottom Line are both about 3,000 yards.  That big cone...a whopping 10,840 yards of thread!  :c)  The cream color cone is even larger at 15,000 yards.  I have a lot of piecing ahead in my future to use up these babies.  LOL!

Thread 3


I still have some prep work to do on the Mariner's Compass top before its ready to start quilting, but I'll be sure to share some pictures on here.  I have to mark some things on it prior to loading it onto my quilting frame for basting.  Because I have a small throat space on the machine on my frame, I will only baste it on the frame and then do the actual quilting on my regular sewing machine.

It may seem odd to some of you, but if you only have 5" of throat space on a frame and your quilting design is larger than 5" you end up constantly having to adjust your rollers and where the quilt is positioned.  I'd spend half my time just trying to move the quilt on the rollers and not mess up my stitching lines.  So the quilt gets basted on the frame and then detail work is done on the smaller machine where I can more easily continue my lines of stitching.


Happy Crafting!
~Sarah at upstateNYCreations
Friday, February 7, 2014

Mariner's Compass Progress

I made a lot of progress this past week or two on the Mariner's compass quilt.  My last update on this, I mentioned that I had to take off the first set of blue borders since I somehow managed to mis-cut the strips and didn't realize until I tried to put the pieced border onto the quilt.  After spending about 3 hours ripping out stitches on ~60" square quilt, I was able to recut the border strips and start putting things together.

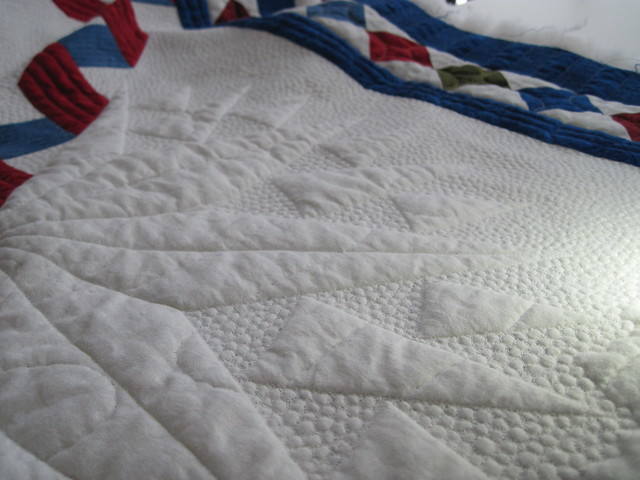
As you can see, the pieced border now lines up properly.  ;c)


My husband was out snowboarding on Saturday, so I had most of the day to myself in the house.  I was also up early with him (he left the house at 7am), so I had a LOT of sewing time in front of me.

I was able to get the pieced borders on by about 10 am.

By early afternoon (after a shower and lunch break), I had all the borders on and the quilt top is complete!


I absolutely love it and can't wait to start quilting it.  I know what I want to do with the large setting triangles outside the ribbon border, but I'm not quite sure what I want to do with the center yet.  I have to think about it a little bit before I start doing anything.  I'll leave it up on my design wall to stare at for a while so I can figure out what I want to do.  Over the years, I've found its usually best to let it sit for a week or two to see what I want to do with the quilting.  Then it will just hit me and I'll start flying with it.


Happy Crafting!
~Sarah at upstateNYCreations
Sunday, February 2, 2014

Stashbusting 2014 - Week 5

Over the past two weeks, I've been able to use up a bit of stash and finish two flimsies!  :c)

The first is a small wool kit that I purchased last year and have been slowly working on.  It isn't quilted or bound yet, but all the hand applique and embroidery is done for the top of the wall hanging.


The second finish actual does come from fabric stash and I'm glad to say that the top is completely pieced!  Yesterday while the hubster was out snowboard, I was up early and in the sewing room to get all the borders cut and sewn onto this puppy.

I have to say...I'm completely enthralled with this one.  It looks similar to what my EQ drawing looked like, but so much better! :c)  A few of the points in the center section aren't as good as I would have liked, but its pretty hard to tell they are off and it was difficult to get that much fabric together in the middle of the quilt.  From other designs I've seen, some folks finish it off with an appliqued circle in the center to hide seams that don't quite line up.  I didn't want to do that, so I tried my best to get them to line up and they're pretty darn close.


So here are my stash numbers:

Added This Week:       0 yards
Added Year to Date:    0 yards
Used This Week:          1.75 yards
Used Year to Date:       3.33 yards
Net Year to Date:         3.33 yards

Go on over to Judy's blog to see how others are doing.

 Happy Crafting!
 ~Sarah at upstateNYCreations
Thursday, January 23, 2014

Mariner's Compass Update

I've slowly been making progress on my Mariner's Compass wall hanging.  A few weekends ago, I had all these blocks ready for sewing:


Here's a small stack of them all trimmed up.  Nice and neat looking! :c)


After having to take a step back to make the green squares (silly me... I forgot them when I was making all the others), I was able to get all blocks trimmed and into rows last weekend.  (Ignore the other stuff on my design wall...its a little cluttered in some spots.)


I quickly moved on to put the next borders on.....


....only to find out that the quilt is a bit smaller than my border units.  :-(  Its hard to see, but if you look at the top right of the picture below, you can see how the border is "wavy" to fit into the space.


So my next step this weekend is to go back and rip the stitches holding that blue border in place...then measure a few times to figure out what the width of the solid border needs to be in order to fit to the pieced border.

Annoying...but I'd rather have it right than have to keep fudging things.  I really don't want wavy borders when I go to try to quilt this puppy.

Its all part of the process, right?  :c)


Happy Crafting!
~Sarah at upstateNYCreations
Tuesday, January 14, 2014

Quick Update

Somehow it was a busy weekend despite not really doing anything.  I did some quilting over the weekend.  I have 80 square-in-square blocks to make for the outer border of the Mariner's Compass wall hanging.  As I was trimming up a bunch of them.... I realized I completely forgot to make some with a green center.  Argh!

Back to pressing and cutting strips so I could make the 14 green square-in-square blocks.  I cut all the fabric, but then ran out of steam and just didn't have it in me to actually sew up the blocks.

There have been a lot of people out sick at my work.  I think that's part of why I feel run down, but I'm hoping that I don't get this cold that's been going around.  It typically has been knocking people down for 3-4 days.

On a good side, I thought I'd share a picture of my parents' Christmas tree from this year.  They used to get real trees when I was kid, but then my mom found out she was allergic to mold.  Surprisingly, evergreens are absolutely covered in mold...no wonder my mom was always sick around the holidays!  They ended up finding a very nice artificial tree... which is hard to do when you're looking for a 12-foot tree!!


Hope everyone is having a great week so far  :c)

Happy Crafting!
~Sarah at upstateNYCreations
Monday, January 6, 2014

Mariner's Compass Progress and Needlepoint

I've been making more progress on the Mariner's Compass quilt.  The setting triangles are now in place and the quilt is very square and very flat, which is a little bit of a surprise.


I also started making the 80 square-in-square blocks that are in the pieced border for the quilt.  I did two test blocks before I cut everything and they came out just right.  I love seeing the stacks of fabric waiting and ready to be sewn. :c)


I also did some needlework this past week and finished up another page on this pattern.  I've now completed 12 pages and am a little over 1/3 done.  Its going to be quite a while before this puppy is finished!


Happy Crafting!
~Sarah at upstateNYCreations
Sunday, January 5, 2014

Stashbusting 2014 - Week 1

Its another new year for stash busting!  I ended 2013 in fairly decent shape and starting out 2014 in the black.  :c)

Most of my stash used this week is for the Mariner's Compass wall hanging.  I was able to get the large setting triangles cut, pressed and sewn onto the center section.  In order to make the triangles, I had to cut two squares at 26.25" and then cut that along the diagonal.  Its not an easy task to cut something that is larger than your ruler!


The other part of my used stash is actually for a BOM that I recently found on Morning Glory Designs.  Its a free BOM, but you have to download each block during the month that it is up.  If you miss a month, you'll have to purchase it from the site.  This is what the BOM will look like per the pattern.  Looks pretty fun!


I prepped the first block and glue basted the pieces in place.  We'll see if I can keep up at doing a block a month. :c)


So here are my stash numbers:

Added This Week:       0 yards
Added Year to Date:    0 yards
Used This Week:          1.58 yards
Used Year to Date:       1.58 yards
Net Year to Date:         1.58 yards

Go on over to Judy's blog to see how others are doing.


Happy Crafting!
~Sarah at upstateNYCreations
Thursday, January 2, 2014

Mariner's Compass Progress

 Just before the Christmas break and a little bit during, I was able to spend some quality time with my sewing machine, iron and bunch of fabric. :c)

A few weeks ago, I showed this picture with a small section of the compass completed.


Shortly thereafter, the small pieces became 1/4 sections of the full compass.


Then it came time to do the dreaded curved seam....and a huge one at that!


In order to make sure it was spread evenly throughout the arc, I made the sure edges were square and lined up a boatload of pins to make sure that curved seam was right!


Half of the circle now all together.  :c)


After getting those curved seams done, it was relatively easy to put all four sections together.  I did have to remove the paper from the paper-piecing first as there was a ton of bulk in that center seam.  As it was, it was difficult to get it "just right" due to the amount of fabric there.  I played around a bit, but then decided to stop messing with it and it was good enough.


Next up was cutting the pieces for the ribbon border that goes around the center compass.  I love seeing the stacks of cut fabric ready for sewing.


Then with the borders pinned up around the compass on my design wall....


Finally, an on-point picture since that's how it will be in the final quilt.


After getting back from visiting family over Christmas, I sewed on the 4th border...then proceeded to remove all four borders. 

They weren't quite lying as flat as I wanted them to be and in checking a few of the individual seams, I realized I had accidentally sewn all the ribbon blocks together with a scant 1/4" seam versus a regular 1/4" seam.  That 1/16-inch added up quickly and caused my borders to be a bit wavy.

Not my ideal way to spend 3 hours, but I fixed the borders and they are now back on the quilt and the thing is completely flat again.  Yay!

I'll be showing more in the next week or so.

For anyone in the Northeast.... hope you're staying warm and in from the snow.  We were forecasted to only have 4" by this evening, but we have 6" with another 10-15" on its way overnight.  Put bone-chilling cold on top of that (the high Friday is only 4F and the low is -15F), and its a recipe for lots of issues.  Thankfully I can work my first two days of the year from home and not have to venture out in the cold and snow.

Stay warm!


Happy Crafting!
~Sarah at upstateNYCreations
Monday, December 30, 2013

Stashbusting 2013 - Week 53

I'm a day late in posting for Judy's final Stashbusting post for the year, but I wanted to make sure I had a summary of 2013.

I actually did alright in 2013 and most of my fabric purchases were for specific projects, which I just haven't finished yet.  I did purchase and finish the Lone Star Wall hanging this year.  As usual, I purchased more fabric than I needed, but I wasn't going to risk running out.  The same goes with the Mariner's Compass wall hanging I'm doing now.

Here's the latest progress on the quilt.  I took the photo on the angle since that center section will be on-point in the final quilt...for now its just easier to put it up square on my design wall.


So here are my stash numbers for the end of 2013.

Added This Week:       0 yards
Added Year to Date:    47.65 yards
Used This Week:          4.79 yards
Used Year to Date:       25.64 yards
Net Year to Date:         22.01 yards
 
I ended up with more fabric purchased than used this year, but the 22 yards extra actually go mostly to the Mariner's Compass quilt.  I hope to at least finish the top in early 2014.  The quilting will take a while as I will need to think about how I want to quilt the open spaces in the design.

Happy Crafting!
~Sarah at upstateNYCreations

Wednesday, December 11, 2013

Mariner's Compass Update

After I finished the last big quilt for the wall hanging (a Lone Star quilt), I picked out the pattern for the next wall quilt to go in our foyer.  I purchased the fabric a while ago, but only really started piecing in the last week or so.


IMG_2413


Here's some of the fabrics cut and ready for sewing.  Since I'm doing paper-piecing, I cut the pieces with 1/2" seam allowance instead of the typical 1/4".  This way I'll have enough fabric for turning when I do the paper piecing.

IMG_2463

The center yellow triangles were a little tricky since the seam is actually a curved seam.  Afterwards I thought it may have been easier just to cut the pieces to the exact size and sew a standard curved seam. 

IMG_2474

In-process pictures of pinning the over-sized pieces to the paper templates.

IMG_2476


IMG_2475

And here is the finished center triangles.  After I got this far, I also trimmed the curved seam at the outer edge to be the standard 1/4" seam allowance.

IMG_2473

I was able to get all of the middle-triangles done with the yellow/green and white fabrics.

IMG_2477

Next step is to add all the larger red and blue triangles that I'm using.

IMG_2478

In the end, the quilt should look something like this:

Mariner's Compass Quilt Top


Happy Crafting!
~Sarah at upstateNYCreations
Sunday, September 22, 2013

Stash Busting 2013 - Week 38

Progress has been made!!  :-)

The last week or two I've been slowly making progress on some Winding Ways blocks.  Here's where I was 2 weeks ago:


IMG_2403

And now...  All 12 blocks are made.  Nine will stay as a small wall-hanging type quilt.  The other three (at the top) are destined to become a table runner.

IMG_2410

From just those blocks, I was able to use just over 1.5 yards of fabric.

The downside over the past two weeks....I bought fabric... and lots of it.  To my defense, Connecting Threads had a sale and I had a gift certificate to the store AND I bought fabric for the next large wall hanging (a mariner's compass style quilt).  I also bought backing material for my Bento Box quilt top that is waiting to be quilted.

Here's the connecting threads fabric (pre-washing):

IMG_2405

Here's the backing fabric...and a cameo by the kitty. :-)

IMG_2412

And here's the fabric for the Mariner's compass quilt.  Its a lot of paper-piecing so I bought more than I needed, but what's a little stash building here and there. ;-)

IMG_2413

I also spent some time yesterday organizing my fabric and bookshelf.  Looks nice and pretty all organized...I wonder how long it will stay that way.

IMG_2411

So here are my stash numbers:

Added This Week:       41.80 yards
Added Year to Date:    47.65 yards
Used This Week:          1.59 yards
Used Year to Date:       16.44 yards
Net Year to Date:         31.22 yards

I'm definitely back in the red now with the backing and extra fabrics that I bought.  I doubt I'll hit neutral again by the end of the year, but maybe I will get lucky.

Go on over to Judy's blog to see how others are doing.

Happy Crafting!
~Sarah at upstateNYCreations